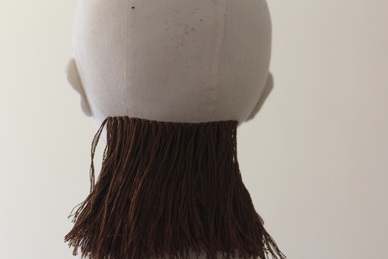
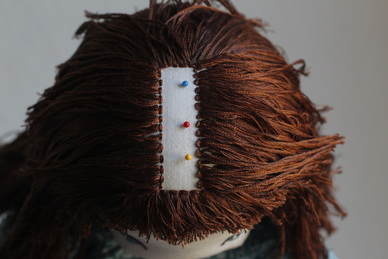
Continue stitching in rows up the back of the head. If you find that your rows are getting uneven, place pins at symmetrical intervals to help you even them out. When your rows reach the back of the head, start mixing in strands of darker floss. I added two strands of dark for each length of six strands of my main color. This helps to create depth in the hair.
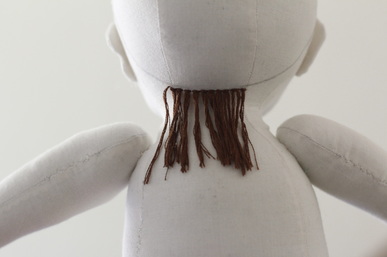
Sew the first row of hair just outside the pencil line at the nape of the neck. The first several rows can and should be very short. They are mostly to fill out the underside and create a proper hairline. Cut the loops.
Note: You may want to wait until after stitching the hair to attach limbs. As you can see in the next image, I removed my doll's arms to make it easier.
Note: You may want to wait until after stitching the hair to attach limbs. As you can see in the next image, I removed my doll's arms to make it easier.
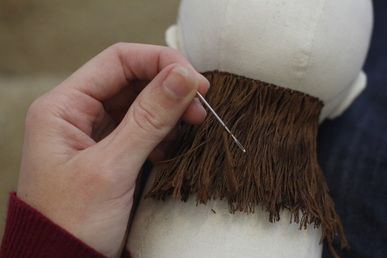
Remove the pins. Cut several lengths of your main embroidery floss color. You will go through it fast, so it speeds up the process if you have a lot cut and set out. For the first few lines of stitching, you only need to use your mid-tone (cone) color.
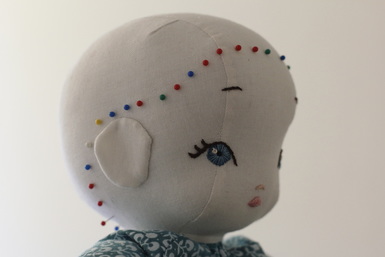
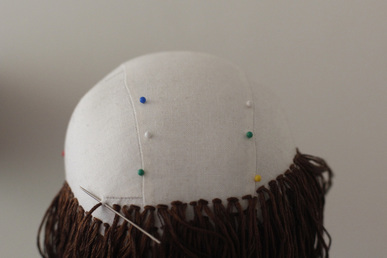
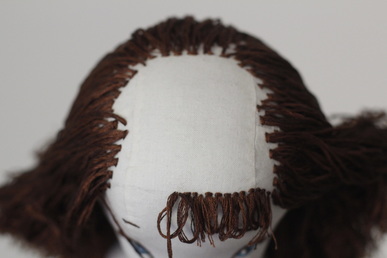
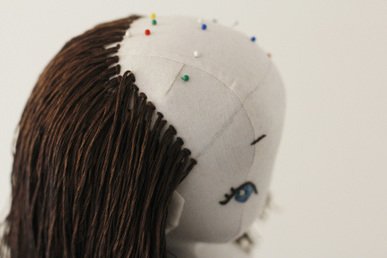
Place pins where you want the hairline to be. Reposition the pins as necessary until both sides of the hairline are symmetrical. It helps to look at pictures to get accurate positioning.
If you've been following the Six Weeks of Love for Softies contest, you may already know that neither my doll nor my snake won. I'm still pretty sad about it. I spent a lot of time on both of them and, of course, had my hopes up. After swearing off any sort of sewing or crafting project, and then realizing that I could never give it up, I decided life would just have to go on. And so it does.
Let me just say that embroidering long hair on a doll is a lot of work. It takes hours and hours, especially if you want full, thick hair. That being said, it looks fantastic when it's done. As I worked on my Little Red Riding Hood doll, I took process shots along the way to share how I did it. I used turkey stitch (also known as turkey work). If you have never done turkey stitch, here is an illustration on how to do it and here is a video tutorial. I love this stitch because it allows you to create loops that can be cut into fringe. The floss or yarn stays in place with tacking stitches, so there is no need to worry about it getting pulled out. Follow the simple steps in my tutorial below for your own handmade dolls. And, before you get overwhelmed, I'll just say that it's a fairly simple stitch, even for a beginner. Time-consuming, but simple.
Embroidered Doll Hair Tutorial
Materials:
- 1 cone embroidery floss for main hair color (I used less than half for my doll)
- 8 or 10 skeins of a darker shade of floss
- 2 or 3 skeins of a lighter shade of floss
- embroidery needle that can accommodate 6-8 strands of floss
- plastic comb with wide teeth and narrow teeth
Instructions:
Stitch another row of hair 1/4"-1/2" above the previous one. The closer your rows are, the thicker the hair will be. If your doll has a hood or hat, make sure you don't make the hair so thick that the accessory no longer fits. Make each successive row of hair a little longer until you have reached the length you want. Create a realistic effect by varying the length of each loop slightly. Cut the loops after each row.
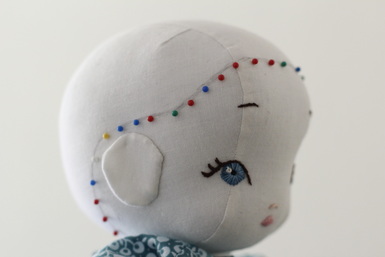
Use a pencil or fabric marker to draw a line to the inside of the pins. Your stitches will cover this line.
After every few rows, use the eye end of the needle or a plastic comb to carefully separate the strands of floss. This will help them spread out and fluff up. Check to make sure the hair is the same length on either side of the head. Some variation is okay, but the hair should not have a severe angle.
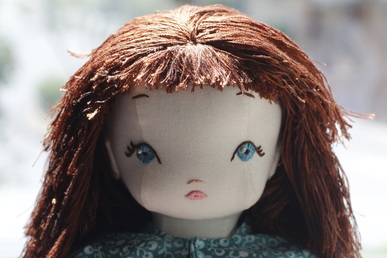
Comb through the hair gently to make sure all the loops are cut. Trim or thin out the hair as needed. Tousle the layers just a bit to get the light and dark intermingling and then do one final comb through.
If you want your doll to have bangs, add them before you get too far on the side rows. Make one or more rows along the forehead line, starting at the marked line and working towards the back of the head. The rows need to be very close together to hide the stitches of the previous row(s). Cut the loops and give them a downward tug to help them lay flat.
Continue stitching the side rows until they touch the pins. Leave about 1/8" space bare.
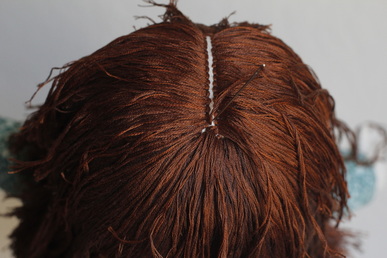
Remove the pins. Fill in the space with stitches working from the back of the head to the front. Make the stitches about 1/8" apart or less to make sure each previous stitch is hidden by the floss.
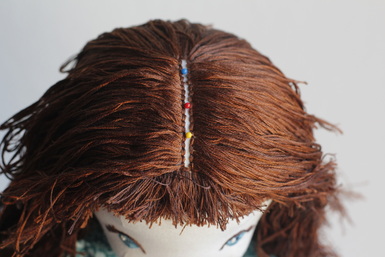
Mark the center of the head with pins and continue adding rows about 1/4" apart until they are about an inch away from the center. Start adding strands of lighter floss instead of darker floss. Again, I used two strands per six of my main color. The light strands add highlights and allow light to bounce off, creating a glowing effect.
Follow the steps exactly or use them to create different hairstyles. Either way, I'd love to see what you make. Send me an email, tag me on Instagram, or tweet me your blog post. And let me know if you have any questions.
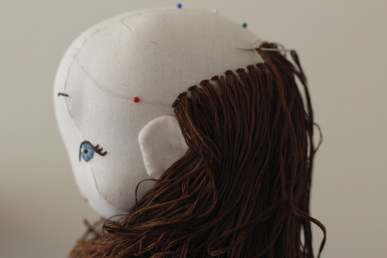
Continue in straight rows until you get to the ears (or the side of the head where the ears would be).
Stitch several rows on either side of the head, angling them toward the center line of the head until they are perpendicular to the original rows. Continue to fill in rows at the back of the head as well until they are about 2" from the front hairline. At this point, you should start shortening the length of the hair to create layers.
Note: Please ignore the random arrangement of pins in the head. My toddler was, er, helping me.
Note: Please ignore the random arrangement of pins in the head. My toddler was, er, helping me.

