Making It Up as I Sew Along
  • Blog
  • About
  • Gallery
  • Shop

Family Craft Swap 2016

3/25/2017

2 Comments

 
Some months ago, people in my family expressed interest in doing a sewing/craft swap.  I was assigned to be the moderator since I have the most swaps under my belt of those in my family.  So, after whipping up a short questionnaire, and cajoling my dad into taking part, I assigned the six people who decided to sign up to a secret partner.  If you're familiar with secret swaps, you know how they usually go.  This was not much like that, though.  I pretty much assigned partners and just checked in a few times to make sure people were on track.  Here are a few pictures and some descriptions of what I made.

Picture
Picture

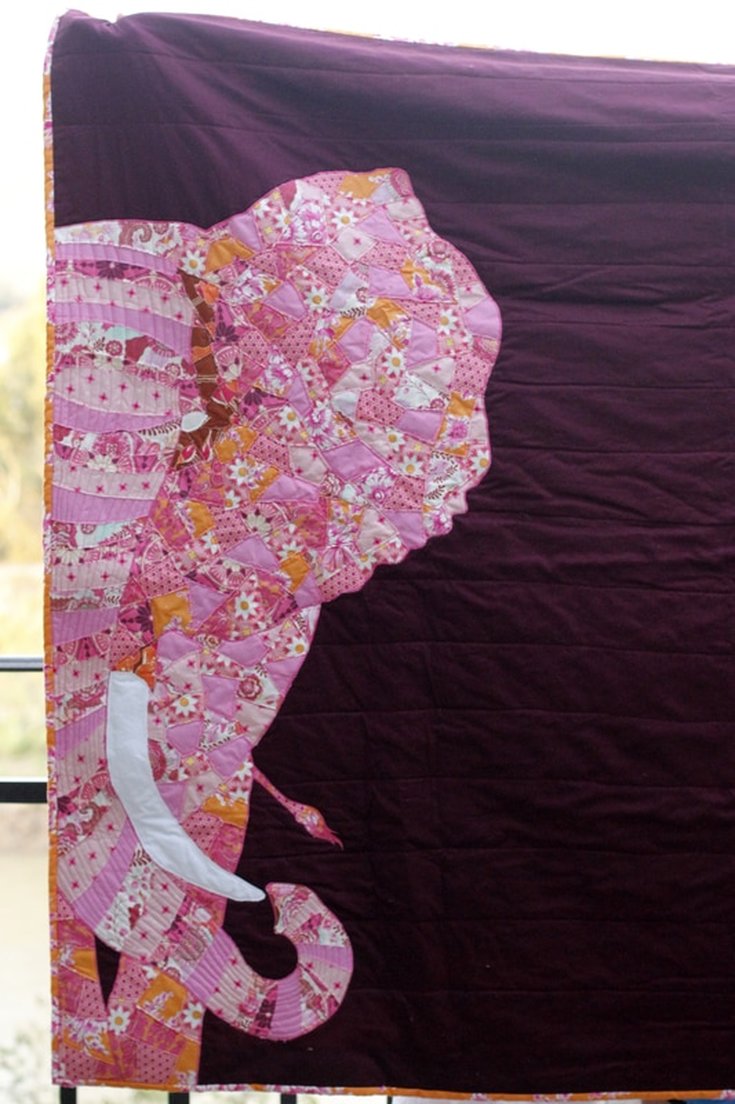
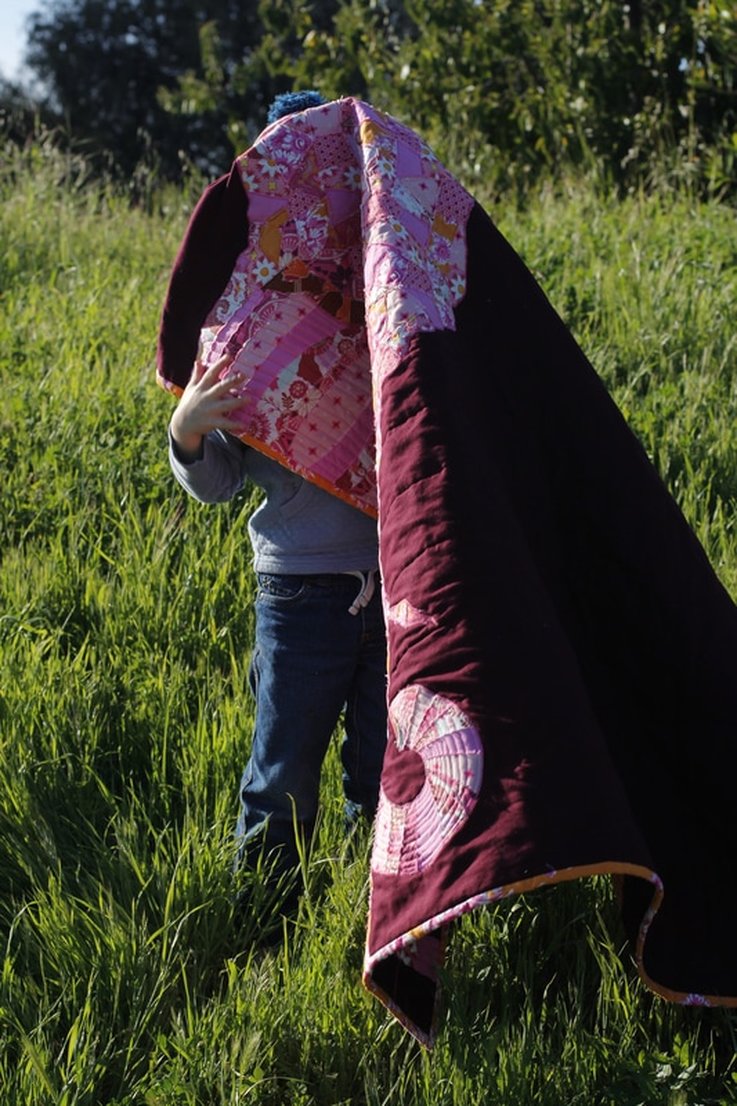
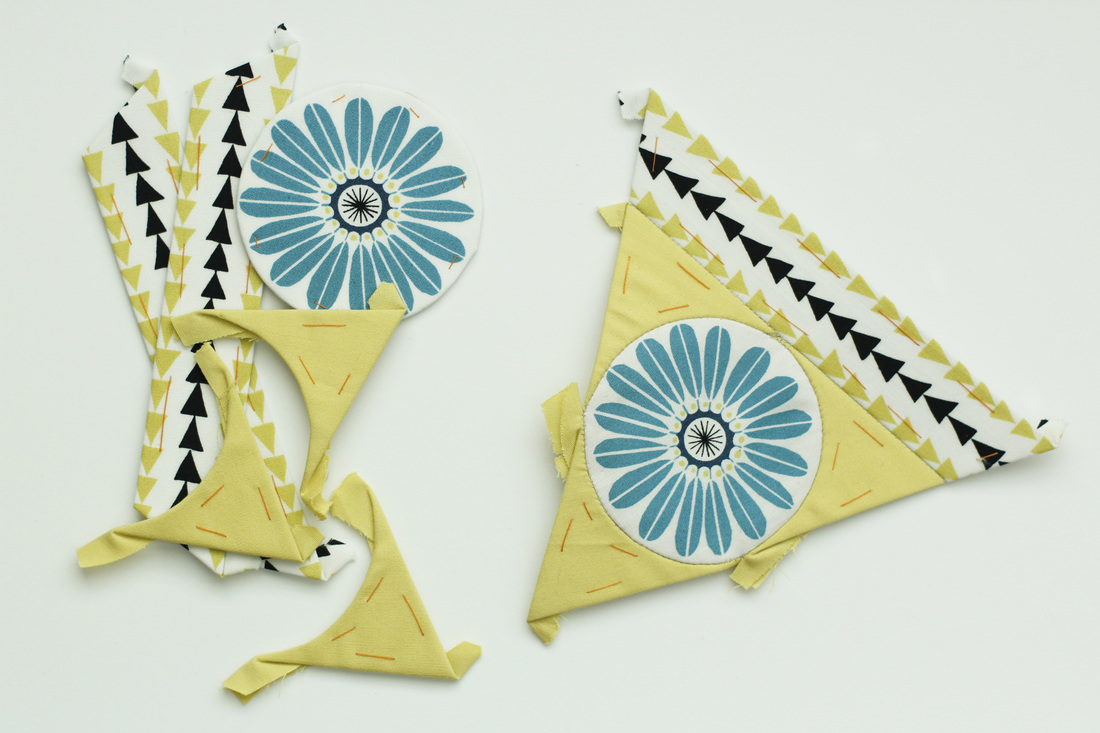
After a month of brainstorming and indecision, I decided to make an applique quilt for my assigned partner (one of my older sisters) using scraps arranged in the shape of an elephant.  For my pattern, I printed up a large-scale elephant at the copy shop for about $4.  I traced the elephant outline directly onto my fusible backing then cut the fusible into several pieces corresponding with distinct parts of the elephant (trunk, legs, tail, etc).  Then I chose some coordinating fabrics in pink and orange, cut them into random shapes for the main body and curved pieces for the trunk.  The pieces were then carefully fused to the glue side of the fusible web.  I tried to arrange the fabric pieces so that darker and lighter tones demarcated specific parts of the elephant to give it a more defined shape.  I think I mostly succeeded with that.
​

Picture
Picture
Picture
Picture
Picture
Picture
Picture

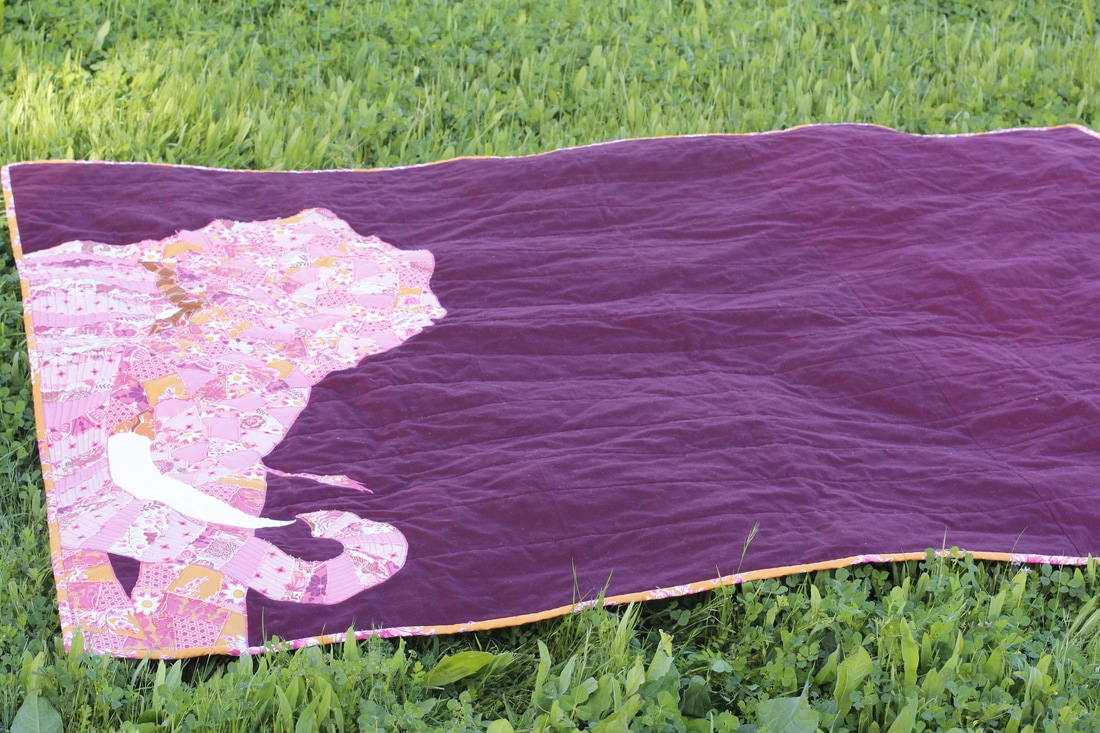
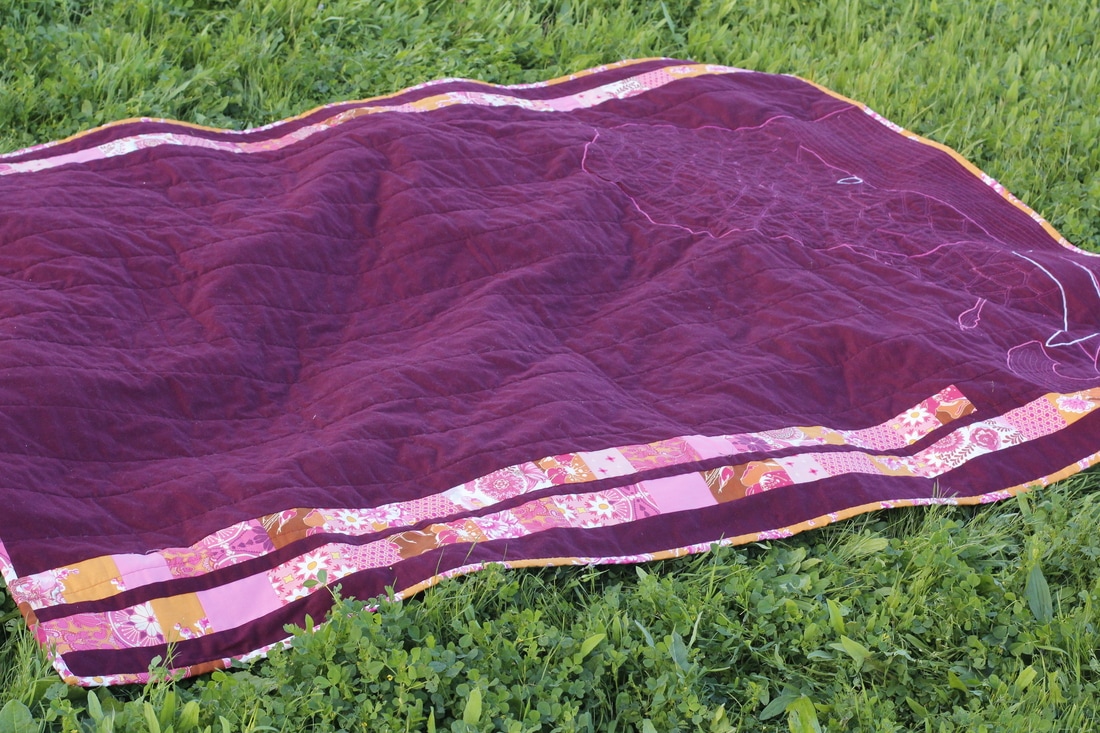
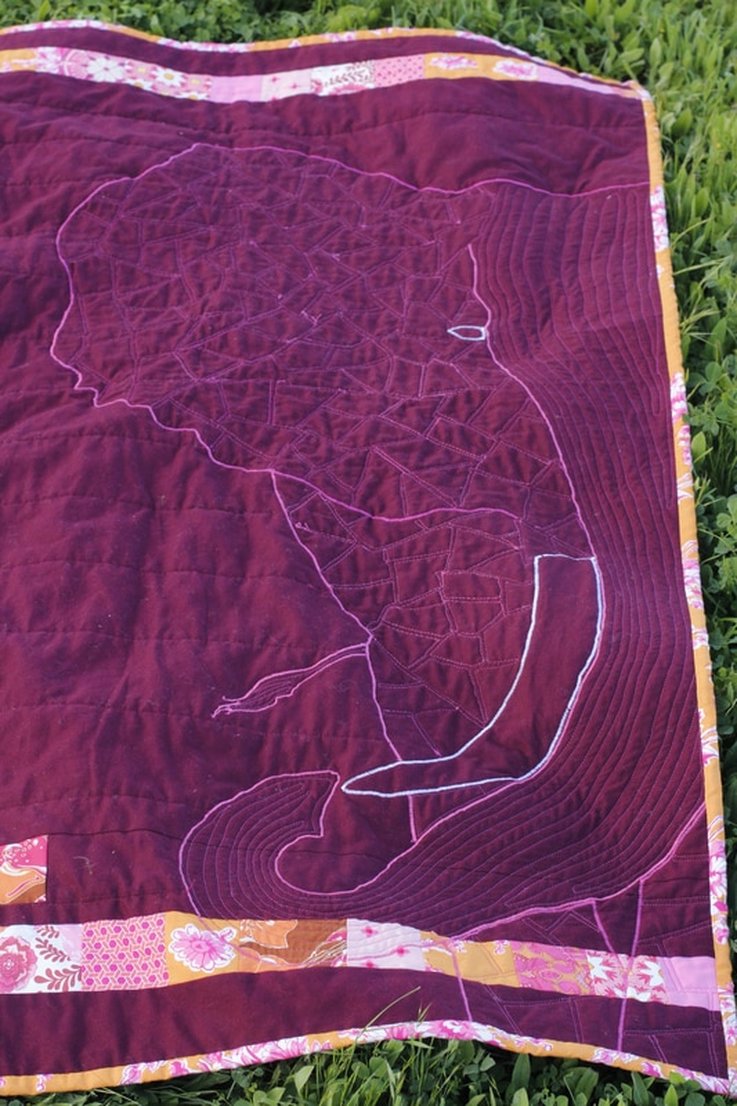
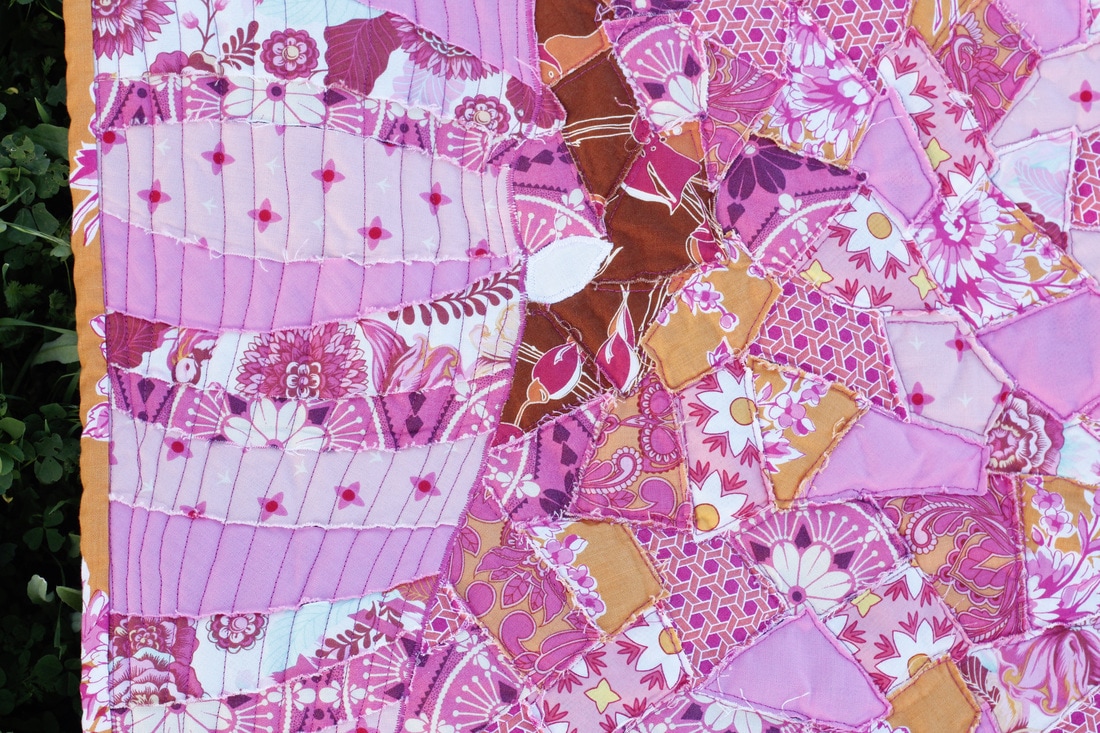
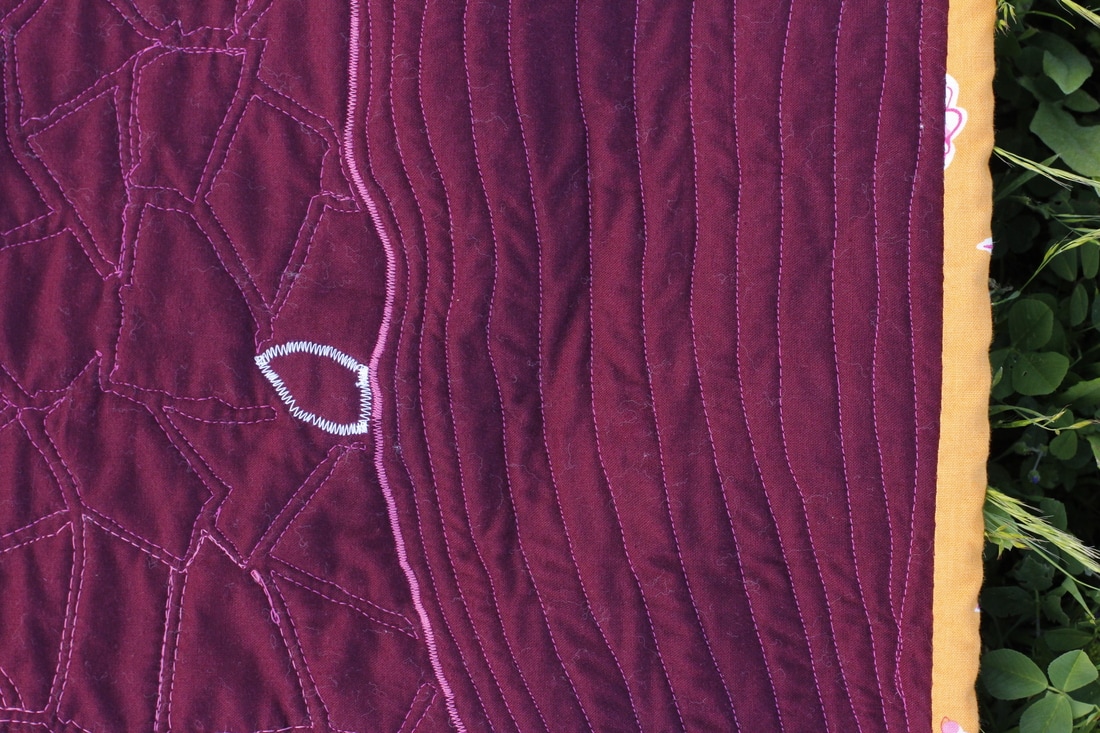
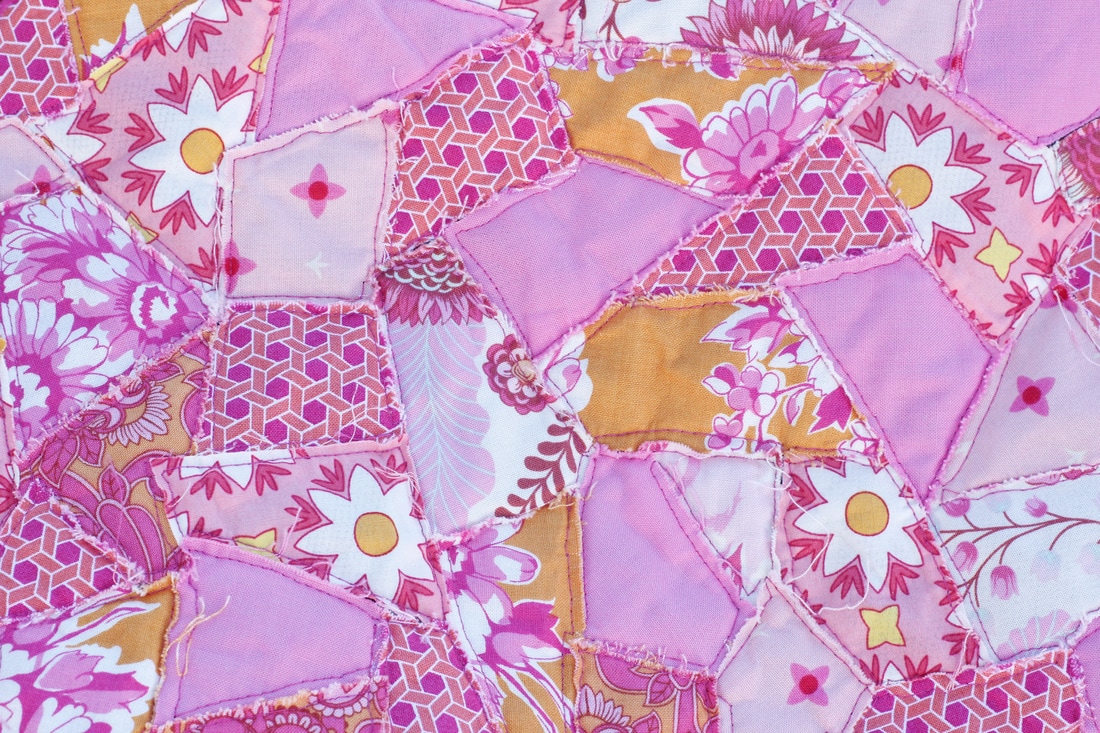
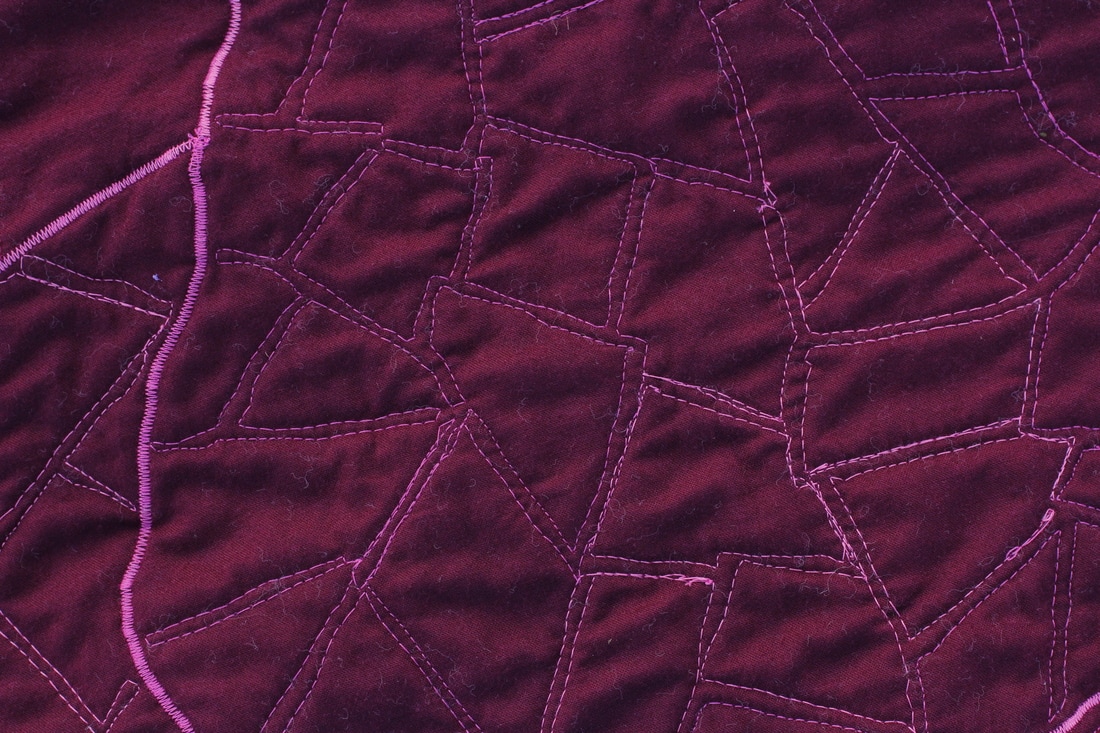
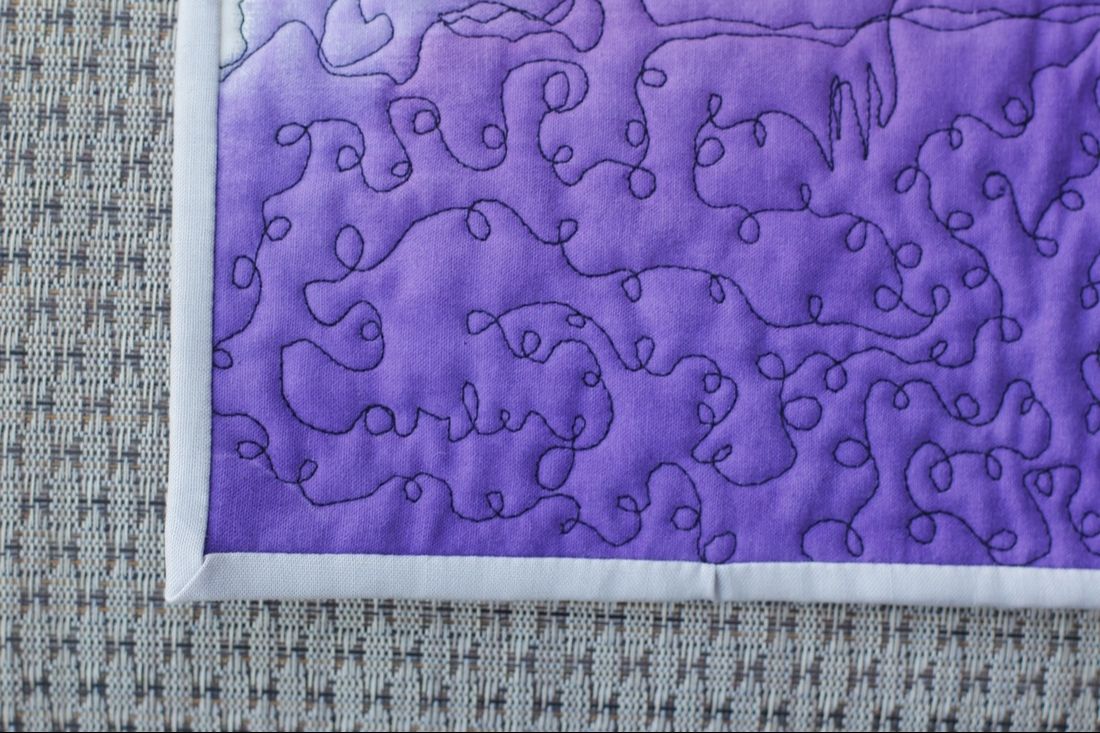
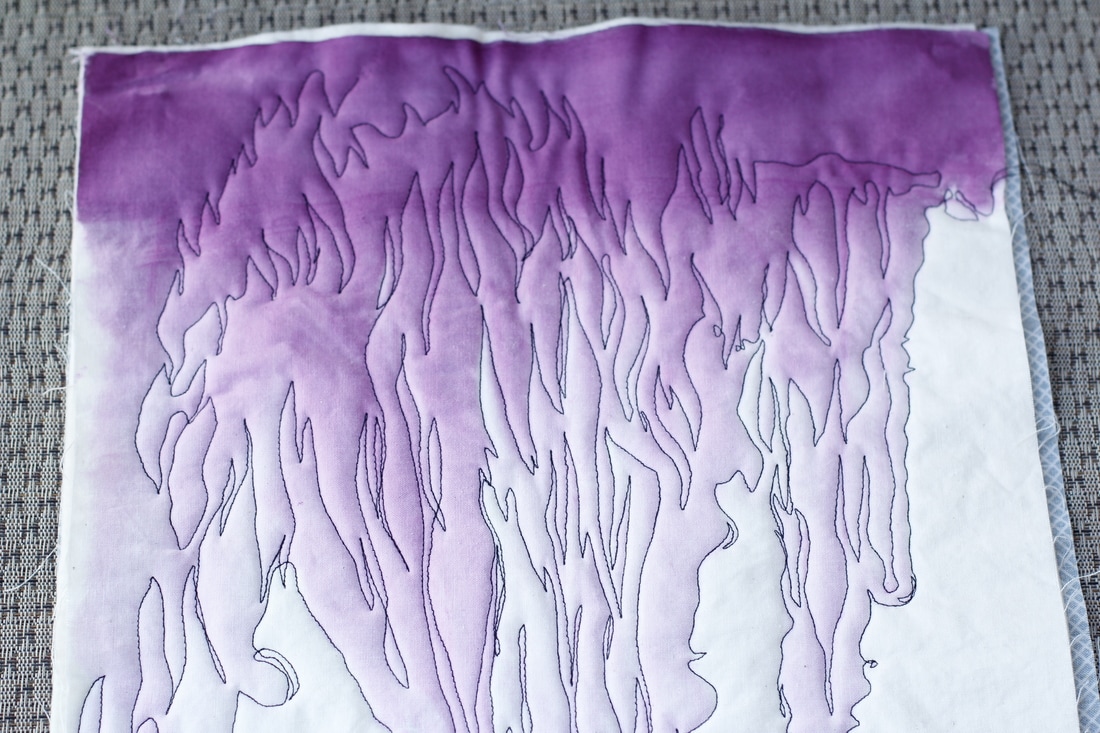
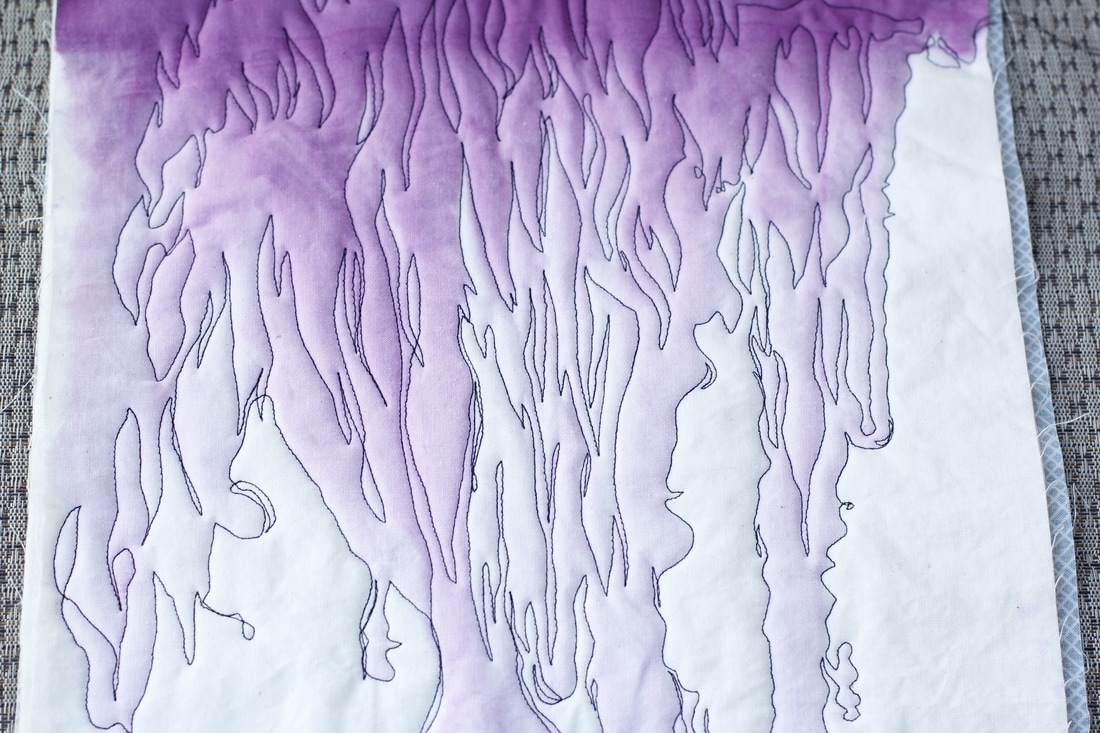
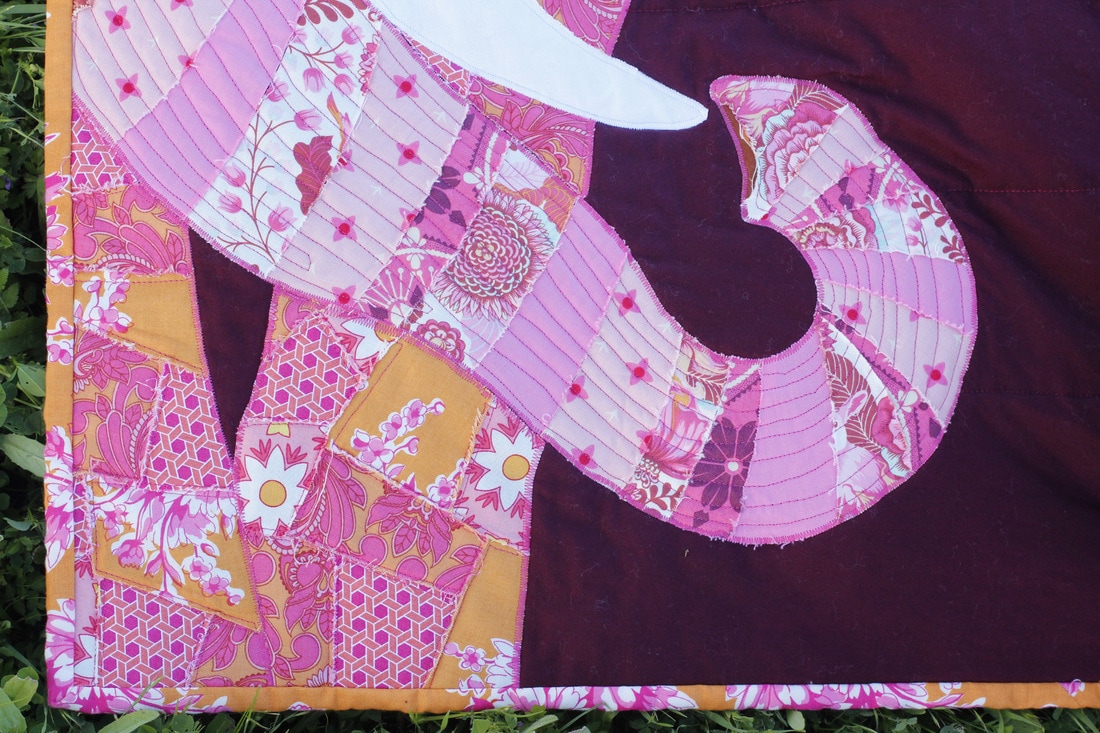
Once all the fusing was complete, I removed the paper backing and fused the individual pieces to a piece of Kona (burgundy, I think).  I pieced a backing using more of the Kona and some pieced strips using more of the fabric from the front.  After putting all the pieces together and basting, I had to figure out how to quilt everything without going nuts.  I decided to quilt over all the raw edges using free-motion techniques to avoid all the needle-down rotating stuff.  It was my first time doing free motion (I hadn't yet done the watercolor quilting workshop at Handcraft Studio School) and it turned out pretty good.  I also zig-zag stitched all around the elephant to give even more definition to the shape when viewed on the reverse.
​
Picture
Picture
Picture
Picture

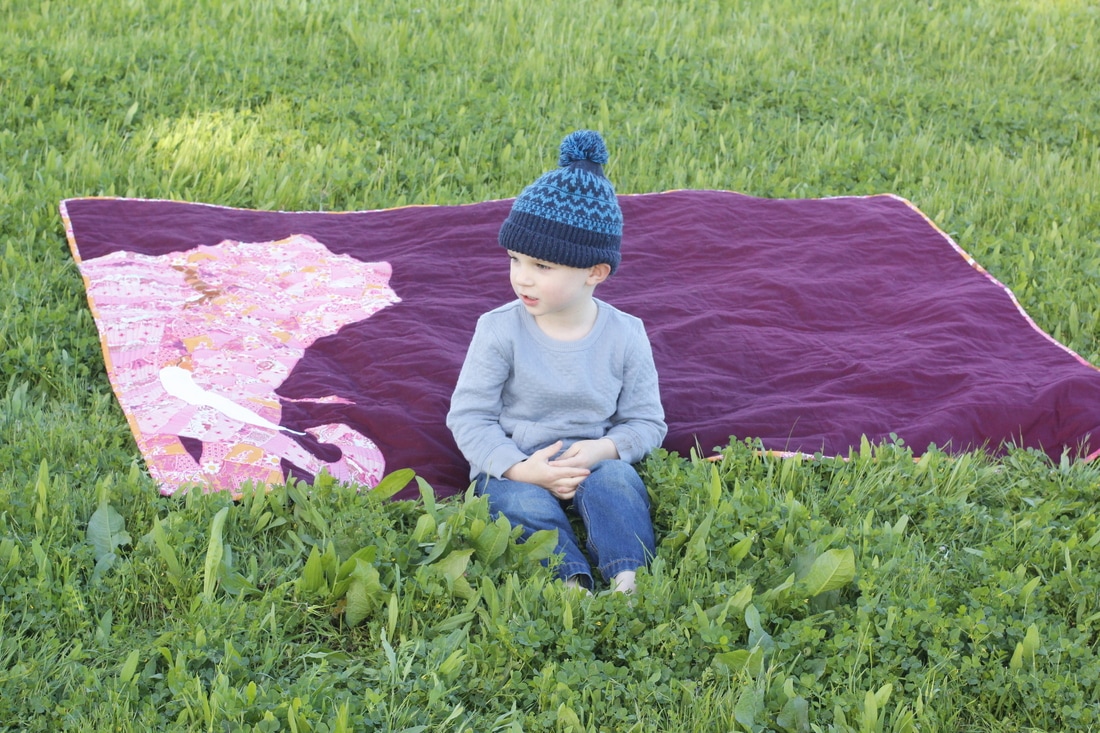
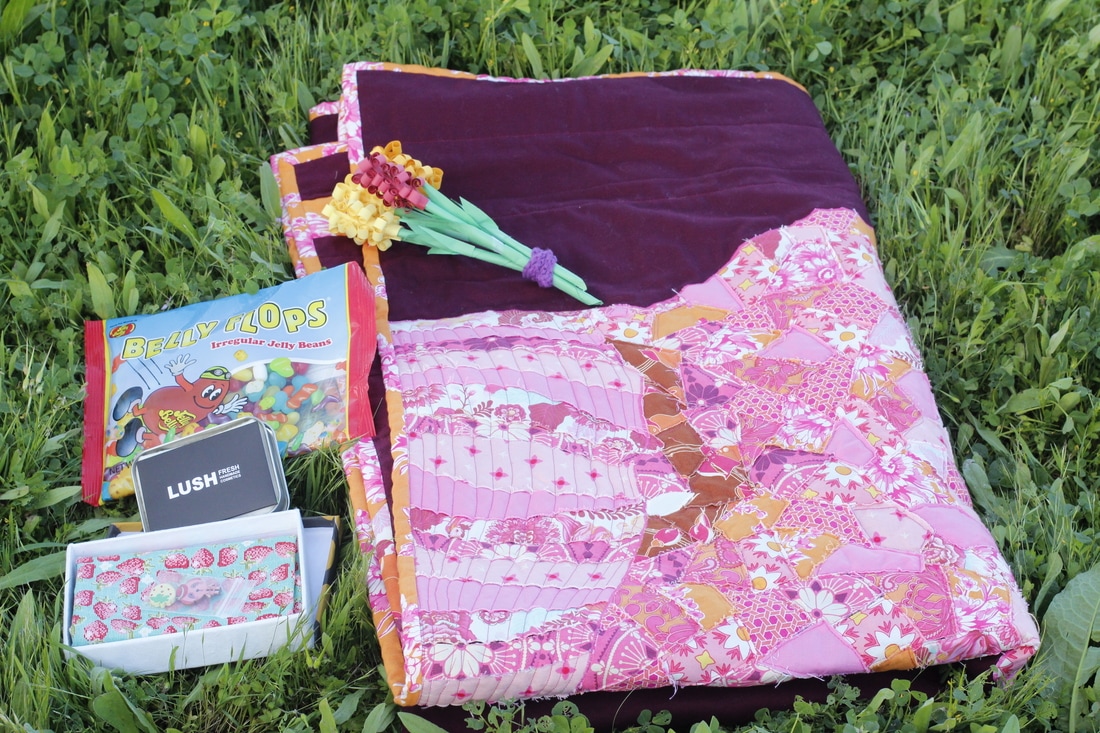
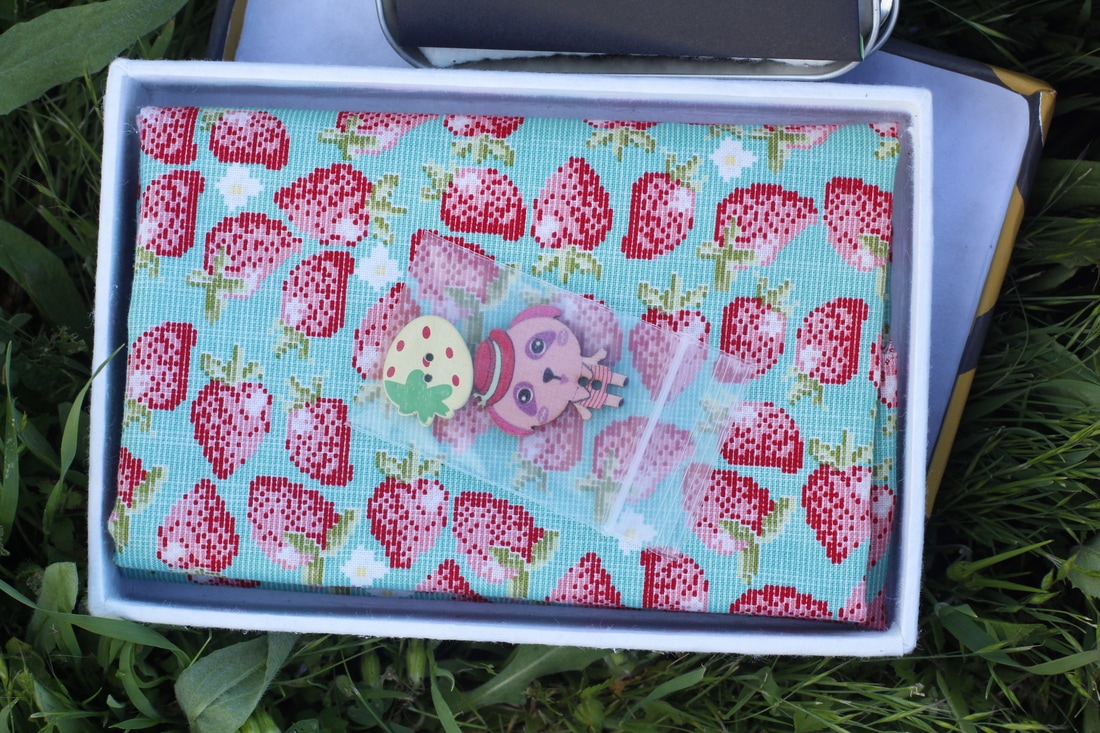
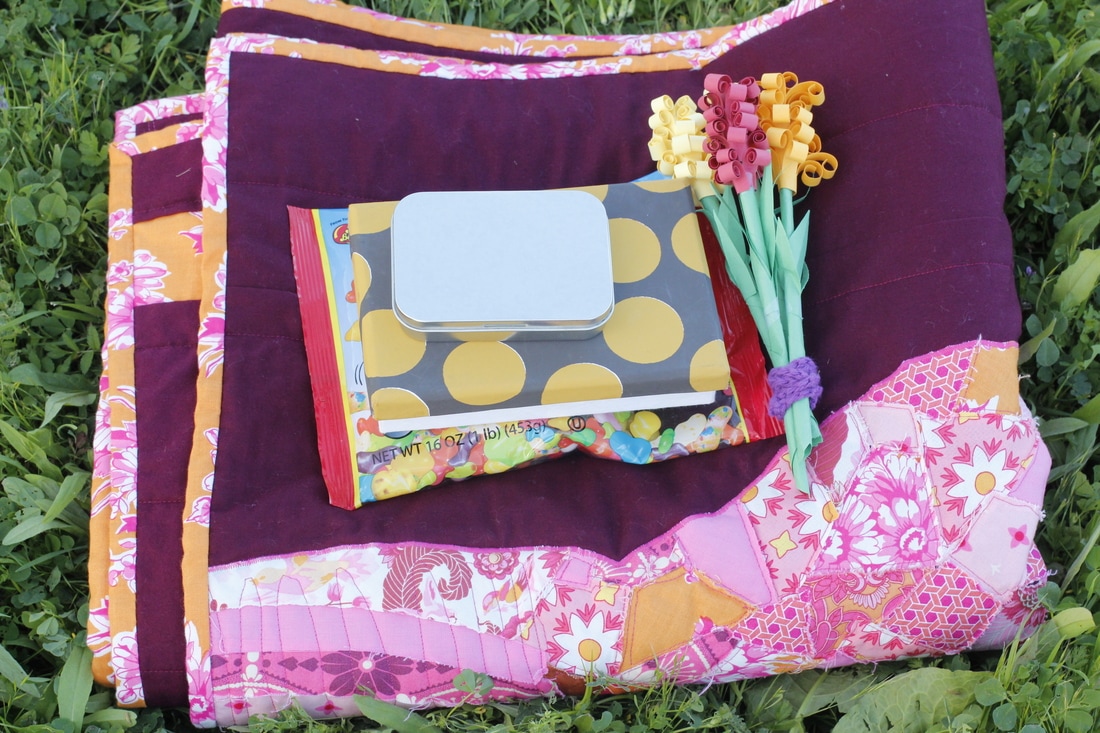
The finished piece is a lap-sized quilt bound with more of the lovely orange and pink flower fabric used in the applique.  For some extras, I included a fat quarter of a strawberry print fabric, some adorable wood buttons, jelly beans, a gift card, and paper flowers.  I know my sister will enjoy it all!
​
Picture
2 Comments

Watercolor Quilting Workshop

3/25/2017

0 Comments

 
Picture
Picture
Picture
Picture
Picture
Picture
Picture

Last weekend I took part in a fun workshop at Handcraft Studio School in El Cerrito.  Watercolor quilting.  Yes, watercolor quilting.  It was so much fun!  We learned how to use special fabric dye to create an abstract watercolor painting on 10" squares of fabric.  Then we made a quilt sandwich and learned how to free-motion quilt using the painting as inspiration.  Some people did abstract quilting and some people made recognizable images, but they were all wonderful.  

I chose to stick to a single color in a couple shades, since I'm not too great at color mixing on the fly.  It was perfect, though, because it allowed me to really focus on the patterns that emerged from the paint and find interesting ways to emphasize certain shapes and lines.  The quilting on the back is just as interesting as the quilting on the front (maybe even more so since my paintings aren't that interesting).

Ashley, the instructor, is a professional quilter who teaches classes on Creativebug that are great for learning to make quilts.  In the workshop, she gave some tips on how to free-motion quilt without having to buy all the fancy tools, and recommended a few tools that she wouldn't want to do without.  She said the watercolor quilting class will appear on Creativebug sometime this year, so that is definitely something to be excited about!  I'll need some reminders for sure.
0 Comments

"On Cloud 9" - New Design Take One

3/12/2017

2 Comments

 
Picture
Picture
Picture
Picture
Picture
Picture
Picture
Picture

So, here it is.  Version one of a new pattern I'm designing.  Despite all its imperfections and mistakes, I'm happy with the way it turned out.  The design uses a few very basic block designs, including "lazy angle," half square triangle, and whatever that clipped corner square is called.  My intention was to create a cloud hovering over a gradient sky, and I included both solids and prints to create dimension and interest.  Since this was mostly a learning/practice project to perfect the design, I'll mostly talk about its flaws (though you're free to admire its glowing qualities as well).

First off, the gradient went too light at the bottom left corner, making the cloud too difficult to see.  The easy fix, of course, is to start darker.  The next glaring mistake was in my initial mental calculation for how to cut and assemble the clipped-corner-square blocks.  After talking it over with my math teacher husband, I made a line graph that quickly and easily solved my problem, so version two will have perfectly matched seams.  Lastly, I ran out of one of the fabrics I had selected, which threw off my gradient in the top left corner and required a bit of muddling to get right again.  Next time, buy more fabric!

One thing I'm completely happy with is the quilting design.  The simple wavy lines, overlapping in random spots, adds some movement, like wind, so I can almost imagine the cloud can move across the fabric background.  I also love, love, love the bright yellow fabric print I chose for the binding.  It pops so nicely with the blue and aqua shades and adds a feeling of sunshine coming through the clouds.  

I think my next version will be a larger, maybe lap-size, quilt with a repeating cloud motif or just larger-scale single cloud.  Either way, it's a design I love that I will pursue as soon as I wrap up a few more projects in the coming weeks.  Meanwhile, I think this mini will become a thank-you gift for a woman who was, in a way, an integral part in the creation of this piece.  I hope she likes it as much as I do!
2 Comments

Porthole Quilt Update

1/25/2017

1 Comment

 
Picture
Picture
Picture
Picture
Picture
Picture
Picture
Picture
Picture

I've been working on the porthole quilt for my soon-to-be-four-year-old son for about two months now (you can see my first few blocks here) and I've made so much progress.  I have a nice stack of single and double porthole blocks, most of which you can see in the pictures above.  I'm planning to add a few more once I find the perfect fabric and I'll likely weed out some that don't fit right.  As you can see, I went for a wide variety of colors and styles.  My main design parameter was that all the prints I chose should fit into the "whimsical realism" category.  You know, stylized but recognizable images.  I also wanted each print to have at least three colors (to maintain realism) and provide some sort of context so the images didn't look like they were just floating in space.  For the most part, I succeeded with these guidelines, though there are a few exceptions that I decided to include for significance reasons. 

Each porthole was created with a Kona solid to coordinate with the print.  In my original design idea, the portholes would be inserted behind yet another porthole stitched directly into the "whole cloth" quilt top.  I still don't have an exact layout in mind, though.  It'll be difficult to find a layout that works well with both the myriad sizes and colors I used.  A couple images I'm using for inspiration are here and here.  I especially like the "ghost" circles quilted in the second one.  I also have to decide on a size, which will be effected by my preferred layout, but I'm thinking lap quilt or a little bigger, something he can use for a while.

If you have any tips for quilting around circles in an interesting way, please let me know.  I'll probably machine quilt, though, since all the top-stitching for the portholes is already done by machine.  Once I'm done making porthole blocks, I'll have some tips to share with you in case you decide to make some yourself.  They're pretty easy, really, and can be used in more ways than I'm using them, so stay tuned for that.
1 Comment

Finished Quilted Pillow

12/8/2016

2 Comments

 
Picture
Picture
Picture
Picture
Picture

A couple years ago I made a pillow cover out of a pretty purple plaid men's button-up shirt.  Unfortunately, I'd made it just a little too small, so the buttons of the shirt that became the closure at the back of the pillow never stayed buttoned.  It frustrated me to no end.  Finally, I decided to just make a new one using a large English paper pieced hexagon I made a while back.  The hexagon, which was the test piece for a design idea, didn't come out right either and wouldn't lay completely flat.  A pillow was the perfect way to use it since a pillow is curved and would fill out the wrinkles.  After appliqueing the hexagon to a 20" square of kona cotton matched to the flowers within the circle shapes, I quilted straight lines parallel to the sides of the hexagon.  As I was quilting, I had the idea to leave a gap after four lines of stitching on each side to add a bit of interest.  I'm glad I did.  The gap breaks up the stitching, giving the eye something to be drawn to.  In the pictures I paired my new pillow with the quilt I won as part of the Wisecraft Handmade book release prize I won with my bunting banner a couple years ago.  They look so good together!

Overall, I'm pleased with the way it turned out.  You can still see the wrinkles caused by the un-flat-ness of the hexagon, but it's much better than it would have been if I'd put it on a quilt or something.  I turned a learning experience from my design into a pillow.  Now I just have to perfect the design and turn it into a pattern.  
2 Comments

Felt Needle Book Tutorial

9/7/2016

1 Comment

 
Picture

​As needle books go, my new one is something of a tome. It's large enough to hold all my hand and machine needles, including my longest doll needle at 5 1/2 inches. It's ten (single-sided) pages include labelled storage for loose needles, small plastic needle cases, and a strap to hold packaged needles that I haven't opened yet.

I designed this needle book myself because I wanted one place to store all my needles. As usual, I took it one step further and made a beautiful paisley motif felt applique for the cover to make myself that much happier every time I open it. And, of course, it took me much longer than it should have to finish it. I mentioned it way back in this post, but it was already long in process at that point. Oh, well. I never do anything unless it's worth taking a long time to do (that makes me sound a bit like Treebeard, though. Hmmmm.).

Anyway, my needle book measure about six inches tall and four inches wide. It holds all my needles, which are organized by type and size so I will be sure to find the needle I want when I need it. Labels next to each type help me keep track of which needles are which. Basically, it keeps me organized and gives me a place to put otherwise homeless needles.


Here's how you can make one of your own.
​
Felt Needle Book Tutorial

Materials:
- Felt for pages (see below for my dimensions or customize as desired)
- Felt for pockets
- Felt for needle holders
- Felt for cover
- Thread
- Twill tape or ribbon for labels (optional)

​
Instructions:

​
Picture
Cut a piece of felt 6" x 8"
Cut a second piece 6" x 8.5"
Cut a third piece 6" x 9"


Stack the felt so that the largest piece is on the bottom, the second one is centered on top of it, and the smallest one is centered on the first two.  Use clips to keep the pages in place.  Find and mark the center of the pages (chalk is pretty useless on felt, but pins work well if you don't have disappearing ink).  Using a stitch length between 3 and 4, sew the pages together along the center line. ​

Picture
​The pages should fold nicely along the stitch line.  Close the book and trim the pages so that they are even along the edges.

Picture
Cut felt rectangles for the pockets.  Make them large enough for the sewing machine needles you want to keep in them.  I cut mine 1 5/8" x 2 3/8" to hold the larger plastic case of needles.  Two pockets will fit on each page.

Picture
Place two felt rectangles on a page of your needle book.  Pin them in place.  On the other side of the same page, place two more rectangles in alignment with the first two.  Each pair of opposite pockets will be sewn with the same lines of stitching.

Picture
Working one pair of pockets at a time, sew through the pockets and page.  Since this is felt and it shouldn't receive too much stress, you don't need much of a seam allowance.  Starting at one top corner, sew down to a bottom corner, along the bottom, and up the other side.  Remove the pins as you go.  Backstitch at the beginning and end to secure the stitches.

Note: I attached all my pockets toward the back of my book since I don't switch machine needle as often as I want a different hand sewing needle.  ​

Picture
Cut narrow strips of felt to hold loose hand-sewing needles.  I cut mine 1 3/4" x 1/4".  Each strip will hold up to 10 needles depending on the size.  Longer needles (such as doll needles) may span more than one strip downwards.

Picture
Place three or four narrow strips on a page of your needle book.  Stagger them as shown to maximize storage and make needle retrieval easier.  Pin them in place.  Working one strip at a time, remove a pin, holding the strip in place with your fingers.  Place the page under you presser foot and sew through both the strip and the page, backstitching at the beginning and end.  

​Note: Larger gauge needles and tapestry needles fit better with a longer stitch length.

Picture
On the last page of my book, I added a strip of twill tape to hold "homeless" needles and carded needles that don't fit anywhere else.  To make one for your book, cut a length of twill tape or similar woven ribbon and stitch it to a page along the top and bottom.  Fold under the ends of the ribbon before sewing for a cleaner look.

Picture
For the cover, start with a large piece of felt (or make a patchwork one).  Close the pages of your needle book and wrap the piece of felt around them to measure for the cover.  Decide how much of an overhang you want on all sides.  An eighth of an inch looked about right to me.  Mark the cutting places with pins on either side.  Use an acrylic ruler to cut the cover piece to size, removing the pins once the ruler is in place.

Picture
Embellish your cover before attaching it.  Applique, beading, embroidery, or stamping are just a few ideas for how to give your needle book that something extra.  Once the cover is all decorated, you can attach it to the pages.   ​

Picture
Since the felt pages and cover were too bulky to get under my presser foot, I attached the cover to the front and back pages only.  You can see the stitching on the front right side.  There is almost identical stitching for the back of the cover and last page.  Of course, this means that the sides of the pages facing the cover are not usable for storage.  It also means that my applique stitches were hidden.  If you need the extra storage, you could attach the cover by hand by sewing along the stitching keeping the pages together along the spine.

Picture
Your needle book is now ready for needles!  Play around a bit with placement, making sure the needles you want most handy are at the front.  As you put the needles in their slots, make a note of which ones you put where.  If you'd like, make some labels so you never forget what needles are on each page.  ​


​And my needle book is finally done! Okay, I may have a couple labels left to sew on, but, other than that, it's finished!


Although I designed the final needle book myself, I used lots of sources for inspiration. Here are some of my favorites:
​
Tiny Apartment Crafts Needle Book
Mmmcrafts Needle Book
Domestic Doozie Needle Book Tutorial
Little Birdie Secrets Needle Book Tutorial
Paisley Applique Design
Paisley Template
How to Draw Paisley

​
Do you have a favorite needle book? Does it hold all your needles or just the most used ones?
1 Comment

Book Review - Sew Serendipity Bags

8/27/2016

0 Comments

 
Picture

I'm finally getting back into the swing of things after visiting family for a few weeks, moving out of one apartment and into another, and putting my little studio together (more on that soon).  I promise to get my newsletter out on Thursday for those who've signed up.  I have so many neat things to share, I'm excited to send it out again!

But on to today's post!  I recently finished up a swap with one of my sisters.  It was great fun.  The bag I made is from Kay Whitt's book Sew Serendipity Bags.  This is a great book and I'm glad to have a copy of it in my library.  The book contains 12 patterns for bags in a wide variety of styles ranging from simple to complex, basic to fancy.  The book begins with some pictures of bags patterns included.  Although this was useful, it did not show ALL the bags in the book or provide page references, so some page-flipping is necessary to see an example of bags not shown.    One thing I love about this book is that, once you open the book to a pattern, it will stay open because of the wire binding.  If you've ever put a heavy object in the middle of a book to hold it open, you know how awesome this little detail is.

Every bag pattern includes at least one photo of the finished bag before the instruction section, so you have an idea of how it should look.  There is also a written overview of the features of the bag, which is helpful for visualizing the parts of the bag not visible in the photo.  Although dimensions are given for all the bag patterns, the photographs don't always show the scale relative to a person or other object (as in the photo below of the pattern I ended up using).
​
Picture

The materials list includes all necessary notions and fabric yardages.  This made it easy to gather everything I needed before starting.  One problem, though, is that I ended up using more of one print than was listed.  I would recommend adding a bit of length to whatever fabric you purchase or use.  Cutting diagrams would also have been useful to ensure that the fabric was being used efficiently and in the amounts listed.

The author divides the instructions into easy-to-follow steps.  Most of the steps are accompanied by a sketched illustration of the relevant pieces and how they come together.  For complex, three-dimensional projects, these sketches are ideal.  There are no hands holding the pieces to get in the way of what you want to see, and everything is simplified to the essential parts.  The sketches for the handle-making steps were less clear than I would have liked as a novice bag-maker, but I managed, in the end, after reading the instructions several times.  Once I figured it out, I made a note in the margin (something I recommend doing for all patterns you plan to make again).  The instructions on making the decorative pocket ruffles were obviously written for someone with a ruffle foot attachment.  I had to make a guess as to how densely to gather by hand.  I opted for gathering as much as pleased me, but I ended up having to make a second batch of ruffles in order to have enough.

Picture

I made a couple simple changes to the pattern.  First, I opted for a continuous cut for the main bag body fabric and interfacing piece, which meant deducting a little for the seam allowance.  I like that it reduced bulk at the bound edges, but I would not recommend doing this if you are using a very directional print, which I was not doing.  Second, I finished all the binding by hand rather than having a line of visible stitching through all the layers.  I'm not so good at keeping straight lines through bulky pieces, so hand-finishing gave it a much nicer look.  It was a time-consuming change, so don't do it if bulky sewing is one of your skills.

Overall, I recommend this book.  It is clear enough for beginner bag-makers as long as they have some sewing experience, and there are projects for every skill level except beginning sewist.  The instructions and sketches are generally clear and easy to follow.  And the dozen bag patterns are a great range for any pattern library.

Picture
0 Comments

Designing EPP Patterns in Word

7/14/2016

0 Comments

 
Picture

​​Have you ever wanted to design your own English Paper Piecing patterns, but don't like the idea of spending tons of money on special software?  If so, I've got quite a treat for you!  I've written a tutorial on how to use Microsoft Word as a tool to create your very own EPP patterns.  From simple motifs to alterations of traditional patterns to complex repeating patterns, Word can be your go-to resource, whether you design for yourself or for retail patterns.  You can find my simple tutorial over on Sew Mama Sew.  Let me know if you have any questions about making the technique work for you.  I can't wait to see what everyone makes!  Tag me on Instagram (@carleybiblin) or link in the comments below to share.
0 Comments
<<Previous
    Picture


    Carley Biblin

    Hi.  My name is Carley.  I love to sew, craft, and create. As a Jane-of all-crafts so to speak, I enjoy sewing, writing, cooking, drawing, photographing.  But the constant thread (if you'll excuse the pun) throughout my weeks is needle arts. 
    I hope you'll join me in
    Making It Up As I Sew Along.
    Learn More...

    My Etsy Shop

      If you'd like to sign up to receive my newsletter, type your email address in the box below and get news, tips, and other neat stuff delivered to your inbox.

    Submit
    Instagram

    Archives

    January 2017
    December 2016
    November 2016
    October 2016
    September 2016
    August 2016
    July 2016
    June 2016
    May 2016
    April 2016
    March 2016
    February 2016
    January 2016
    December 2015
    November 2015
    October 2015
    September 2015
    August 2015
    July 2015
    June 2015
    May 2015
    April 2015
    March 2015
    February 2015
    January 2015
    December 2014
    November 2014
    October 2014
    September 2014
    August 2014
    July 2014
    June 2014
    May 2014

    Categories

    All
    Arts & Crafting
    Books & Music
    Celebrations
    Embroidery
    Family Photos
    Fixing
    Guest Posting
    Inspiration
    Kids & Family
    My Week
    Parenting
    Photo Tour
    Present Moment
    Recap And Goals
    Recipes & Food
    Reviews
    Sewing
    Shop Update
    Swaps
    Tips And Techniques
    Travel
    Tutorials

Powered by Create your own unique website with customizable templates.