Making It Up as I Sew Along
  • Blog
  • About
  • Gallery
  • Shop

A New Leaf

3/28/2016

2 Comments

 
Picture
Picture
Picture

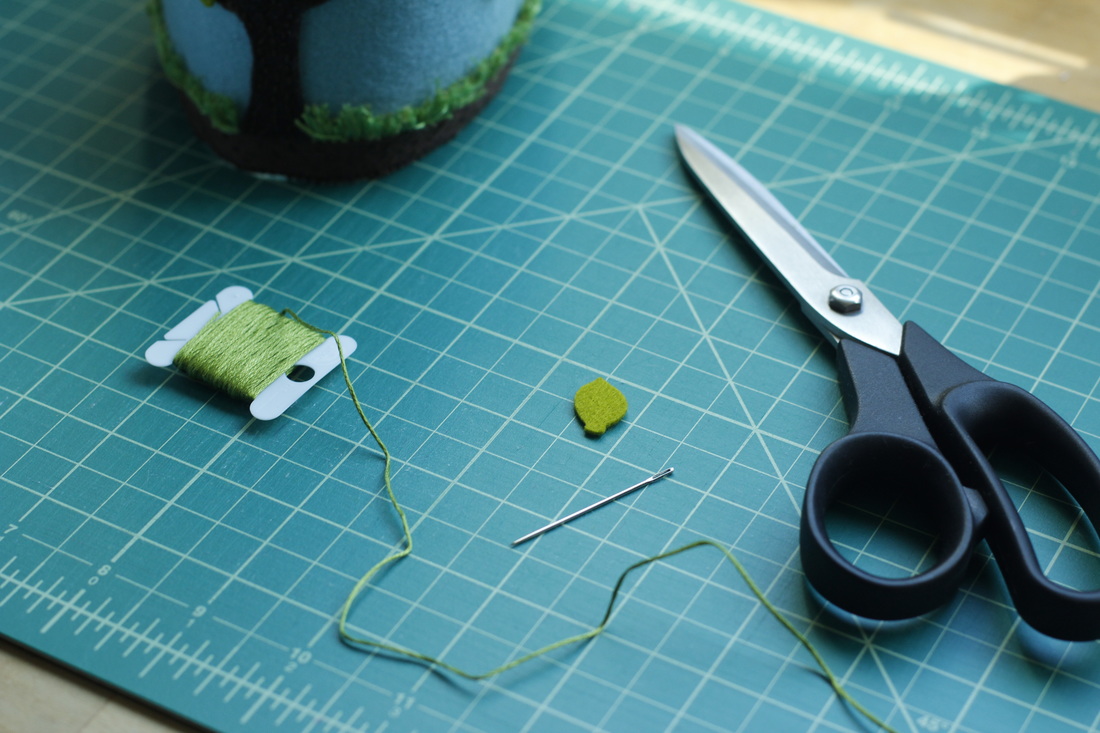
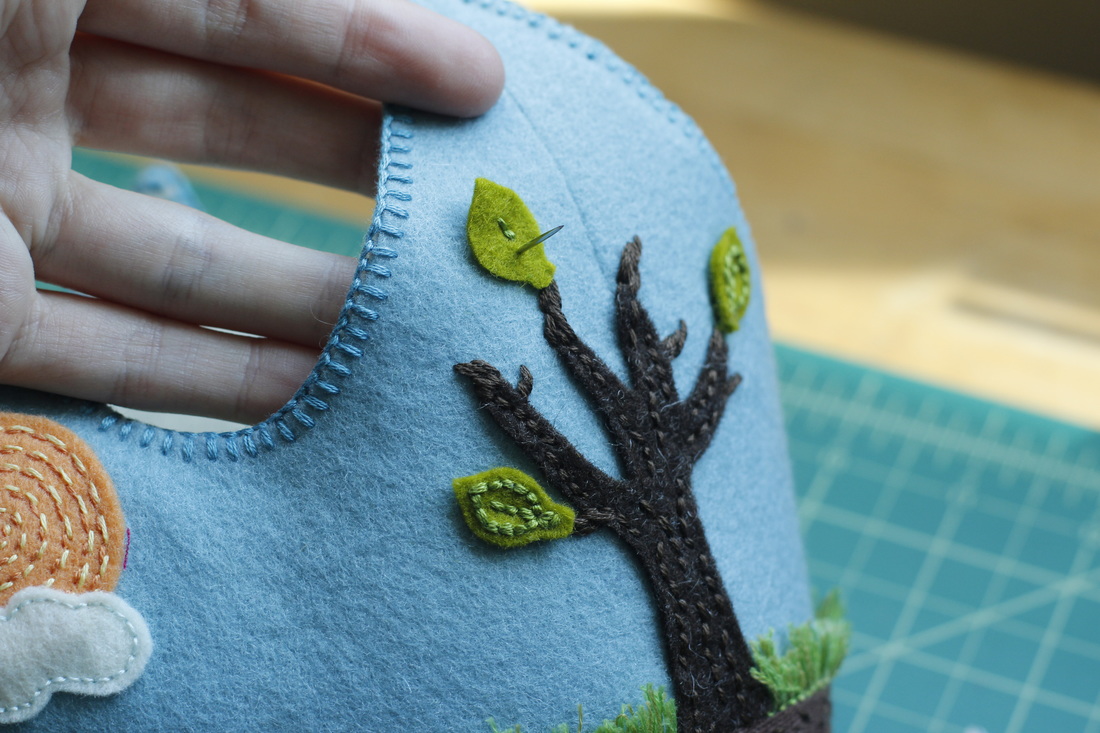
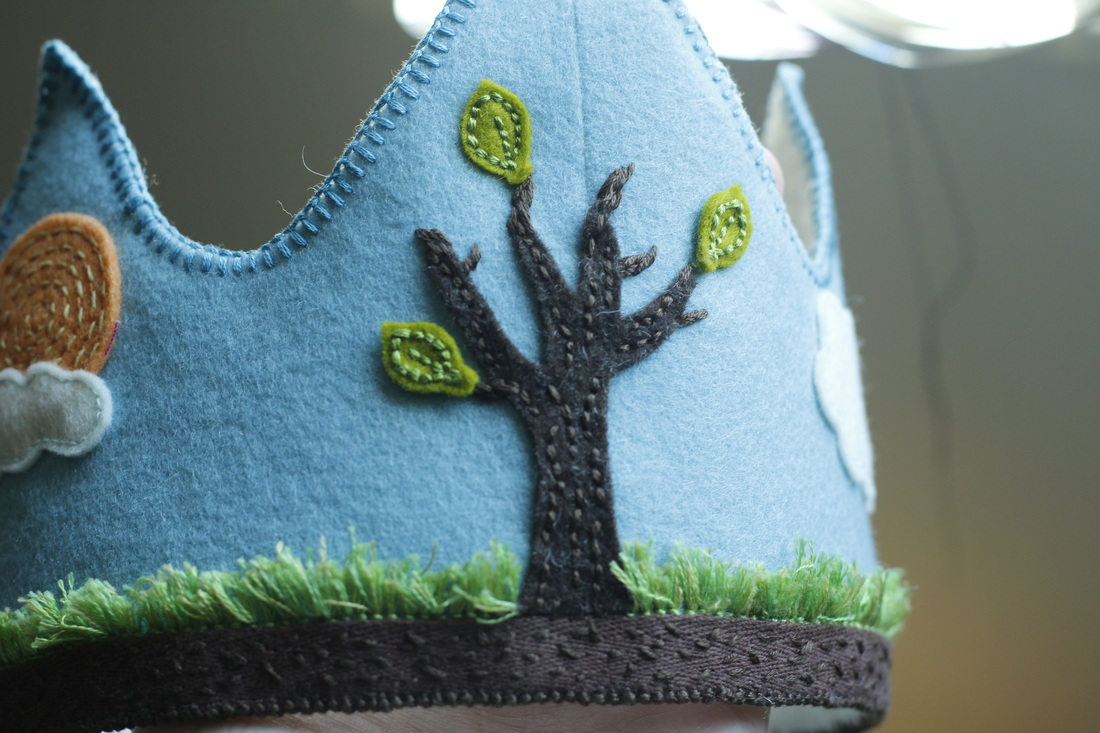
Goen's third birthday is officially today, though we won't have a party until next Sunday.  Even so, I figured it would be fun to have his crown ready in case we decide to have some cake and blow out candles today, too.  For his first birthday I made a felt crown using a pattern I designed (which you can purchase through my Etsy shop).  In the center of the crown is a tree on which I plan to stitch a leaf for every one of his birthdays.  You can see pictures from his first year here and his second year here.  Each leaf is added with a simple backstitch to outline and stabilize the felt and to add texture.  I'm currently drawing up these designs and more to include with the pattern I have for sale, including a fully-photographed tutorial.  That means I'll be making another crown, which might make it into my shop.  I'll let you know when that happens.  Sign up for my newsletter near the top right if you'd like first access to the updated pattern, as well as a coupon code.

I've still got lots to do before party day next week.  I'll have at least one more party-themed tutorial to share, so stay tuned for that.  And I'll definitely have pictures of his party and all the decorations in action.  I can't wait!
2 Comments

Rainbow Mini Quilt Swap

3/23/2016

4 Comments

 
One of the great things about Instagram is that you can find out about lots of sewing swaps and, even though I'm not a quilter generally, I enjoy making minis for other people and stretching my skills.  Most recently I finished a mini quilt for the Rainbow Mini Quilt Swap (Round 2).  Among other things, my partner said she likes flying geese, so I chose that as my theme.  I sewed together lots of flying geese using gray for the geese and rainbow-colored fabrics for the backgrounds.  I made up my own design, arranging the smaller geese in a sort of curve around strips of the larger geese.  I was going for a gradient effect and I thing it turned out pretty well.

Picture

I went simple for the quilting, but with a contrasting light gray thread, which adds just the right amount of brightness to the darker colors.  The stitching for the small geese follows along with the direction of the geese to evoke a flight plan of sorts.  The stitching for the larger geese goes along the top sides of the "wings" with a connecting line to one side.  On the back it looks like a chevron pattern.

Picture

I went above and beyond for the backing, especially considering it isn't usually the displayed side.  I carved my own rubber stamps (you can find out more about how I learned here).  One is a flying goose and the other reads "flying geese" and is written in a text that reminds me of feathers and flying.  The label was made on my sewing machine (I love that it can do text!).  You can see the chevron quilting better here, too.  Since the mini is mostly solid fabric, I decided to go with a fancier print for the binding.  It's a two-tone magenta that provides a nice contrasting border but still matches the simple colors theme.

Picture

Of course, I sent some extras along with my mini.  I made a stitched mini paper banner with the word "STITCH", picked a fat quarter of fabric that I thought my partner would like, bought some adorable tiny clothespins in rainbow colors, and added some Starburst candies in rainbow colors.  My partner received it all and loved it!  It's fun to make these minis, but it's even better to make something for someone else and have them appreciate it.

Picture
Picture

A few days after my partner got her package, I received mine from the person assigned my name.  I was so excited to open it!  Inside was a rainbow cross-stitch design in a hoop, a lined notebook, a tape dispenser (because you can never have too much tape), moisturizer, dark chocolate candy, and the mini quilt.  My favorite part of the mini is the matchstick quilting in rainbow colors.  It must have taken forever, there is so much of it!

Picture
Picture
Picture
Picture
Picture

I can't wait for the next mini swap!  I've got a pouch swap I'm supposed to be working on, so you can look forward to seeing that soon.  I'll also be working on lots of English Paper Piecing, which you see my day by day progress for on Instagram.  I'd love to see what you're working on, too, so leave a link in the comments if you'd like to share.
4 Comments

Yarn-Embroidered Party Signs

3/19/2016

1 Comment

 
Picture

My little guy's birthday is creeping ever closer, and there is still so much left to do.  I gotta figure out what cake to bake, some favors to give to the guests, and a gift to sew for him.  For that last one I was thinking about "big boy" underwear using some really soft knit fabric I've got in my closet.  Any pattern suggestions?  Tips?  I don't sew with knit very often, so I'm a bit worried about how it will go.  I'll just have to decide on a backup in case it goes badly.

My tutorial is all about creating signage to direct guests to the celebration.  We're just doing the party at our local park, but some guests have never been there before and I want to make sure they find the right spot.  The supplies are pretty simple and the options for design are limitless and open to your imagination.  I went with a simple, two-word phrase and three arrows that can point any direction I want.  Here's what you'll need.


Materials:

 - Cardboard (I used cereal and cracker boxes)
 - Craft paint (acrylic, washable kid paint, etc)
 - Large paint brush
 - Pencil
 - Awl (or other strong pointed tool for poking holes)
 - Tapestry needle
 - Yarn
 - Scissors
 - Tape (optional)


Directions:

Picture
Gather all your supplies first.  Cut pieces of cardboard to the size you want.  It's best to cut out the creased sections and only use smooth, flat pieces.

Picture
Paint a base layer on your cardboard.  Mine warped from the wet paint, but it dried pretty flat so don't worry too much if it happens to yours too.  After the first layer dries, add any additional layers until you get the effect you want.

Picture
Use a pencil to sketch your chosen design on the painted side of cardboard.  Avoid touching the pencil lines because they can smudge onto your hands and across the painted surface.  Do this for all your pieces.

Picture
Use you awl to poke evenly-spaced holes along the pencil lines.  The distance between holes depends on the size of your letters or shapes.  Mine are 1/4" to 1/2" apart.  You may want to space holes closer along curved sections to get a smoother line.  Make the holes big enough to fit the eye of the needle through without hurting your fingers (trust me on this).  Also, try to poke holes along parallel lines at about the same level to achieve a more symmetrical look.

Picture
Once all the holes are poked you're ready to embroider

Picture
Thread a length of yarn onto your tapestry needle.

Picture
Push the needle up from the back to the front of the cardboard and pull the yarn through, leaving a 3" tail.  You can either knot the tail or tape it down to keep it in place.

Picture
To create fill lines, cross the yarn to the other side of the shape or letter and put the needle down through the appropriate hole.

Picture
Bring the needle back up through the next hole where you want a stitch to begin on the front.  Continue until all your fill stitches are complete.

Picture
As you can see, you may not use all the holes you made for your fill stitches.  Don't worry about that, though, because they can be covered up with a border stitch.  For the border stitch, you can use every hole or skip several.  Either way, try to keep the distance of each stitch under about 2" to help the yarn lay flush with the surface.

Picture
Continue the border stitch all around the shape alternating straight stitches and back stitches. 

Picture
For large letters with only an outline, the easiest thing to do is to go around once with a running stitch and then around a second time with a running stitch to fill in the gaps.  To end a length of yarn and begin another, take the yarn to the back side and tape or knot it.  Begin a new length in the same way as before.


Once all your embroidering is done, your signs are ready to lead your guests to the right place.  You can display them on steps, pin them to a wall, or use another length of yarn to hang them on a fence post.  No matter which way you show them off, your guests will be able to find the way.  Unless, of course, a wily toddler decides to flip the arrows around...

Picture
Picture
Picture
Picture
1 Comment

Watercolor Paint Set and DIY Palette Box

3/11/2016

1 Comment

 
Picture
Picture
Picture
Picture
Picture

Several weeks ago, in my newsletter, I mentioned wanting to make my own watercolor paints using this recipe, but using a custom-made box for a travel set.  Well, I did it.  I bought a couple different plastic hinge-lidded containers, the kind that click shut.  One was a bobbin case and the other a pencil box.  I made additional dividers by hot gluing in pieces of plastic from washed-out food containers.  Then I mixed the paint base and poured it into the compartments.  Right away I could tell that I should have spent more time gluing because the paint base was getting through.  I kept going anyway.  I added the food coloring to each compartment and mixed it with a plastic stick.  The clear containers made it easy to see where I needed to keep stirring.  I filled each compartment to within a millimeter or two of the top, and I'm so glad I did.  By the time the paints were set and the excess liquid on the top soaked up with paper towels (a fun art project in itself), it was actually much lower.  There was a little color mixing because of the gaps, but it wasn't too bad. 

Goen and I did a test of the paints yesterday.  They look pretty good.  A couple of the colors weren't as dark as I would have liked, so next time I will add more food coloring to those.  It's really trial and error with this if you're not measuring precisely and keeping notes (which I'm not).  The pencil box set is our at-home set and holds several paintbrushes.  The bobbin case is my travel set to take to the park or wherever.  I'm still trying to figure out how to make my own paintbrushes that can unscrew to go in the case and then screw back together and be long enough to use.  I'll let you know what I come up with.  In the meantime, definitely give this watercolor activity a try.
1 Comment

Stitched Mini Paper Banner

3/4/2016

0 Comments

 
Picture

Here's the first post in my birthday prep series.  Only 27 more days until Goen turns three (I bought myself a few days by waiting for the weekend to have the party) and still so much left to do.  Today I'm sharing a tutorial for a stitched mini paper banner.  It's a great project that you can make as simple or as fancy as you want.  For mine, I had Goen help me paint the paper before I punched my shapes, and he even pressed the foot pedal on my sewing machine while I ran the paper through.  If your kid likes to help make things, this is a fun way to do it.


Materials:
 - Paper (cardstock or similar weight)
 - Paper punch (I used a Fiskars tag punch)
 - Paper scissors
 - Sewing machine
 - Sewing thread
 - Well-used sewing machine needle


Instructions:

Picture
The first thing you will need for this project is a piece of paper.  You can use plain paper or stamp and paint it first (a great kid project!).  Use your paper punch to create shapes for your banner by punching along one side of your sheet of paper. 

*Alternatively, you could cut shapes with scissors using printed templates or freehand.

Picture
Once you've punched the first row, use your scissors to cut off the scrappy bits so you have another straight edge to work with.  Continue punching and cutting until you have the number of pieces you want.

Picture
If you are making more than one banner at a time, sort and stack the paper pieces into piles.

Picture
If you have a well-used sewing machine needle lying around, now is the time to use it.  Paper will dull your needle, so don't waste a good one on it.  Thread your machine with a coordinating or contrasting thread.  Set your stitch length to three or thereabouts.  Pull several inches of your top and bobbin thread to create a tail.

Picture
Begin sewing the first paper piece across the top edge.  Add a second piece, leaving a quarter to half an inch space between them.  Continue sewing until you have used all your shapes.

Picture
Before cutting the thread, pull another tail for the end.

Picture
Use the tails to tape or tie your banner for display.


There are lots of ways to personalize this project.  In addition to the banners above, I created a special birthday banner for my little guy.  I used paper with a colorful painted background, then used sharpies to write "Happy Birthday" on it.  You could get really fancy and use scrapbooking supplies to decorate the banner.  Letter stickers, flat wood shapes, or sequins are great ways to give it your own spin.

Picture
Picture
0 Comments
    Picture


    Carley Biblin

    Hi.  My name is Carley.  I love to sew, craft, and create. As a Jane-of all-crafts so to speak, I enjoy sewing, writing, cooking, drawing, photographing.  But the constant thread (if you'll excuse the pun) throughout my weeks is needle arts. 
    I hope you'll join me in
    Making It Up As I Sew Along.
    Learn More...

    My Etsy Shop

      If you'd like to sign up to receive my newsletter, type your email address in the box below and get news, tips, and other neat stuff delivered to your inbox.

    Submit
    Instagram

    Archives

    January 2017
    December 2016
    November 2016
    October 2016
    September 2016
    August 2016
    July 2016
    June 2016
    May 2016
    April 2016
    March 2016
    February 2016
    January 2016
    December 2015
    November 2015
    October 2015
    September 2015
    August 2015
    July 2015
    June 2015
    May 2015
    April 2015
    March 2015
    February 2015
    January 2015
    December 2014
    November 2014
    October 2014
    September 2014
    August 2014
    July 2014
    June 2014
    May 2014

    Categories

    All
    Arts & Crafting
    Books & Music
    Celebrations
    Embroidery
    Family Photos
    Fixing
    Guest Posting
    Inspiration
    Kids & Family
    My Week
    Parenting
    Photo Tour
    Present Moment
    Recap And Goals
    Recipes & Food
    Reviews
    Sewing
    Shop Update
    Swaps
    Tips And Techniques
    Travel
    Tutorials

Powered by Create your own unique website with customizable templates.