Making It Up as I Sew Along
  • Blog
  • About
  • Gallery
  • Shop

Getting Stuffed: Fish Tales

7/29/2014

0 Comments

 
Picture
Picture
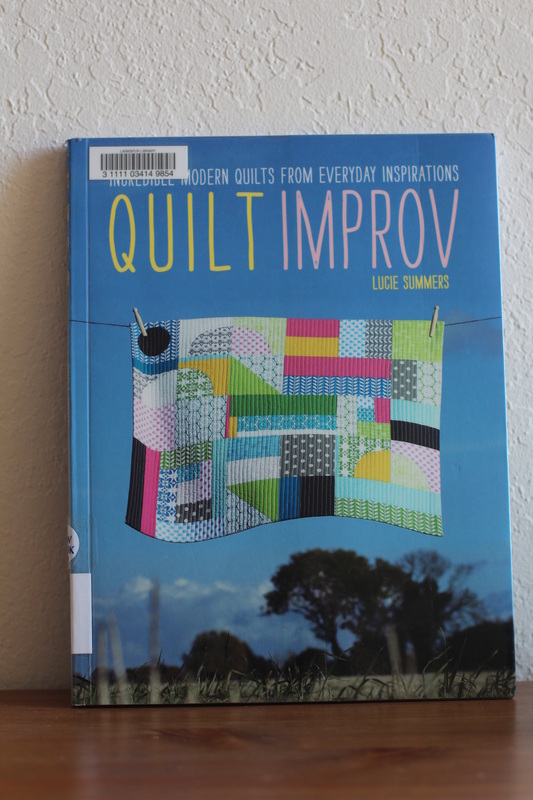
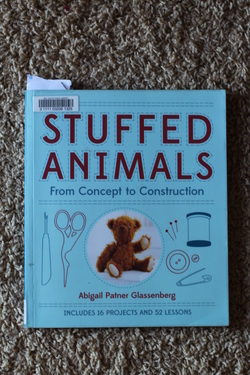
This excellent book by Abigail Patner Glassenberg, Stuffed Animals: From Concept to Construction, includes 16 projects, each one focusing on a different set of techniques for designing and creating your own stuffed animals.  Her writing is easy to follow and she includes picture examples to illustrate her descriptions.  One nice thing is that the patterns are available online to print so you don't have to trace them all from the book (but you could do that, too, if you wanted).  I highly recommend checking it out at your library or a bookstore if you are interested in learning about how to make stuffed animals.  Glassenberg makes the whole process seem possible, regardless of level of experience.

For my first foray into these pages I chose the first and simplest pattern: a fish, but added details of my own.  I will move through the book to the more difficult gusseted creatures sometime soon.

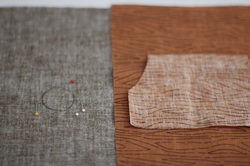
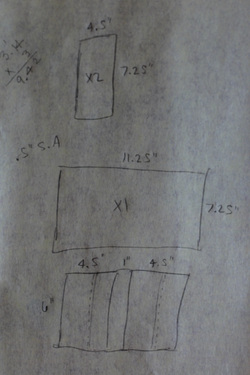
One thing to be aware of for these patterns is that there are no seam allowances included so you will need to add them when cutting your fabric.

Picture
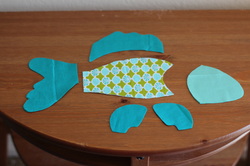
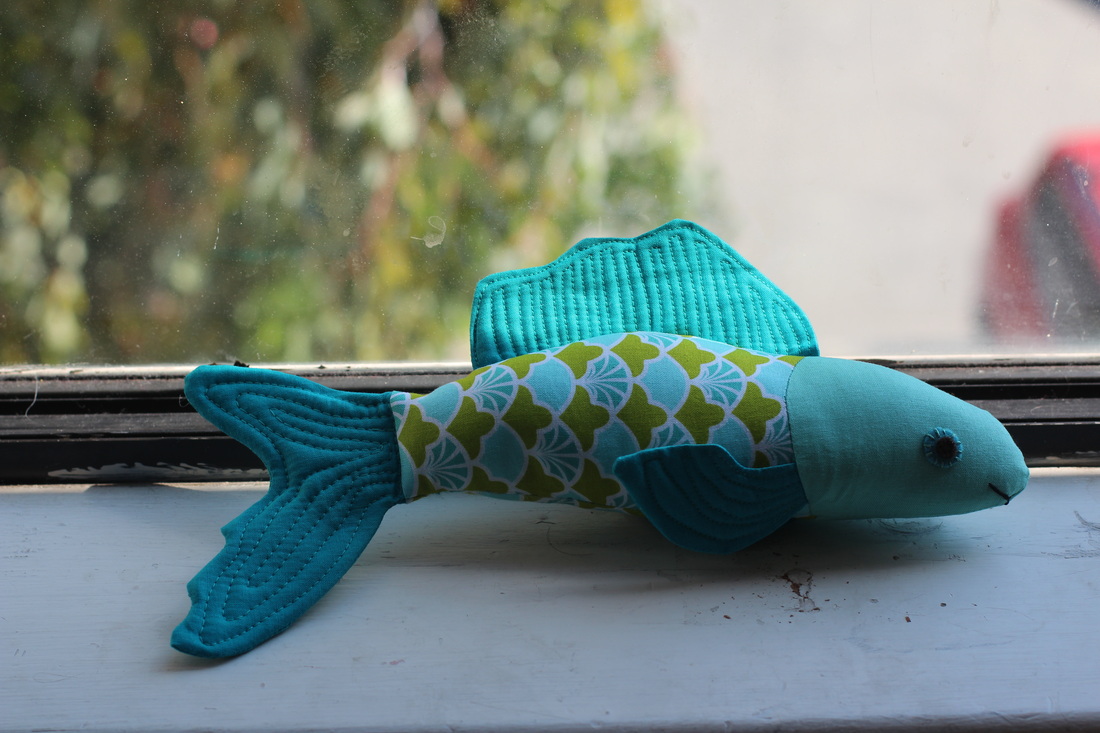
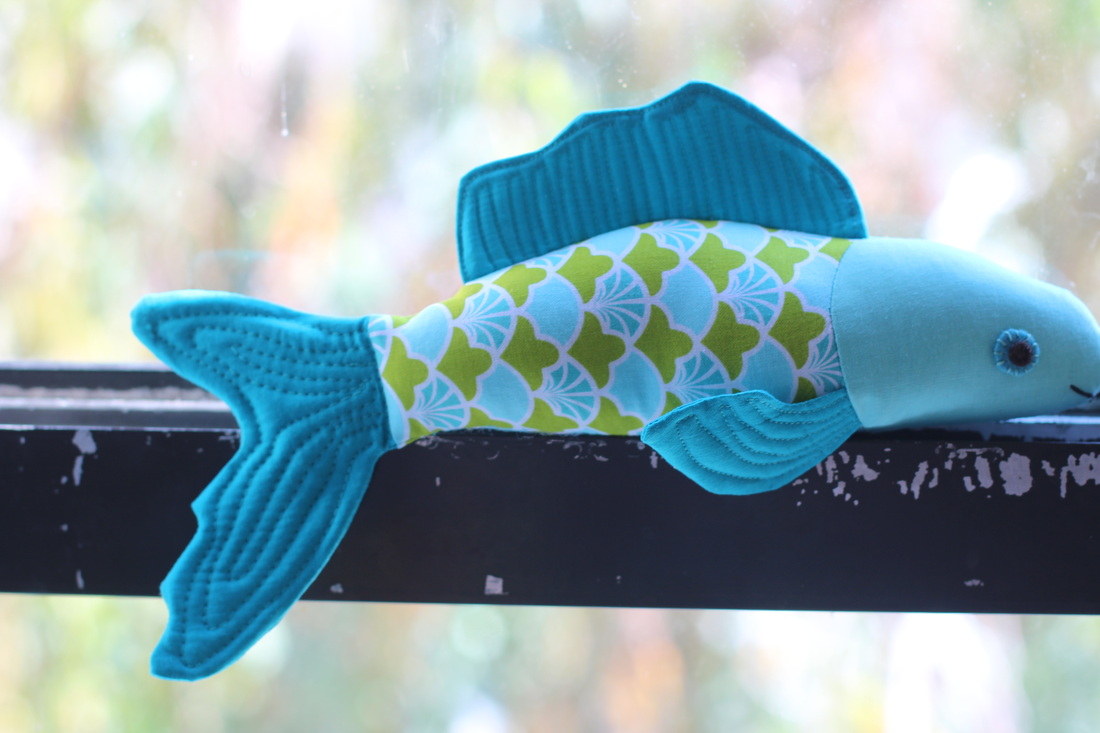
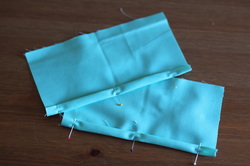
Here are all the pieces of my fish cut out.  The fabric for the body of my fish is French Scallop in teal by Patty Young.  I will note that I did not follow the instructions for the side and top fins.  I decided to cut them out before sewing, rather than the reverse called for in the pattern.  To spice up my fish a little, I quilted all the fins.  My process is detailed below.

Picture
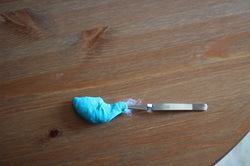
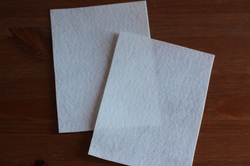
After sewing, clipping, and turning the fins, I stuffed a bit of stuffing in them to make them poofy.  A pair of tweezers was helpful for the smaller fins.  I only used small bits at a time to make sure it is distributed evenly and not clumpy.  The more stuffing you use, the firmer the resulting fin will be.  If you want something more floppy, stuff lightly.

Picture
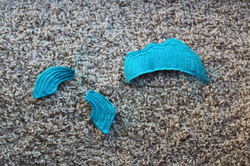
I opted for machine quilting my fins, but hand quilting or embroidering using a running stitch could also work.  Use either a matching or coordinating thread depending on the look you want.  I started my stitching at the raw, open edge of the fins to make sure that it would be hidden in the seam.  For the side fins, I followed the outer edge until I got close to the tip and then I pivoted the fin slightly and manually stitched once.  I pivoted again so that the next stitch would be parallel to the flat edge and did another manual stitch.  Another pivot, and then I resumed machine stitching, following the curve of the fin and reducing the distance between the first line of stitching and the second as I got closer to the raw edges.  I repeated the pivot-and-stitching routine until I covered the entire fin.  I did the same for the second side fin, trying to get them to match.

For the top fin, stitch the open side closed before quilting the lines in order to prevent the stuffing from getting pushed out.  I continued this line of stitching all around the fin, following the curves at the top.  Then I followed a similar procedure as for quilting the side fins.  I added a little more interest by curving the lines of stitching slightly.

Note: Looking at pictures of fish fins before doing this helps to get a more realistic look. 

Picture
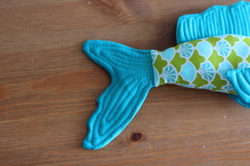
The tail of the fish is stitched onto the body before stuffing, so it requires a slight deviation.  I stuffed the tail so that the stuffing went just past the edge of the tail and into the body.  This adds more stability to the fin so that it does not just flop around.  Then I stitched the tail closed so the stuffing wouldn't get pushed out during quilting.  I continued this line of stitching (the fewer stops and starts the better since the threads cannot be hidden very easily) around the tail, following the curves.  When I got back to where I started, I made two or three short stitches over the same line and then did the inner lines of stitching.  The loopy stitches on the top of the tail were done first and then the ones on the bottom part of the tail.  Each time I finished a loop, I took a couple stitches along the first line of stitching and then did a loop inside the previous one.  I again used the first line of stitching to move from quilting the loops on the top to quilting the loops on the bottom.

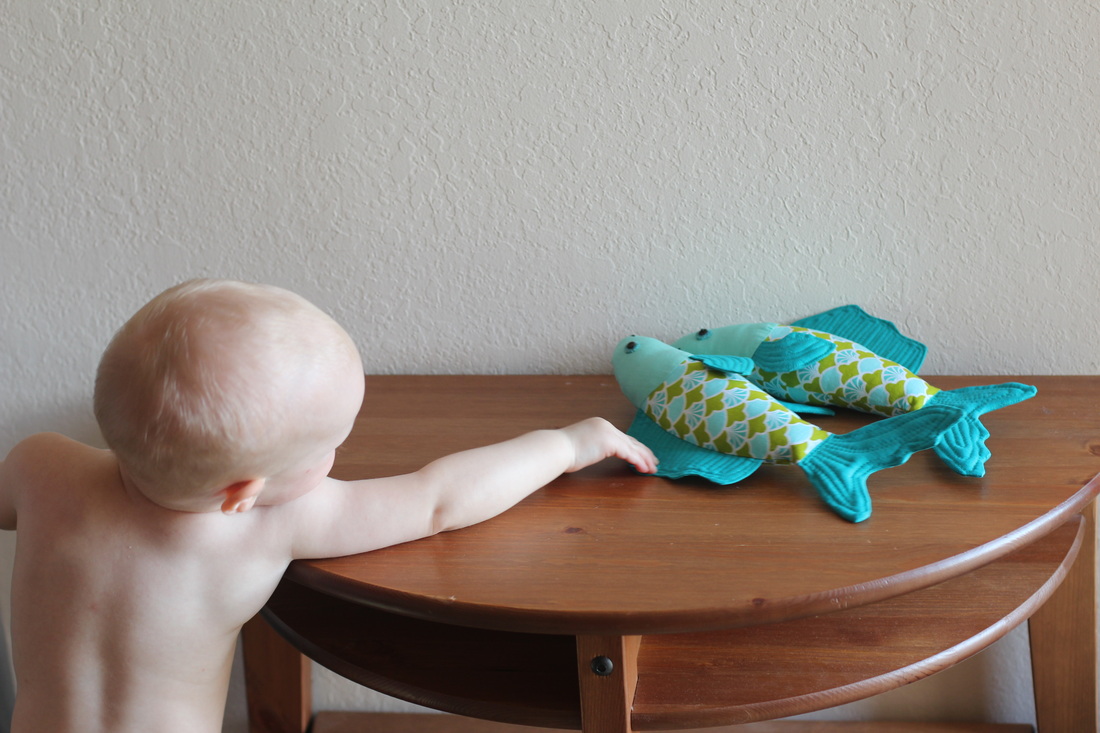
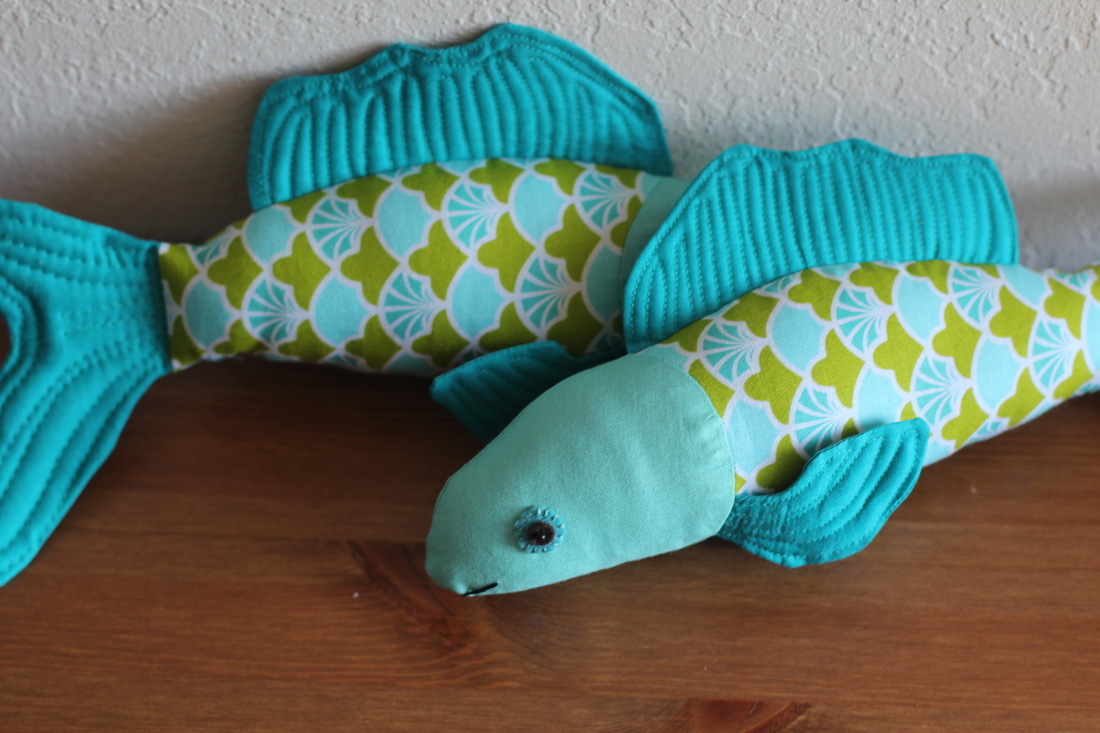
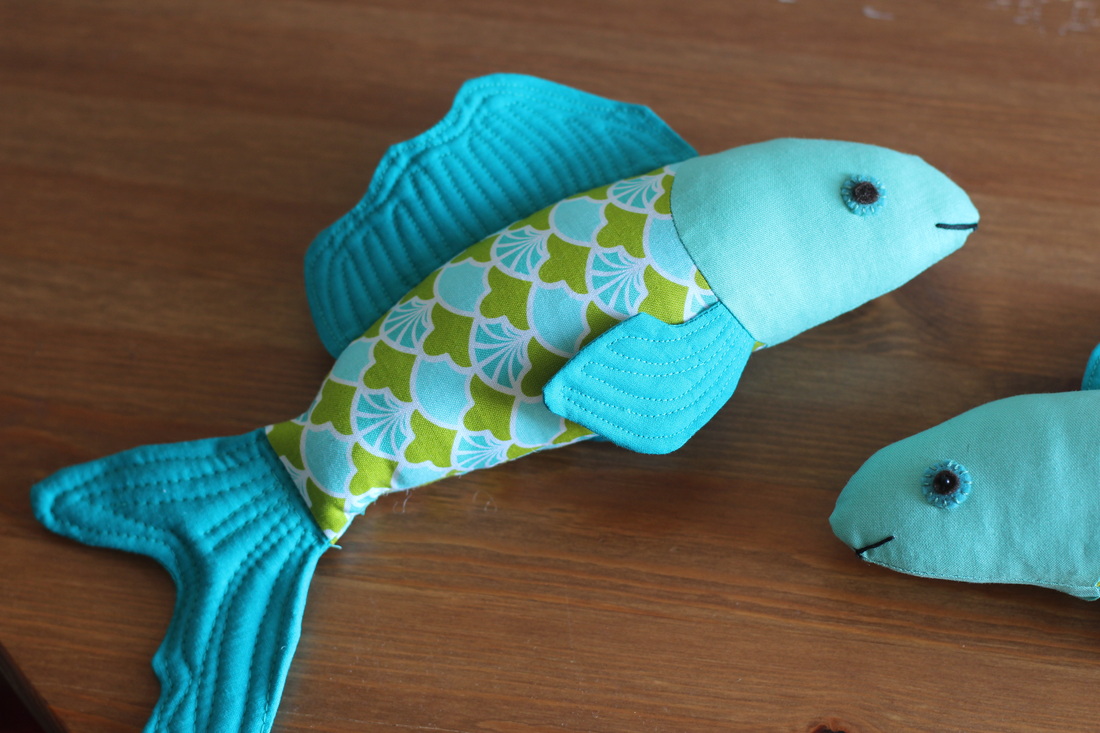
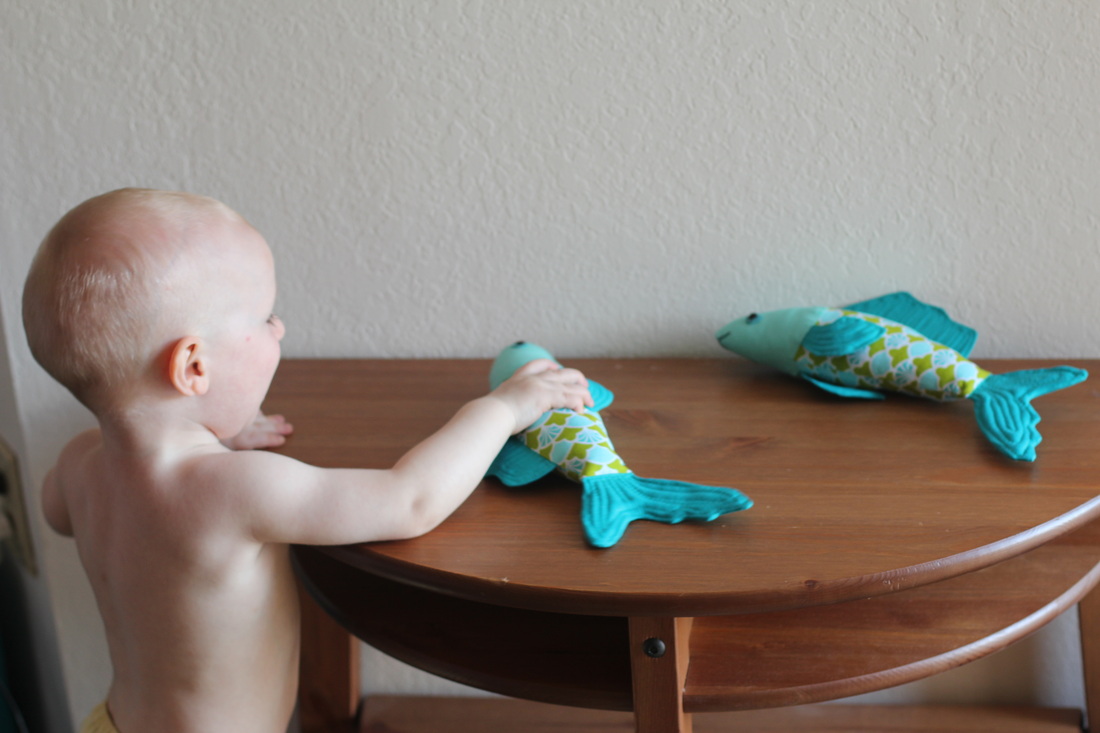
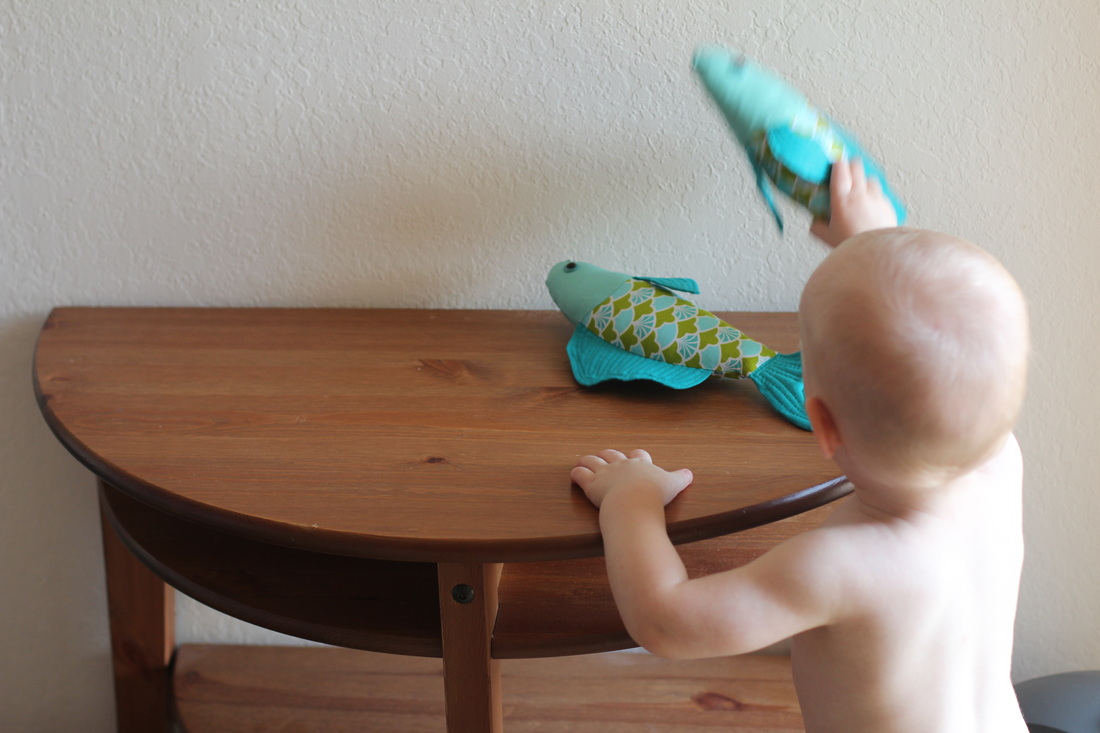
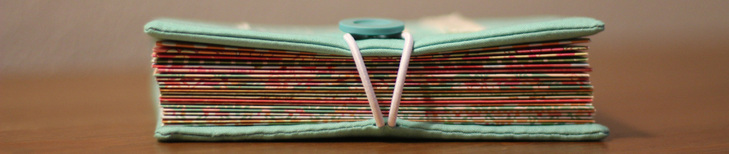
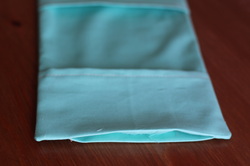
I made two of these delightful fish.  If you look closely, you can see that the pattern of the fabric is reversed in one.  It doesn't seem to make much difference in how much it resembles fish scales, though.  And, to wrap up this project, here is a gallery of images. 
0 Comments

Making Up a Hollow Log

7/24/2014

0 Comments

 
Picture
After sharing with you a photo tour of the Muir Woods, I thought it was fitting to post a tutorial on making a fabric log.  It can be made with the peep hole or without.  But, either way, it is a great addition to any child's play set.

After making my felt stuffed bird, I decided that she needed a perch.  At the same time I was planning to create it, I happened to have in my possession a copy of Quilt Improv by Lucie Summers.  One of the designs in the book is called "Portholes."  It is a sort of reverse applique method, but I won't try to describe it here.  I do recommend checking out the book since it has so many neat ideas and inspiring pictures.  Part of my tutorial below is based on what I learned from this book.
Picture
Picture
Hollow Log Tutorial:

Supplies:
Wood grain fabric
Dark lining fabric
Heavy weight interfacing (sew-in is fine, but fusible is stiffer)
Matching thread
Embroidery floss (optional)
Calculator (optional)
The first step to making a hollow log is deciding how big to make it.  Draw a rectangle on a piece of paper (scale does not matter, it is just a reference point).  On the right or left side, write the measurement for the height of your log plus 1" for seam allowances.  Now you need to calculate the circumference of your log.  Multiply the diameter you want your log to be by 3.14 (or pi).  Add 1" for seam allowances and write the resulting number on the top or bottom of the rectangle.  For a size reference, my log is 8" tall and has a diameter of 3".  This means that the height of my log is actually less than the distance around.  Make sure you keep track of which side is which since it is easy to get them mixed up for this very reason.

Next, use your rectangle dimensions to cut out a piece of wood grain fabric (making sure that the grain follows the height of your log and not the diameter) and a piece of lining fabric.  For the interfacing, subtract the seam allowances and then trace the rectangle directly onto the interfacing.  Cut the interfacing and set it aside for now.
Picture
Use a small circle template (such as a medium-sized spool of thread) to trace a circle onto the wrong side of the wood grain fabric and the lining fabric.  Make sure the circle is the same distance from the top (or bottom) on both pieces.  Pin a scrap of fabric behind the circle.  The scrap should be larger than the circle.  Make sure to put right sides together.

The picture here shows a circle drawn onto the wrong side of the liner fabric (left) and a scrap laid right sides together with the wood grain fabric (right).

Picture
Using a small stitch length, sew around the traced circle on both the wood grain fabric and the lining fabric.  If your circle is small (like mine), hand sewing may result in a better-formed circle.

Picture
Use a sharp pair of scissors to cut out a circle of fabric inside the stitch line, leaving a very narrow seam allowance.  Cut through both the main fabric and the scrap piece.  You should be able to see through it.  Clip the curves well.

Picture
Press the seams for the wood grain fabric and the lining fabric in opposite directions.  Turn the wood grain fabric right side out.  Ease the interfacing inside.  You may need to fold it or squish it to get it in.  The interfacing should be 1/2" shorter on each end than the outer and lining fabrics and centered accordingly.  Slip the lining fabric over the wood grain fabric so that the right sides are together.  Make sure the holes are lined up.  Machine stitch one end of the log with a 1/2" seam allowance.

Picture
Take the wood grain layer and push the scrap piece through the hole you created in the last step.  Smooth it out and press.  Make sure the circle is well formed.  If not, you may need to clip more of the seam allowance.  If you want, use embroidery floss to make a decorative running stitch around the edge of the circle.  Repeat for the lining fabric.

With the right side of your wood grain fabric facing up, fold the fabric in half so that the raw edges representing the height of your log meet up.  Pin along the height and sew with a 1/2" seam allowance.  Repeat for the lining fabric, but sew with a 5/8" seam allowance (this will help reduce some of the excess fabric that will result from it being the inside layer, which will inevitably have a smaller diameter than the outer fabric).

Roll the piece of interfacing into a log shape so that the edges representing the height meet up but do not overlap.  Whipstitch the edges together snugly.  Make sure to take enough of a "bite" with your needle so that the thread does not rip through the interfacing.

Picture
Pull the lining fabric off of the wood grain fabric.

Picture
Push the lining fabric through the sewn end so that it is inside the log.

Picture
Here is a top view of the log with the lining fabric in place.  As you can see, the lining fabric wrinkles up a bit as a result of the smaller diameter of the inside of the log.  It will smooth out a bit after you stitch the top seam.

Picture
Ease the holes into position so that they are in alignment.  Sew around the holes using a ladder stitch, going through the outer and inner fabrics. 

Picture
Fold over the remaining raw edges and (right sides together) sew them with a ladder stitch.  And you're done!

One of the great things about this hollow log is that it lays flat because of the seam in the interfacing.  That means it won't take up much space in a toy box (so you can make lots of them!) and it can easily be tossed into a traveling toy bag and act as a prop in a game of imaginative play.

After making this I started thinking about how to make it into a tree by adding a green, leafy top.  Fabric?  Crochet?  Something else?  I don't know yet, but it seems that this side project has led to yet another side project. 
0 Comments

Into The Woods

7/20/2014

2 Comments

 
Picture
Although we have been living in Marin County for almost a year now, we have not taken many adventures into the beautiful forests that surround us.  Until now.  Several weeks into summer, and just days after a failed trip to Point Reyes, we drove to Muir Woods National Monument.  There is so much to see there, and so many eloquent words to describe it, but I will let the woods speak for itself.  All I can say is, I'm glad we got the annual pass.
Picture
Picture
Picture
Picture
Picture
Picture
Picture
Picture
Picture
Picture
Picture
2 Comments

Belly Dancing Class

7/18/2014

0 Comments

 
Picture
Picture
A chance meeting with a woman at the park a couple weeks ago led to finding out about a mommy and me belly dancing class called Giggles and Wiggles.  I was instantly intrigued by the idea and asked that she keep in touch about it.  Two weeks later we went to our first session at the park down the street from us.  It is in the late morning and ends right before nap time so Goen can run out some energy.

The instructor, her name is Tatanya, brought all the classic belly dancing accessories.  There were coin sashes that sounded like so many tiny bells whenever they shook.  She also had bindhi stickers (for the third eye), shell bead necklaces, and veils.  Goen refused to wear any of the necklaces, but he had a great time picking them up, dropping them on the ground, and putting them in his mouth.  He wore a coin sash and a bindhi on his forehead, though.  He is quite a sight to behold in his blue-striped onesie, multi-colored striped legwarmers, and orange coin sash.  The purple beads really set off the whole ensemble.

Picture
Instruction on classic belly dancing moves was interspersed with fun exercises and kid-friendly games related to belly dancing.  Goen got excited when the veils came out.  The wind was blowing, so they were particularly billowy.  All the kids ran around and under the veils for a while and then we learned the proper way to hold one so that it will do your bidding (the "scissor hold" is what Tatanya called it).  The setting and the activities were all to my liking.  Warm weather, cool grass under our feet, and an outing that mama and baby can both enjoy.  I am looking forward to next week and all the things we will learn in belly dancing class!

0 Comments

Making Up An Address Book

7/15/2014

0 Comments

 
Picture
I came upon an idea in a book recently that described how to make a booklet out of envelopes and tape.  I loved the idea so much that I thought and thought about a way to use it, and I finally decided what to make: an address book.  I know what you're thinking: "But address books are a thing of the past."  And in that you may be right.  But, as much as I love this digital age, there are some things that I prefer to touch and hold in my hands.  Besides, this is no ordinary address book.  Instead of just holding information to be copied down, it holds already-completed address labels and stamps.  It could also hold some extra envelopes as long as they are the correct dimensions.  But enough of that.  Here is what I did to create my beautifully artistic address book.

Address Book Tutorial:
Picture
Begin by making the envelopes.  I used a template that makes envelopes with the dimensions 5 3/4" x 4 3/8" but other dimensions are possible.  trace the template shape onto the back side of a sheet of paper (the slightly thicker kind, but not cardstock) and cut it out.  Make as many of these as you need (my book has twenty).  Decide how you want to arrange your envelopes.  The flaps and backs can face each other or all the flaps can face the same direction.  For the sake of simplicity, I will now refer to each envelope as a page.  Lay two pages  beside each other so the top and bottom edges are even.  Use a decorative tape, such as washi tape or other durable tape, to connect the pages.  The tape should be half on the first page and half on the second page.  Tape from top to bottom, making sure that the tape is not laying at an angle.

Picture
Flip the second page so it is laying on top of the first page.  Lay a third page next to these and align the edges.  Tape as before.  Continue adding pages.  As the stack of taped pages gets taller, you may need to boost up each new page to get it at the right level to tape.  Thin books work well for this.  Add pages until you reach the number you want.  If all you want is a simple address book, you can stop here.  But, as is my wont, I will take this project to the next level by making a custom fabric cover.  Read on to find out how to make one.

Picture
Cut out two pieces of cardstock to the same dimensions as your enveleopes.  Tape them to either end of your stack of pages in the same way as you attached the envelopes together.  If you are using a textured paper, make sure that the texture faces the envelopes (that is, the texture should be face down when the book is closed).  These will be inserted into pockets to hold the pages inside the cover.

Picture
Admire your handiwork once more and then pull out paper, pencil, and ruler.  If you are not mathematically inclined, you may also want a calculator, but the calculations are mostly pretty simple fraction addition.

Picture
To figure out the dimensions of the cover, measure and write down the dimensions of your pages and the thickness of the book (if your envelopes tend to fluff up, squeeze them together a little bit to measure their thickness).

Draw a horizontal rectangle on your piece of paper (accuracy is not important here).  The right and left lines represent the height of the book cover and the top and bottom lines represent the distance from the left edge to the right edge of the book when it is opened flat (including the spine).

Take your height measurement and add 1" for top and bottom seam allowances (this means you will sew with 1/2" seam allowance) and some wiggle room (between 1/4" and 1/2" is best).  Write the resulting number on the right or left side of your rectangle.  Now take your width measurement and thickness measurement and add them together.  Add 1" for the side seam allowances (again, sew with 1/2" seam allowance) and more wiggle room.  Write this number to the top or bottom of your diagram.  This is for the main cover.

For the endpaper pockets, create a second diagram by sketching a vertical rectangle.  The height will be the same as for the cover, so just copy that number over to the left or right side of the rectangle.  Now, take your width measurement again, cut it in half (give or take), add 1" for a hem on one side and 1/2" for a seam allowance on the other side.  Write this number at the top or bottom of the diagram. 

Once you have all your notes and diagrams in order, it is time to get to cutting your fabric.  Cut out two of the cover pieces and two of the pocket pieces.


Picture
To hem the pockets, take one of the pieces and fold over 1/2" on one of the long sides and press (make sure you are folding towards the wrong side).  Fold it over another 1/2" and press.  Pin if necessary and stitch from top to bottom.

Picture
If you want a more substantial feel to the cover, add medium or heavy weight interfacing.  I cut two smaller pieces for mine, but you could cut one continuous piece if you want to reinforce the spine as well.  The dimensions should be about the same as those for the envelope pages.  After stitching the cover, you may need to trim the interfacing if you didn't add enough wiggle room.

Picture
Now to assemble the cover.  Lay the inside cover (that is, the piece of fabric that will be visible on the inside of the book) face up on your work surface.  Place one pocket right side up so that the raw edge on the long side meets up with the raw edge on the left side of the cover piece.  Place the other pocket in the same way on the right side of the cover.  Then, lay the outside cover piece face down so that its edges match up with the inside cover.  Pin all around and sew.  Leave an opening on one of the short sides large enough to slip in the interfacing.  Clip the corners and turn right side out.  If, when you turn it, the pockets come out on the wrong side, just turn them to the other side (the process is similar to that when turning the cover right side out).  Push out the corners with whatever tool you have handy.  Iron everything down smoothly, making sure to fold the seam allowances under at the opening.

Picture
Flex the interfacing pieces and slide them into the cover one at a time.  One will be pushed all the way over to the far side and the other will need to be eased into position on the side with the opening.  The latter will be more difficult since you have to get the interfacing under the seam allowance in order to get it flush with the edge of the cover.  I decided to add a closure to my book using cord elastic and a button.  The length of the elastic depends on how wide the book is, but make sure to add an inch for the seam allowances.  Before stitching the opening closed, place the elastic at the center of the open side and pin (I know.  Cord elastic is hard to pin, but do your best).  Hand stitch the opening closed with a ladder stitch, pausing briefly at the elastic to make several stitches through fabric and elastic.  Sew a button to the front cover for the elastic to loop around.  Make sure to sew from inside the pocket, not through it.

Picture
To make sure the interfacing stays in place, stitch through it at the edge closest to the spine.  If you used iron-on interfacing, you can skip this step.  Unless, of course, you doubt the integrity of the glue.  In which case, stitch away.

Picture
Embellish the front cover however you wish.  I stamped cotton twill tape with fabric ink to stitch onto the cover and then added a running stitch with thick cotton thread.  I also did extra lines of stitching on the spine to add some texture.

Picture
Open the cover and carefully insert the endpapers one at a time.  You may need to open the cover all the way so the front and back meet in order to get them at the right angle.

Picture
The last step is most important of all.  Take a picture of your wonderful creation, upload it to the internet, and link to it in the comments for all to see.

0 Comments

Wedding Week: The Event

7/12/2014

0 Comments

 
Picture
Whew!  It's been a full week of posts.  But here is the cherry on the sundae.
My sister planned for over two years how she wanted her wedding to be.  And her planning showed in the details.  Here is a photo tour of the wedding ceremony and the reception that followed later in the day.
The Ceremony
Picture
Family and friends arrive at the Ventura pier in Southern California, the wedding will take place on the shore beneath the pier.  Ventura is about 15 minutes from the town where my siblings and I grew up, so it is a special place.

Before the ceremony, we wait for the groom and everyone else to get in place.  I take the opportunity to get a few pictures.  Here is my dad and Kristin as they wait to walk down the beach.

Picture
My brother Dalton acts as ring bearer.  I snap this picture without him knowing it.  He looks so contemplative, looking off into the distance.  The rings are tied to a handmade burlap and lace pillow with twine.  Along with each ring is a dog tag stamped with "Beauty" for her and "Beast" for him.

Picture
My sister admires her bouquet one last time as she gets the go ahead from down the beach.  Everything is ready!

Picture
With a big grin on her face, Kristin walks onto the sand and towards her sweetheart.  A proud dad by her side, they walk arm in arm.

Picture
My sister MariJane is the flower girl.  But, instead of flower petals, she is scattering little pebbles at the feet of the procession.  Then the bridesmaids (except for me since I ran ahead to get the picture) all in red.  It is a slow walk because of the sand, but then I suppose it is supposed to be a slow walk anyway.  Inch by inch, we get closer to the chosen spot.  As per tradition, Zachary still has not seen her dress.  It is an exciting moment!

Picture
And then he sees her and she sees him.  It is a touching moment.  Everyone has a smile on their face, and a few have joyful tears.  The ocean beats on the sand and the wind blows in our ears so it is hard to hear.  My brother-in-law Steve  (in the center) begins the ceremony.  When he gets to the vows, Kristin goes first.  She sings a song she wrote herself.  Zachary speaks eloquently of his love for my sister.  More tears, and I can't stop my own.  After some wonderful words read by the best man and my sister Averie, it is all over.  But it has only just begun.

Picture
We take many pictures of the wedding party.  Here is one of almost all of my immediate family (my brother and his wife were unable to attend) plus one aunt.

Picture
And here is just the sisters: Me, Annie, Kristin, and Averie.  The pier supports created a wonderful neutral backdrop for all the pictures.  It was a lovely wedding, but the celebration is only just beginning.

Taking Photos After the Ceremony

We spend quite a while taking pictures after the wedding.  My sister has a nasty sunburn to show for it.  But we get some pretty shots for them to remember this special day.
The Reception
The wedding is over by 11:30, but the reception doesn't start until 5:00.  It's a good thing, though, because there is still a lot to do to prepare.  We manage to finish almost everything before guests start arriving.
Picture
Kristin put together this table.  On the left is a box for cards tied with red and black tulle.  On the right is a shadow box frame with a slot cut in the top.  Instead of a gift registry, the couple requested donations for their future home purchase.  The stickers on the front spell "home fund" and inside is a little painted wood house and their engagement picture.  Right in front of the home fund is a copy of the Dr. Seuss book Oh, the Places You'll Go, which they used as a guest book.  Guests were asked to sign wherever they liked.

Picture
Here is another of Kristin's brilliant ideas.  Messages in a bottle.  Every table has a bottle on it and slips of paper and pens.  Each bottle bears a label for a significant anniversary, starting with the honeymoon and going to 50 years.  Everyone writes advice, suggestions, quotes, or other fun stuff and puts them in the bottles.  The bottles will stay sealed until the anniversary listed on the label.  It was lots of fun to come up with things to write for each bottle.

The bottles are reused sparkling juice bottles with a chalkboard label, some ribbon, and stickers.  They are also filled halfway with sand.

Picture
After everyone has a chance to digest their food, we bring out the cake.  Kristin and Zachary cut the first piece together.  If you missed it, check out the cake post to see how we made the cake.  It was delicious!

Picture
After they feed one another a bite of the cake, Zachary puts a dab on Kristin's nose.  She tries to do the same to him, but he is so tall that she can't reach when he backs away from it.

Picture
While the guests finish their cake, the father/daughter and mother/son dance begins.  It is a slow dance and both couples have a good time dancing and chatting with their respective parent.

Picture
My sister has a smaller (and less special) bouquet for throwing.  Dalton catches it, but when my brother Jerem tells him the significance of catching the bouquet, Dalton gets a funny look on his face and drops the flowers on the ground.

Picture
Kristin wore her garter under her pants (she didn't want to wear her dress at the reception; they wanted it to be less formal), so Zachary has a hard time getting it off.  As per tradition, he uses his teeth.

Picture
Zachary throws the garter to the small crowd of guests and MariJane catches it.  Of course, she doesn't know the story behind it either, but she is a bit young anyway.  My brother Jerem in the center wearing a shirt I designed and painted many years ago.

And then the dancing begins.  Most of the guests had left, so it is just my family.  It is lots of fun spinning and bouncing along with the music with all of them.  I know, my sister Averie is in every picture of the dancing, but she has so much exuberance that it's hard not to photograph her moves.
Picture
After all the guests leave and everyone else is inside cleaning up, Kristin quietly comes to get me.  She asks if I will take some pictures as she and Zachary have one last dance alone in the fading light.  (I didn't want to use a flash and end up with flat pictures, so they are a little fuzzy, but in a pleasingly artistic way.)  And then they leave for their honeymoon and their new life as a married couple.

Oh, the places they'll go!


Thanks for joining me for Wedding Week.  It was a fun way to continue the celebrations.  I hope you enjoyed the tour.  If you use any of the ideas or tutorials from this week, please leave a comment with a link to some pictures.  I always like to see how other people use ideas in their own way.  

0 Comments

Wedding Week: The Dress

7/11/2014

0 Comments

 
Picture
Here is the final Wedding Week installment before the event photo tour.  This post is all about the dress my sister wore for her wedding.  But, of course, it is no ordinary dress...
Kristin's wedding dress was made by our mom.  Unfortunately, I don't have any pictures of its construction since I was not awake when most of the sewing was done (she was up a lot of late nights right up until the day before the wedding!).  However, my sister hired a great wedding photographer (me) and had a wonderful assistant wedding planner (our sister Annie) helping design photo ops.  So, I have many pictures of the finished dress.  Plus, I will let you know about the little details that made it such a gorgeous wedding dress.

The pattern is Simplicity 3878, but with a few minor alterations, which I will detail below.
Picture
The waistband was done in black satin.  The wrinkled effect looks divine when worn.  The bust has a layer of tulle added to it (not called for in the pattern).  Since she used black tulle over white fabric rather than matching colors, it looks much better with the tulle over the bust as well as the skirt.

Picture
Another detail that was added are the little red flowers cascading down one side of the dress.  They start just below the waistband on the left side of the dress and continue all the way to the bottom.  They are attached with a dab of hot glue on each one.  The tulle over the skirt is a double layer, rather than the single layer called for in the pattern, which provides a more substantial look.

Picture
This picture shows how the flowers are placed on the tulle.  There is enough distance between each flower that they are still spaced appropriately when the skirt folds and flutters.  You can just imagine they are dropping from a tree and spinning gracefully to the ground.  It is a beautiful effect. 

Picture
Here is another view of the bust.  The tulle continues up over the edge to create a small ruffle.  There is also a flouncy underskirt to be worn under the dress to give it a fuller look and add some bounce.

Picture
Along with the dress, she wore these shoes.  They are Soda wedge espadrilles in red canvas.  I imagine they were a little difficult to walk in on the beach, but easier than regular high heels.

Picture
The shoes went perfectly with the tiny red flowers on the side of the dress.  And, if you notice in the header picture on the opening post to Wedding Week, the red theme is continued in the veil.

Picture
Here is the whole ensemble.  I always thought it was difficult to recreate professional-looking photographs, but all it really takes is a sheer curtain, some morning light, and a camera with a decent lens.  Oh, and no flash.  Nothing ruins a picture faster than a flash (unless you have a really high end one).  But I'm getting off topic.  The setup is perfect for scrapbooking or for a collage frame of a wedding.  Everything appears as if the bride is just about to get dressed and ready to meet the groom.  I can't help but sigh. 


I've enjoyed showing you all the loveliest pieces of my sister's wedding.  The dress is the final post before the event photo tour.  Check out tomorrow's post to see the dress in action.
0 Comments

Wedding Week: The Bouquet

7/10/2014

0 Comments

 
Picture
This installment of the Wedding Week posts is quite special.  Kristin will tell, in her own words, how she made her beautiful bouquet.  So, without further delay, here is a guest post from the bride.

When my husband first proposed to me three years ago, I began, like so many brides, to flip through dozens of bridal magazines searching for ideas on ways to make our wedding unique.  Yes, I will admit, I wanted people to look at my wedding and envy me just a bit.  So I went on the hunt and got in the wedding zone to find ways to do just that.
Picture
It began with a simple idea.  Vintage. We decided early on that our wedding theme would be vintage, aged, and classic.  So when I found this image in a bridal magazine (I think it was Bridal Guide), it felt like lightning struck me.  I couldn't stop staring at it.  I instantly ripped the page out of the magazine and set it aside to review later.  But even as I continued flipping through pages and pages of centerpieces and dresses, I kept sneaking glances at this bouquet.  A few glances later, I knew I had found the inspiration for my own bouquet.

Before diving in to how I managed to duplicate this (with my own twist, of course), I have to warn you, this took hours of detailed, carefully planned work by me and Annie.  The result is incredible--no one could say I had an average bouquet--it was extraordinary.

Wedding Bouquet Tutorial:

Supplies:
styrofoam ball - approximately 5" diameter
wooden dowel - 1 inch diameter
string of fake pearls
fabric
paper flowers (handmade or purchased) 
ribbon
burlap ribbon
baubles

letter tiles
wire and wire cutters
hot glue gun and glue sticks


Picture
To start, I picked out a ball of styrofoam from Michael's, quite a bit smaller than the size my bouquet turned out.  You have to keep in mind you will be inserting wires with flowers on them that will stick up quite a bit, so you don't want to get too big of a ball.  Once you have your ball, cut a flat surface on one end to make the bottom.  The flat surface will allow you to place a handle later on and help keep it in one spot while you are placing flowers.  Trust me, it will make your life easier.  To keep it steady, I used a plastic container with a wide base to set it on.


Picture
Cover the styrofoam ball to make sure you can't see it in the finished product.  Any sort of loosely woven fabric would work for this.

As Carley mentioned, we got married on the beach, so we intertwined the beach theme subtly throughout the wedding.  For my bouquet, we used brown and black burlap, twine, pearls, and seashells to tie in the ocean theme. 
We covered my styrofoam ball in brown burlap and used hot glue and pins to attach it to the ball as shown in the picture.  Once the ball is covered, you can start planning out where to place the flowers.


Picture
Your bouquet base is now ready to be decorated.  Make or purchase your flowers out of your chosen materials (my paper flowers are from etsy).  Throw in some synthetic flowers for a little more realism and add some interest by including some sparkly pieces.  I recommend using several flowers made out of each material and placing them a fairly even distance apart to attain a certain level of symmetry and balance. 

I relied on my inspiration bouquet picture when deciding what materials to use to make the flowers.  I could see paper, fabric, beads, yarn, and ribbon flowers.  I decided to make my flowers primarily out of paper, fabric, ribbon, and burlap.  As I folded, twisted, and swirled flower after flower, I began to plan where I would place them.  I attached each flower to wire with hot glue, leaving a tail of about 2-3 inches at the base to stick in the styrofoam.  We did not use a pattern for the fabric flowers, just folded and twisted the fabric until it started to resemble a flower shape.

Once you have wires attached to your flowers and are ready to start placing,  pay attention to the colors you are using.  For example, you don't want to place too many white flowers together.  Break up the white with a red and black flower in between.  This will create balance and be more aesthetically pleasing. 

Picture
Once you have placed your flowers and are sure they are where you want them, use hot glue on the end of each wire and replace it in its spot quickly before the glue dries.  By gluing the stems in this way, you ensure your flowers won't fall off when you're walking down the aisle!

In addition to flowers, I chose to include several vintage-looking broaches, an antique key, seashells, pearl beads, and tufts of black tulle to fill in gaps and create a well-rounded, vintage look.  Most of these were purchased from Michael's.

Picture
Keep adding flowers and baubles, interspersing plenty of solid colors between flashier pieces.

Picture
Add flowers and baubles until you have filled fully half of the styrofoam ball.

Picture
The last couple steps are all about finishing the base of the bouquet and hiding the ball and hand hold.

Cut a piece of dowel the length you want so it is comfortable to hold plus an inch.  Wrap the dowel in a coordinating fabric or ribbon so you can't see the wood (leave one inch bare).  Drill a hole in the flat base of the ball that is the width of your dowel.  Put hot glue on the bare end of the dowel and stick it in the hole. 

You can leave the handle as is or decorate it.  I wrapped and hot glued ribbon around the dowel and topped it with pearl beads for a clean and sturdy hand hold.

Picture
To finish the base of the bouquet, I gathered brown burlap and used pins to attach it to the base of the bouquet (see the picture above for a view of this).  I used hot glue on each pin before sticking them in to ensure they would stay in place, and this worked perfectly.  A layer of black burlap ribbon above the brown burlap helped to ground the bouquet and provide a nice background for the flowers.

Picture
Add a special word or phrase using letter tiles and you are done.  You and your bouquet are now ready to walk down the aisle.


You can see through the progression of photos how it slowly went from a burlap-wrapped ball of styrofoam to a beautiful, seamless bouquet!  But as is often the case in DIY projects, I made it up as I went along, using whatever tools I had handy at the time.  Above all, if you attempt this bouquet, make it fun and make it your own!
Thanks for joining me and the bride on this bouquet tutorial.  I hope to see you tomorrow for the dress post (you got a tiny peek in the two bouquet pictures above).  And you won't want to miss the culmination of all this work on Saturday when I take you on a photo tour of the event.
0 Comments
<<Previous
    Picture


    Carley Biblin

    Hi.  My name is Carley.  I love to sew, craft, and create. As a Jane-of all-crafts so to speak, I enjoy sewing, writing, cooking, drawing, photographing.  But the constant thread (if you'll excuse the pun) throughout my weeks is needle arts. 
    I hope you'll join me in
    Making It Up As I Sew Along.
    Learn More...

    My Etsy Shop

      If you'd like to sign up to receive my newsletter, type your email address in the box below and get news, tips, and other neat stuff delivered to your inbox.

    Submit
    Instagram

    Archives

    January 2017
    December 2016
    November 2016
    October 2016
    September 2016
    August 2016
    July 2016
    June 2016
    May 2016
    April 2016
    March 2016
    February 2016
    January 2016
    December 2015
    November 2015
    October 2015
    September 2015
    August 2015
    July 2015
    June 2015
    May 2015
    April 2015
    March 2015
    February 2015
    January 2015
    December 2014
    November 2014
    October 2014
    September 2014
    August 2014
    July 2014
    June 2014
    May 2014

    Categories

    All
    Arts & Crafting
    Books & Music
    Celebrations
    Embroidery
    Family Photos
    Fixing
    Guest Posting
    Inspiration
    Kids & Family
    My Week
    Parenting
    Photo Tour
    Present Moment
    Recap And Goals
    Recipes & Food
    Reviews
    Sewing
    Shop Update
    Swaps
    Tips And Techniques
    Travel
    Tutorials

Powered by Create your own unique website with customizable templates.