Making It Up as I Sew Along
  • Blog
  • About
  • Gallery
  • Shop

Holiday Cooking - Part II

12/31/2014

2 Comments

 
Picture
Picture

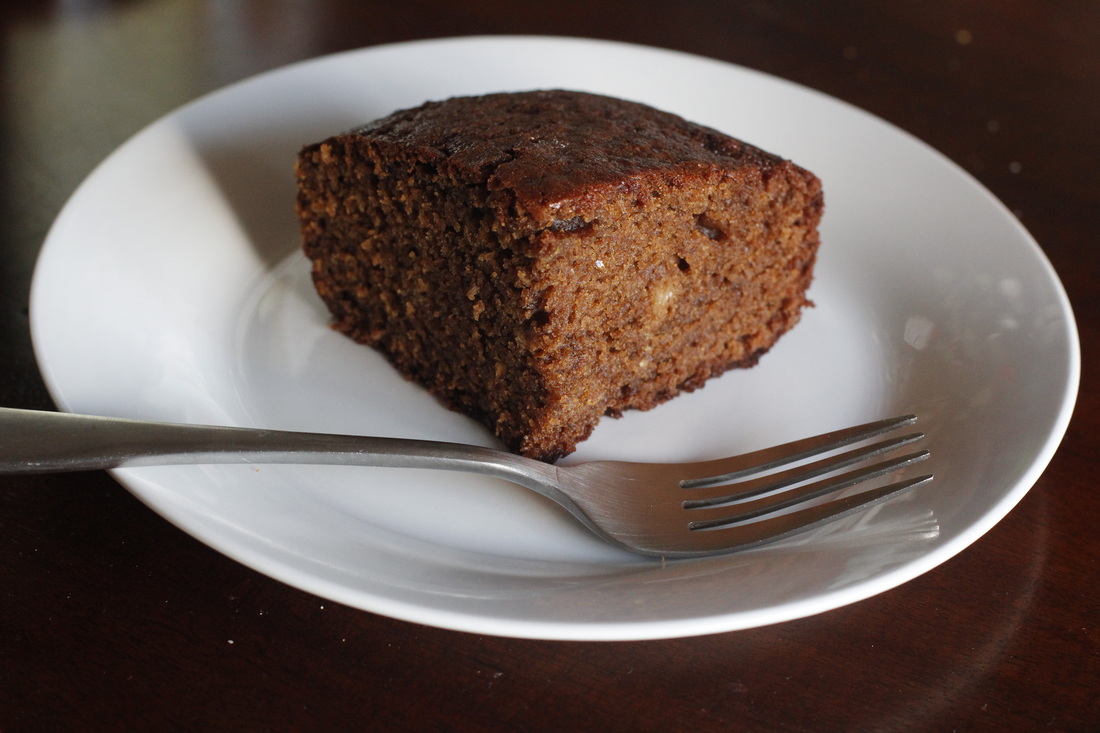
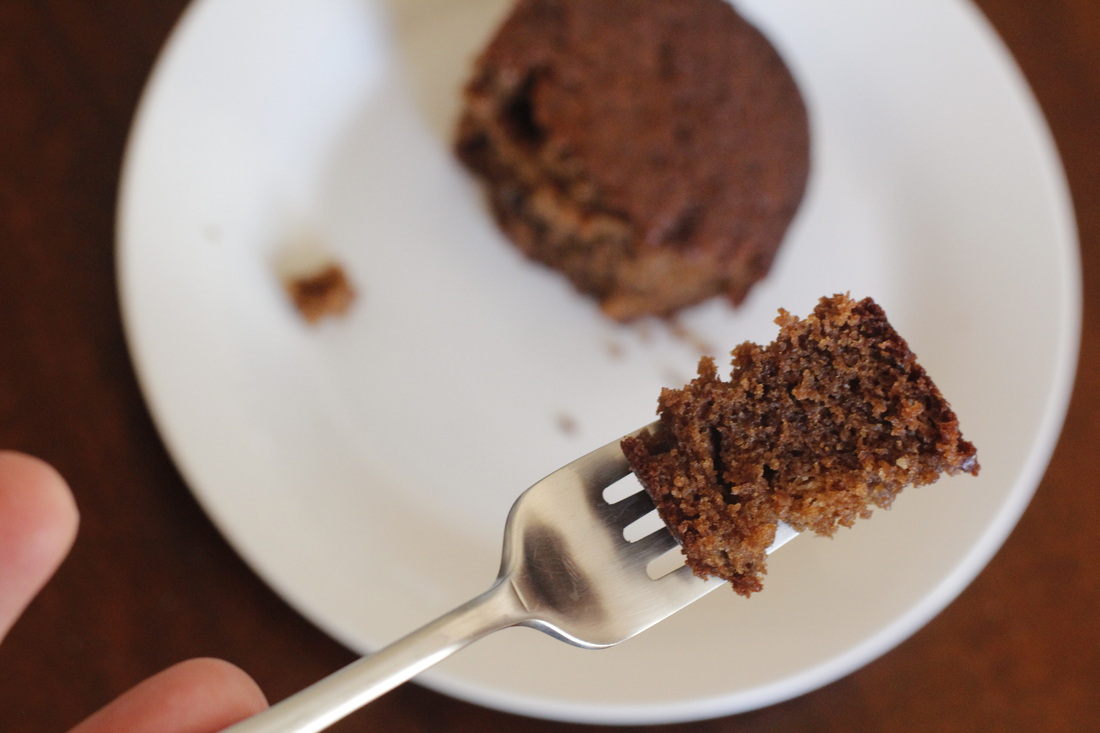
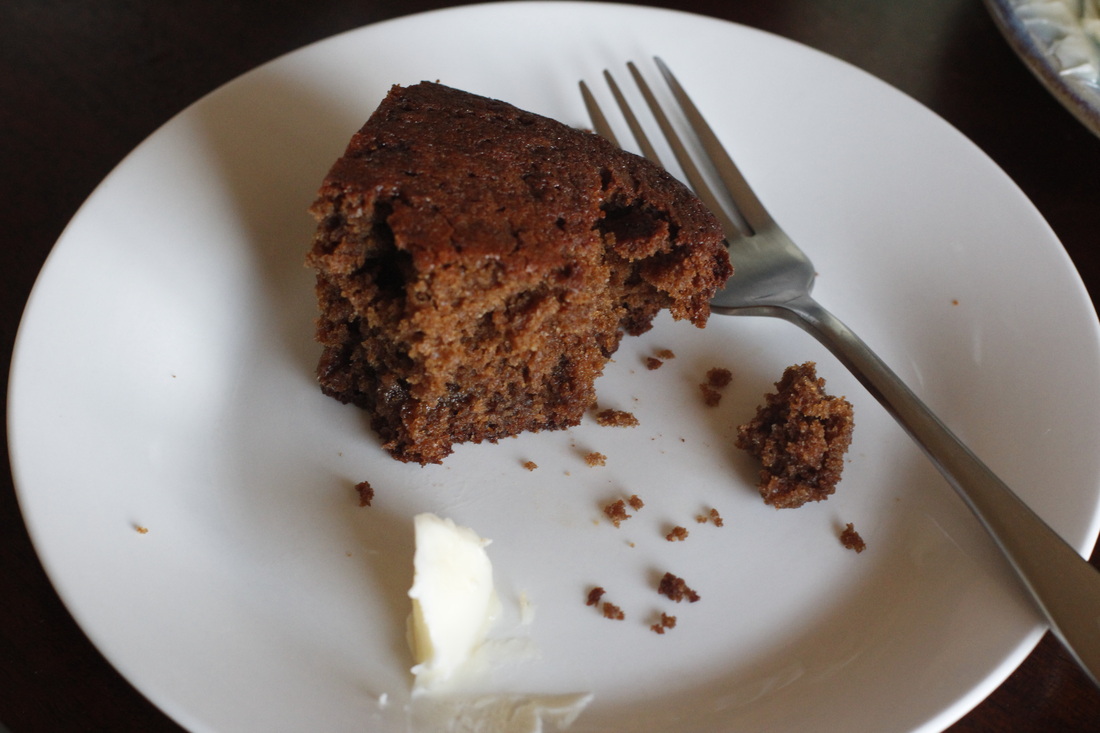
To combat my lack of Christmas cheer and melancholy about being far away from my family during the holidays, I made some traditional gingerbread on Christmas Eve.  My hope was that the delicious smells would permeate my house and lighten my mood.  I chose this recipe because it used fresh ginger and freshly-grated nutmeg.  I didn't have quite enough ginger (it calls for 2/3 cup!).  The amount I put in was closer to 1/2 cup, and I could tell that the typical ginger kick was lacking.  Even so, it tasted good, especially with the addition of a little more butter on the side (because the 2 1/4 sticks in the recipe just wasn't enough, hehehe).  Vanilla ice cream would have been the perfect accompaniment, though.  The gingerbread smelled so good when it came out of the oven that we just couldn't wait for dessert to eat it.  We cut a piece right then and there.  And then we cut another...and another.
  I just couldn't get enough.  In fact, I made another, gluten-free version of gingerbread the next day (scroll down to see the recipe).

Picture

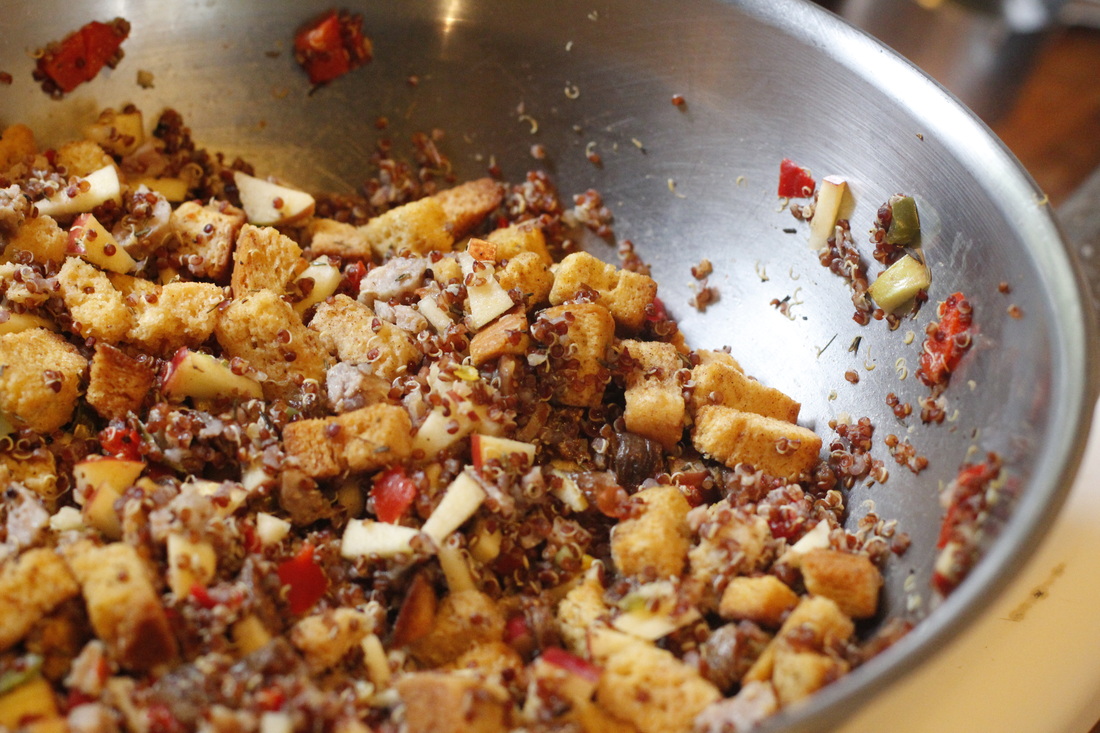
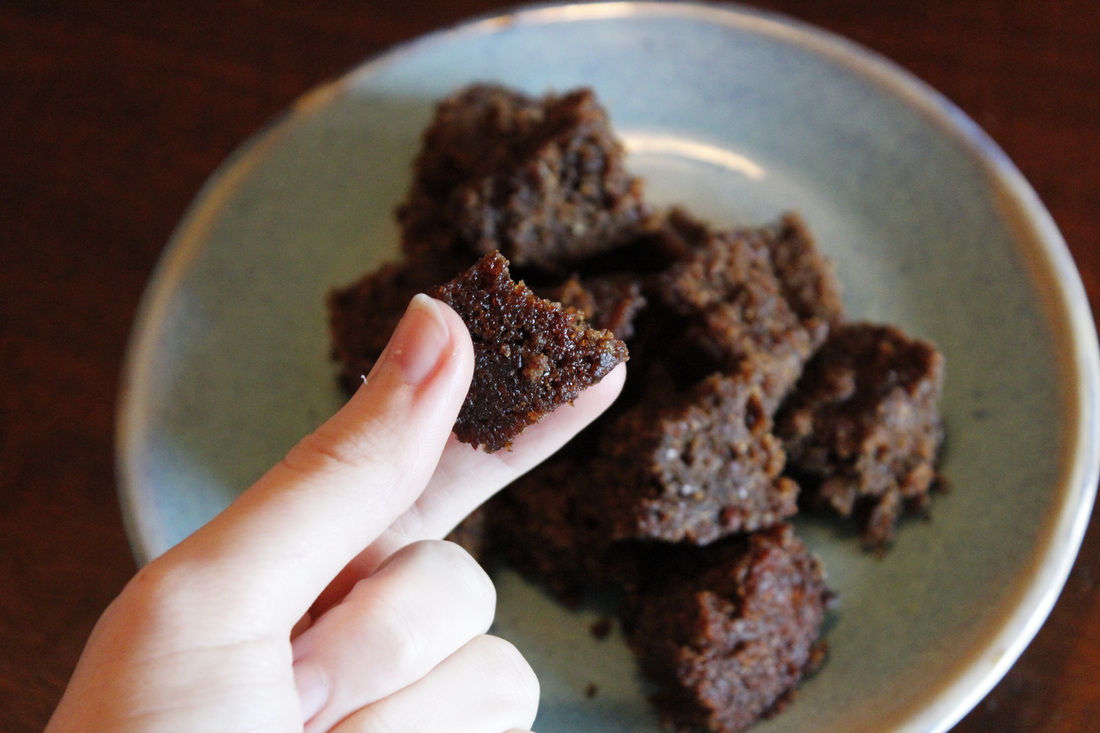
On Christmas Day we were scheduled to have dinner with relatives in the area.  Since one of them can't have gluten, I decided to try my hand at making a bread everyone could eat.  I don't care for the starchy flours used in most gluten-free breads, and the texture of baked almond flour reminds me of coconut (which I love), so I tried adapting an almond flour-based bread recipe into a gingerbread.  One of the cookbooks on my shelf is
Cooking with Trader Joe's, which includes just such a recipe.  My version is a mashup of the cookbook recipe with the flavorings of the gingerbread recipe I found online.  This time I made sure to have plenty of ginger on hand to make the kick really stand out.  I actually like it better than the wheat flour bread.  Even if your diet doesn't require going gluten free, I totally recommend giving this recipe a try.  It's super moist and flavorful.

Picture
Picture
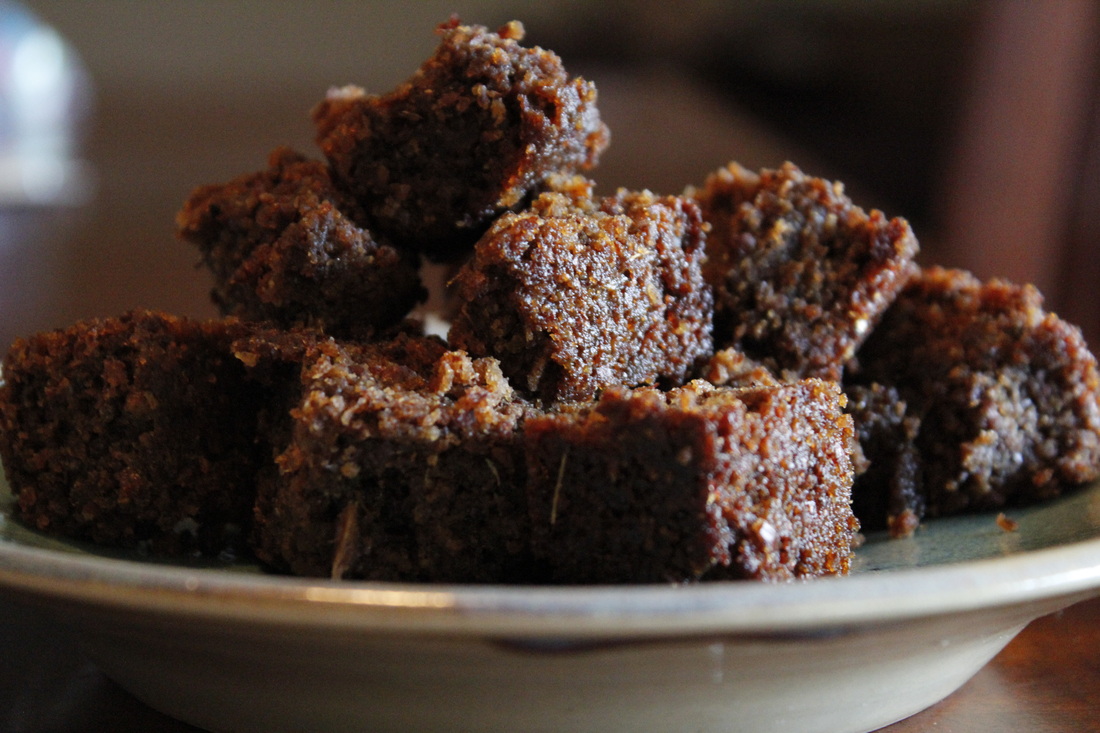
Gluten-Free Gingerbread Recipe:

Adapted from the Almond Bread recipe in the Cooking with Trader Joe's cookbook.

Ingredients:
DRY
 - 16 ounces almond flour (about 4 1/2 cups)
 - 1/2 cup sugar
 - 1 teaspoon salt
 - 1 teaspoon baking soda
- 1 tablespoon baking powder
 - 1/3 cup minced fresh ginger (or more to taste)
 - 1 teaspoon ground cinnamon
 - 1/2 teaspoon freshly grated nutmeg
 - 1/4 teaspoon ground cloves (I replaced this with more nutmeg)
 WET
 - 5 large eggs
 - 1/2 cup molasses
 - 1/2 cup whole milk

Instructions:
 - Preheat your oven to 325 degrees.
 - In a large bowl, combine all the dry ingredients.
 - In a medium bowl, whisk together the wet ingredients.
 - Pour the wet mixture into the dry and mix thoroughly.
 - Grease an 8x8 baking pan (I prefer glass) and pour the batter into it.
 - Immediately place the pan into the oven on the center rack.
 - Bake until a toothpick or fork inserted into the center comes out clean, about 30-40 minutes.

Picture

Have you ever experimented with combining recipes to get something new or different?  I know I have, with varying success.  But part of the fun is testing out how ingredients go together and what happens when you change something.  And who knows, maybe you'll come up with something your family loves.

Picture
Picture
Picture
2 Comments

Getting Stuffed: Making Faces

12/30/2014

4 Comments

 
Phew!  After weeks (though it feels like months) of working on the fur for my ram, it was time to take a break and work on the face.  For some reason, stitching on facial features makes a project seem more finished than anything else.  And I need so badly to feel that progress.  In anticipation of this next step, I purchased a pair of doll needles.  Those things are loooong!  When I took one out, I felt like Dr. Frankenstein about to hodge podge a creature together out of bits and pieces.  The needles made sewing the nose and eyes so much easier, especially since I stitched the eyes on after sewing and stuffing my ram.

The nose and mouth are the same as on the ram in the pattern.  I was able to securely knot the floss at the top of the head since it will be covered by fluffy yarn fur.  For the eyes, I made three different versions in an attempt to find the perfect fit (Dr. Frankenstein, indeed!).  I'll show you all three in a trilogy of tutorials below.
  This will be the last tutorial before the big reveal of my stuffed ram.  Can you feel my excitement?  Eep!

Picture
Picture
Felt 2-D Eye Tutorial:

Materials:
 - Felt scrap in your choice of color (2" square should be more than enough)
 - Circle templates (your choice of sizes, one for the eye and one for the pupil)
 - Ink (e.g. pen, marker, stamp pad)
 - Black embroidery floss
 - White embroidery floss (optional)
 - Embroidery needle
 - Black thread
 - Doll needle

Instructions:

Picture
Gather your tools and materials.  If you are using a pattern, reference the materials list for the recommended eye size.  Find or make a circle template of the recommended size, then find or make a second, smaller circle template for the pupils.  I used leather punches for my circle templates and a fabric stamp pad for my ink.

Picture
Use your larger circle template and ink to make two circles side by side on the felt.  Use your smaller circle template and ink to make a circle inside each of the larger circles for the pupils.  You can change the character of your stuffed animal's face by putting the pupils off center.  The stamped side will be the back of the eye, so don't worry about the ink showing.

Picture
Cut a length of black embroidery floss and remove three strands.  Thread the remaining three strands onto a needle.  Working from the back of the felt (the inked side), backstitch all around the pupil circle.  Don't worry about making the front look nice since it will be covered up by the next step.  Repeat for the second eye.

Picture
Cut the eyes out following the larger circle as a guide.  Since the ink will be on the back, you can cut on the outside of the line to make the eye larger.  Don't cut too close to the embroidery stitches.

Picture
Turn the felt piece over.  Working from the front, sew a sating stitch so that it covers all of the backstitching.  When deciding on the orientation of the satin stitch (right to left, top to bottom, or diagonal), consider how the eyes will be placed on the face.  The eyes will look best if the direction of stitches is symmetrical once they are attached to the face.  Tie off the floss at the back of the felt.  Repeat for the second eye.

Picture
Place the eyes on either side of the head and pin in place.  Make sure you like how the placement affects the character of the face.  Check that the eyes are symmetrical when seen from the front, top, bottom, and all around.  Thread a length of black thread onto the doll needle and knot the end.  Bring the needle up through one of the eyes right at the edge of the pupil (so the stitching is hidden) and pull the thread through.  The knot should be hidden between the face and the back of the eye.  Sew the eyes on at the same time by going down through one eye and up through the opposite eye, keeping the stitches close to the edge of the pupils.  Once the eyes are sewn on, make one last tacking stitch and then cut the thread where it comes out of the fabric.

Picture
You can add more interest and dimension with a reflective dot on the pupil.  Thread a short length of white embroidery floss onto your needle and knot the end.  I used all six strands to make it bolder.  Use a white-tipped pin placed against the pupil to determine where you would like the dot to be.  Bring the needle up at this point and pull the thread through.  Make a french knot and bring the needle down right next to where it came up.  Make a tacking stitch in the felt at the back of the eye and cut the floss.

Felt Puffy Eye Tutorial:

Note: This method works better for larger eyes (e.g. 1/2" or more).

Materials:
 - Felt scrap in your choice of color (2" square should be more than enough)
 - Circle templates (your choice of sizes, one for the eye and one for the pupil)
 - Ink (e.g. pen, marker, stamp pad)
 - Black embroidery floss
 - White embroidery floss (optional)
 - Embroidery needle
 - Black thread
 - Stuffing

Instructions:
Picture
Follow the instructions for the 2-D Eye until you get to the point of attaching the eye.  Begin sewing on the eyes in the same way.  When the eyes are three quarters of the way attached, stuff the eye with a very small bit of stuffing or leftover yarn.  It doesn't take much.  The end of a small crochet hook works well for stuffing.  Finish attaching the eye and cut the thread.

Felt Ball Eye Tutorial:

Materials:
 - wool felt ball (one ball makes one pair of eyes)
 - Craft knife/blade and cutting surface
 - Black embroidery floss
 - White embroidery floss (optional)
 - Embroidery needle
 - Black thread

Instructions:


Stamp circles.

Knot a strand of embroidery floss.  I used three strands.  Bring the needle up through the center back of the eye (the flat part is the back).  The needle should come up on the circle line from the previous step.  Backstitch all around the circle and then continue with the same strand to satin stitch over the backstitch, making sure to cover both the stitching and ink lines.
Picture
Gather your tools and materials.  If you are using a pattern, reference the materials list for the recommended eye size.  Some independent crafting stores sell wool felt balls in many different colors.  Find a ball the size you want.  Use a sharp blade to cut the felt ball in half.  Press the pointed tip of the blade into the center of the ball to start and then saw through some of the fibers.  Remove the blade, turn the ball, and repeat the cutting motions until the ball is cut in two pieces.  Trim any stray fibers with a pair of scissors.

Picture
Use a circle template and ink to mark where the pupils will be.  I used a leather punch (ideal for the rounded surface) and stamp pad.  Play around with placement since this can affect the resulting character of your animal's face.

Picture
Cut a length of black embroidery floss and remove three strands.  Thread the remaining three strands onto a needle.  Backstitch all around the pupil circle.  Cover as much of the ink line as possible.  Repeat for the second eye.

Picture
Sew a sating stitch so that it covers all of the backstitching.  When deciding on the orientation of the satin stitch (right to left, top to bottom, or diagonal), consider how the eyes will be placed on the face.  The eyes will look best if the direction of stitches is symmetrical once they are attached to the face.  Tie off the floss at the back of the felt.  Repeat for the second eye.

Picture
You can add more interest and dimension with a reflective dot on the pupil.  Thread a short length of white embroidery floss onto your needle and knot the end.  I used all six strands to make it bolder.  Use a white-tipped pin placed against the pupil to determine where you would like the dot to be.  Bring the needle up at this point and pull the thread through.  Make a french knot and bring the needle down right next to where it came up.  Make a tacking stitch in the felt at the back of the eye and cut the floss.

Picture
If the felt ball half has flattened out during stitching, you can pull it back into shape by making a few stitches on the back from side to side and top to bottom to help pull it back into shape.

And there you have it.  Three different ways to make felt eyes for your critter.  Do have a special method for making stuffed animal eyes?  Any techniques you've discovered?  I'd love to learn something new.  And stay tuned for the big reveal.  My ram is just about done.
4 Comments

Holiday Cooking - Part I

12/27/2014

0 Comments

 
I decided almost at the last minute that I wanted to make a special meal for Christmas Eve dinner.  I sent David to the store to "pick up some delicious meat."  He came home with three pounds of pork loin and I got to work finding a recipe I liked.  I found this Fig-Balsamic Roasted Pork Loin recipe that I had most of the ingredients for.  For the things I didn't have, I just improvised.  The pear became an apple (I left the peel on).  The stuffing mix became croutons and seasoning.  The chicken broth became plain old water.  The fig preserve became rehydrated figs simmered in a balsamic reduction. Plus I added some cooked quinoa for a little texture.  The meal was complete with a side of sliced oranges.  It was delicious.  Come back tomorrow to see what was for dessert!

Picture
Picture
Picture
Picture
0 Comments

The Present Moment

12/26/2014

2 Comments

 
“The present moment is filled with joy and happiness. If you are attentive, you will see it.”
        ― Thích Nhất Hạnh, Peace Is Every Step: The Path of Mindfulness in Everyday Life


A Friday ritual adopted from SouleMama.  A single photo - no words - capturing a moment from the week.  A simple, special, extraordinary moment.  A moment I want to pause, savor and remember.  If you’re inspired to do the same, leave a link to your ‘moment’ in the comments for all to find and see.
Picture
2 Comments

This Eve

12/24/2014

0 Comments

 
Well, everything is in order.  I have my tree, gifts wrapped up in muslin bags, and...oh, yeah, some fresh gingerbread that will be coming out of the oven later today.  Yesterday I wasn't feeling so much of the Christmas cheer that I used to look forward to as a kid.  Then my aunt passed on some great advice to me: "Just do what you love."  There are few things I love more than delicious, homemade food, so what better way to create some cheer in my home than the smells of traditional winter foods cooking in a hot oven.  I found a recipe that calls for lots of fresh ginger, orange zest, and a cup of whole milk.  Yum!  And so, on this eve of Christmas, I am finally getting into the spirit and making my own cheer.  I wish you all the best (and lots of warmth and delicious food) over this holiday season, and all the cheer that can fit into your own oven.  Happy Christmas!
Picture
Picture
Picture
Picture
0 Comments

Call Me Thrifty

12/22/2014

0 Comments

 
December has been a great month for thrifting.  I found a plaid wool skirt in great condition for $20, a duck ornament made from pine needles for $1, a book about mathematics that is very close to falling apart for 50 cents, and a knitting board that I'm thinking could turn into a loom for $5 (that's the half off of half off price).  I like to walk through my favorite thrift store, St. Patrick's, almost every week (toddler permitting) to see what's new, to look at pretty things, and to find out what has been marked down to half off since last time (maybe I should have titled this post "Call Me Cheap." Hehe).  I have to be careful, though, because it's right down the block from the library.  Luckily I have two things in my favor: 1) I'm super che- I mean careful with my money, and 2) we will be moving in a few months and I don't want to have to move a bunch more things.  And before you remind me about my recent post about downsizing, I will mention that I have also taken two large boxes full of stuff to that very same thrift store (it's weird seeing things I recognize there).  Besides, the best thing about thrifting is that I can get such a good deal that I don't mind taking it back when I'm done with it.

Picture
Picture
Picture
Picture
What are you thrifting these days?  Do you have a favorite thrift store on your usual route?  Score any amazing deals?
0 Comments

I Won!

12/20/2014

4 Comments

 
Remember the Wisecraft Handmade book release contest I entered at the end of October?  Well, guess what? I won!  I found out yesterday during Goen's nap.  I was perusing my favorite sites when I noticed this post on the Wisecraft Handmade blog.  As soon as I saw the title "Contest Winner" I got super excited and anxious all at the same time.  I forced myself to only scroll down far enough to read the next line, partly to hold off the excitement and partly because I was afraid I would be disappointed.  When I finally got to the end of the post and saw my name (in lights, it seemed), I almost squealed.  No lie.  I had to put my hand over my mouth just in case one accidentally slipped out.  I was finally able to do my Happy Dance after Goen woke up.  I danced around the room with him singing out loud.  He enjoyed it so much he kept asking for more.  So we spent the next half hour spinning, sashaying, and squealing delightedly around the room until I got dizzy and had to stop.  I emailed my address immediately, of course, and am now eagerly awaiting my prize in the mail.  I'll be sure to show it off as soon as it arrives.  Eep!  I'm so excited!  And, just so you can share in my excitement, here is a little reenactment of my happy dance.
Picture
Picture
Picture
4 Comments

The Present Moment

12/19/2014

4 Comments

 
“The present moment is filled with joy and happiness. If you are attentive, you will see it.”
        ― Thích Nhất Hạnh, Peace Is Every Step: The Path of Mindfulness in Everyday Life


A Friday ritual adopted from SouleMama.  A single photo - no words - capturing a moment from the week.  A simple, special, extraordinary moment.  A moment I want to pause, savor and remember.  If you’re inspired to do the same, leave a link to your ‘moment’ in the comments for all to find and see.
Picture
4 Comments
<<Previous
    Picture


    Carley Biblin

    Hi.  My name is Carley.  I love to sew, craft, and create. As a Jane-of all-crafts so to speak, I enjoy sewing, writing, cooking, drawing, photographing.  But the constant thread (if you'll excuse the pun) throughout my weeks is needle arts. 
    I hope you'll join me in
    Making It Up As I Sew Along.
    Learn More...

    My Etsy Shop

      If you'd like to sign up to receive my newsletter, type your email address in the box below and get news, tips, and other neat stuff delivered to your inbox.

    Submit
    Instagram

    Archives

    January 2017
    December 2016
    November 2016
    October 2016
    September 2016
    August 2016
    July 2016
    June 2016
    May 2016
    April 2016
    March 2016
    February 2016
    January 2016
    December 2015
    November 2015
    October 2015
    September 2015
    August 2015
    July 2015
    June 2015
    May 2015
    April 2015
    March 2015
    February 2015
    January 2015
    December 2014
    November 2014
    October 2014
    September 2014
    August 2014
    July 2014
    June 2014
    May 2014

    Categories

    All
    Arts & Crafting
    Books & Music
    Celebrations
    Embroidery
    Family Photos
    Fixing
    Guest Posting
    Inspiration
    Kids & Family
    My Week
    Parenting
    Photo Tour
    Present Moment
    Recap And Goals
    Recipes & Food
    Reviews
    Sewing
    Shop Update
    Swaps
    Tips And Techniques
    Travel
    Tutorials

Powered by Create your own unique website with customizable templates.