Making It Up as I Sew Along
  • Blog
  • About
  • Gallery
  • Shop

The Bamboo Spoon

8/31/2014

2 Comments

 
Picture
Months before Goen was born, we bought one of our very first baby items: a small bamboo spoon.  We were living in Fort Bragg in Mendocino County at the time, a town where there is not much to do, so one of our favorite (or default) activities was walking the aisles of Harvest Market and visiting the bakery section for a free sample.  During one such visit, I was looking through the baking goods section and happened upon a display for small bamboo utensils.  I dug around in it and found a spoon.  Picking it up, I turned it over in my hands and inspected the curve of the bowl, the smoothness of the surface, and the daintiness of the handle.  It was small but sturdy.  I realized immediately that it would be the perfect natural material baby spoon.  We bought the spoon even though we knew it would not be used for quite some time.  It was the first time I had ever seen one, and I didn't know if I would get another chance.

Picture
About a year after we bought the bamboo spoon, I started using it to feed Goen and fell in love with it all over again.  Although wider than traditional baby spoons, it was small enough to fit comfortably in my baby's mouth.  For liquidy foods, such as soups or smoothies, the deep bowl held a small mouthful without the food slipping off.  Plus, the bamboo did not heat up as much, or stay hot for as long, as metal spoons (even the coated ones). 

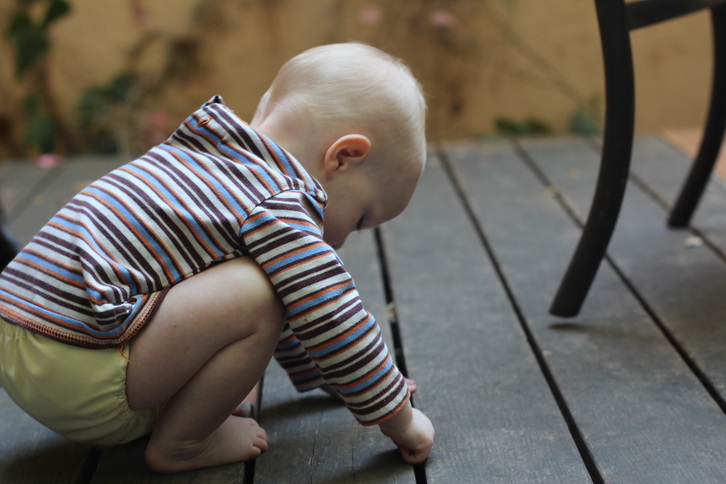
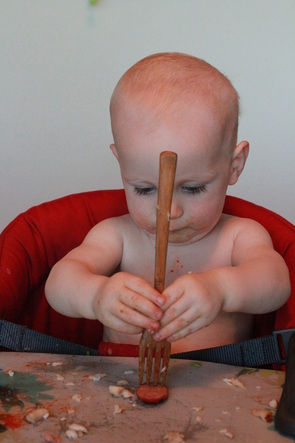
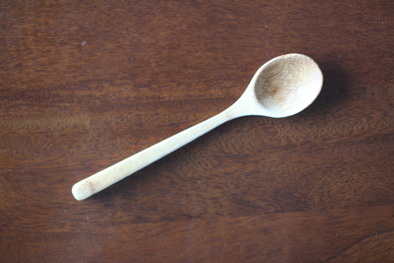
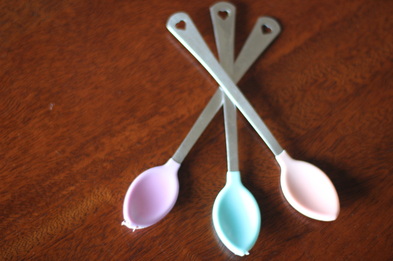
Goen's spoon soon became one of his favorite toys, and he would refuse to give it up after mealtimes.  He would carry it around the house, put it in his toy bucket, and chew on it.  It wasn't long before the bamboo spoon was lost (probably hiding in some drawer or in the car waiting to be rediscovered).  The spoon in this picture is actually one of mine, which is designed more like a soup spoon with a wide bowl.  Now he carries this one all over the house so I guess I'll have to stock up.

Picture
My husband, ever the concerned parent, thought that the baby spoons made from metal with a heat-sensitive, plastic-coated bowl would be better for Goen to eat from, so he bought a set to replace the bamboo.  But, every time I used one, I found something wrong with them.  Some foods slipped off because the spoons are too shallow, others because they are too narrow.  The handles are so flat and smooth that they are difficult to hold on to.  When Goen got teeth, he started chewing the plastic off.  I decided to keep using the plastic-coated spoons or standard-sized metal spoons until I could replace the bamboo one.  When I fed him using an all metal spoon, I had to make sure the food and the metal was not too hot for his mouth.  When he started to feed himself on occasion, I didn't like when the metal hit his teeth, so I stopped using them for fear he would hurt himself.  With the baby spoons, he soon chewed right through the coating so they were no longer smooth. 

I was not able to find a local source for bamboo baby spoons (despite living in a rather well-to-do city), so I turned to online sources.  None of them have as good a deal as I paid for the first one, but such is life.  Anyway, I hope to receive my new bamboo baby spoon in the mail any day now.  All I need now is a decoy for Goen to carry around.

2 Comments

The Present Moment

8/29/2014

1 Comment

 
“The present moment is filled with joy and happiness. If you are attentive, you will see it.”
        ― Thích Nhất Hạnh, Peace Is Every Step: The Path of Mindfulness in Everyday Life

A Friday ritual adopted from SouleMama.  A single photo - no words - capturing a moment from the week.  A simple, special, extraordinary moment.  A moment I want to pause, savor and remember.  If you’re inspired to do the same, leave a link to your ‘moment’ in the comments for all to find and see.


Picture
1 Comment

Making Up Stories

8/27/2014

0 Comments

 
Picture
I recently read a book by Anne Pellowski called The Story Vine.  In the introduction, the author talks about different ways people use to remember and pass down their life histories or stories.  One culture, she said, used shells, another used little dolls, and another used knotted vines (this is the one referenced in the title of the book).  The idea of a story vine intrigued me, and it sat at the back of my mind for some time.  It just so happened that there were several other ideas there as well.  One included a strand of lights and fabric strips and another sought to use scraps and leftovers to make things rather than throwing them away.  Well, these ideas got together there in the back of my mind and, to make a long story short, they soon became one really neat idea, which I will share with you today.
Making A Story Vine:

For my story vine, I used a strand of lights
with 100 bulbs, but it would work for any length of strand lights.  The materials I tied on include large scraps of cotton fabric in different shades, weights, and textures; tulle; ribbon; and yarn.  I did not have a set plan when I started making it, but here is my process, simplified:
  1. Cut out lots of strips of fabric measuring 1" x 6".  The exact number depends on how many fabrics you are using and how prominent you want each one to be.  You can mix colors, shades, and textures to make different effects.
  2. Start tying.  It's just a simple right over left, under, and pull tight.  The friction of the fabric should prevent it from coming undone.  Try to make the ends of even length.  Tying can be a tedious process that is best done over several days.
  3. If you want a fuller look or don't want to see the wire, push the strips closer together where they are tied on and add more strips until you get the look you want.
  4. Hang it on a wall or drape it over a mantle or door frame.  I used small nails to create loops for a more decorative look.
  5. Wait for dusk and then turn on the strand of lights (make sure all other lights are off).  The glow of the lights bouncing off the fabric has a fairy-like appearance.  Scroll to the bottom of this post to see mine lit.
  6. Create or buy some ornaments to represent family stories or traditional fairy tales or fables (see below for some ideas).
Now to add some stories.  Below are some of the stories I chose to hang on my vine.  Tailor stories to your family's preferences.  I started by making ornaments to represent traditional tales and fables, but have since added others that tell stories of my own family.
Picture
I used an empty baby food jar to create an ornament for the fable (one of Aesop's I believe) about a greedy little boy.  In the story, a boy reaches into a jar of nuts and grabs the biggest handful he can.  When he tries to remove his fistful of nuts, the narrow mouth of the jar prevents him from doing so.  Depending on the version of the story you read, one of his relatives (mother, aunt, uncle) suggests he only take a few so that his hand will be able to get out of the jar.  After all, a few nuts are better than no nuts at all.

To make one of your own, wash out a baby food jar and poke a hole in the center of the lid with a pointed tool, such as an awl or a metal skewer.  You may need to tap the top of your tool with a hammer to get the hole started.  Make the hole wide enough for a length of yarn or flexible wire to fit through.  If you are using yarn, tie a knot on the end that will be on the underside of the lid.  If you are using flexible wire, use a crimp bead.  Put the strand through the hole in the lid.  Attach a small metal ring (like the kind used for making jewelry) to the end of the strand coming out the top of the lid.  For yarn, tie a knot around the ring.  For wire, use a crimp bead.  Use a ready-made ornament hook (or make one of your own) to hang the jar.

Picture
Goldilocks and the Three Bears is an ultimate children's classic story.  I chose to represent this story by crocheting a lock of Goldilocks' hair using a skein of yellow embroidery floss.  Here is how to make one of your own.

Tie a slip knot in one end of the floss and put it on a 1.5mm crochet hook.  Make a length of single chains about 2.5-3 times longer than you want the finished lock of hair (if you want it to fold over like mine, use the 2.5 multiple).
  Once you have your chain, start working back towards the beginning, make three single chains in each chain.  This will force the work into a tight spiral.  Once you have an inch or so of spiral, leave out some single chains so that sometimes you do three and sometimes you make two in each of the existing chains.  This will reduce the tightness of the spiral.  When you get close to the halfway point of your chain, do only single chains for about twenty chains (this will be the fold-over segment).  Resume the pattern of two and three single chains until you get to the end.  Cut the floss so there is a two-inch tail.  Weave in both ends so they are invisible.  Trim any leftover tail of floss.  One caution I will add is that the spiral tends to, well, spiral out of control, so make sure to keep the initial chain as straight as possible to avoid reversing the spiral.

Picture
Here is one of the ornaments representing my own stories.  Trees have always been an important part of my life and I have many memories that include them.  I decided to use my book to collect leaves from important trees in my life.  Each page holds a different pressed leaf with a different memory attached, hence my chosen title: Leaflet.  There is a leaf from the place where I grew up, a small twig of needles from the redwood tree overhanging the cabin where Goen was born, a leaf from the tree outside our current home, and others.  It is a book I will add to as life moves on.

I found instructions for the folded book with pockets in Alisa Golden's book Making Handmade Books: 100+ Bindings, Structures, and Forms.  Since I wanted more pages than one book offered, I made two and attached them together.  I also added a cover and a title.  To hang it, I put an eyelet in the spine and then put a metal ring through it.  Since it was already pretty large (about 3" square), I put on a hook without an extension wire.  I suggest checking out Alisa's book if you want to make one of your own.  It's a fabulous resource and the directions and pictures are clear and easy to follow.

Picture
Some objects can be hung as-is, whether purchased from the store or found in a box of family memorabilia.  This key is a perfect example of this.  I'm not sure where or when I got it, but I rediscovered it in a box from my parents' attic.  The thing I like about this key is that it does not have a single story associated with it, but many.  Keys appear in several popular stories, and this ornament can represent any and all of them.  I recommend including some objects that are durable and not easily broken.  Kids should be able to touch and hold the objects as the story is told so that the objects become connected with the stories.


Picture
This bundle of sticks is from another of Aesop's fables.  In this story, an old man challenges his sons to break a bundle of sticks.  Each one tries and fails.  The father then gives each son a single stick from the bundle and challenges them to break it.  Of course, they all succeed, and the father's moral becomes clear: There is strength in numbers.

To make thisornament, gather a bunch of twigs and small sticks that are all fairly straight.  Break them into 5-6" lengths.  Wrap yarn around the bundle tightly several times and then tie the ends together securely.  Loop a metal ring onto the yarn.  Attach a short length of yarn or flexible wire to the ring (by knot or crimp bead).  Attach another metal ring to the loose end of the yarn/wire. 
Use a ready-made ornament hook (or make one of your own) to hang the bundle.

The ambiance created by this lighted story vine is one of comfort, ease, and intimacy.  It is bright and cheerful enough to banish away any "scary" darkness, yet the low light creates a peaceful setting for storytelling.  When all other lights are out, it focuses all energy to the activity of speaking and listening.  My story vine is hung above our couch near the bookcase, which further sets the stage for stories and imagination.

If you would like to share your own method of preserving and presenting stories, leave a comment for all to read.  Feel free to include a link to your own pictures.
Picture
0 Comments

Monday Mornings

8/25/2014

0 Comments

 
Picture
I like Monday mornings.  Monday is trash day.  The day loud beeping noises pull me out of sleep.  The day garbage barrels are pulled across a stretch of bumpy asphalt.  The day Goen crawls across my chest to get to the window.  And the day I am ignored for a few blissful minutes.

Early Monday mornings, the trash truck comes to our neighborhood.  I hear it first when it arrives at the complex next to ours.  Since there is a narrow roundabout, the truck has to be backed in, which means that I am woken up by the beep beep beep of the backing up warning sound.  Once the truck is in place, two men get out of the truck to retrieve the trash barrels from each unit and empty them into the compacter in the back.  For most of the units in the roundabout, this means dragging the barrels across the pavement.  To my sleepy brain, it sounds like a rocket taking off into space.  Sometimes it is the beeping, and other times it is the barrels, that wakes Goen up.  As soon as he registers the sounds, he pops up and climbs over me to get to the window above the bed.  He is not as light as he used to be, so this often results in an oomph sound escaping my lips.  Of course, none of these is the reason I like Monday mornings.

What I really like about Monday mornings is that, while
Goen watches the men below as they noisily roll the garbage cans to their truck, I have a few minutes to rest alone.  I can turn over onto my stomach, tuck my arms into my sides, and bury my face in the pillow.  I can relax and breathe and pretend that I am waking up slowly, taking my time to enter the day.  It may not be quiet, but there is a sort of peacefulness that I feel, laying in bed with my baby at the window above my head.  And then the men clatter the barrels back into place, the trash truck drives away, Goen crawls back over me (oomph), and my day begins.
Picture
Picture
Picture
Picture
Picture
0 Comments

Celery Nut Salad

8/23/2014

0 Comments

 
Picture
Several years ago, David and I were living in Ojai, California, in a tiny (98-square-foot tiny) rented room in a house.  To get away from the insanity of living in a shared space with the landlord and two other renters, we often went for a walk in the evening.  One of our favorite destinations was Rainbow Bridge market where we would peruse the shelves with no intention of buying anything other than a few chocolate worlds.  Occasionally we would splurge and buy food from the lunch counter.  My favorite dish from there was the celery salad.  After reading the ingredients on the container, I realized that it would be super easy (not to mention cheaper) to make myself.  So, I set about recreating the recipe and making it my own.  After all these years, I think I have finally perfected it (hint: it's the lime!).

Make sure to plan in advance since the salad should ideally sit for at least 24 hours in the fridge before serving.
Celery Nut Salad Recipe:

Ingredients:

 - 1 pound celery hearts
 - 6 ounces pecans (either halves or pieces)
 - 6 ounces dried fruit (currants or raisins work best)
 - 1 large lemon or 2 limes
 - 3/4 cup mayonnaise
 - 1 Tbsp. maple syrup
 - 1 Tbsp. dried parsley

Directions:
Picture
Take apart the ribs of celery from the main stalk, discarding the small, yellowish ones on the inside.  Wash each rib and trim off the top and bottom ends.

Picture
If the ribs of celery are very wide (i.e. more than an inch at the widest point), slice them in half or thirds lengthwise.  This will make it prettier and easier to eat when it is done.  Chop the celery by hand or with a food processor using the 4mm blade.  Since celery has a tendency to tip at an angle when going through a food processor, I recommend using the narrow spout and putting in several ribs at a time.  If your cutting board or food processor fills up before you are done slicing, empty it into a large mixing bowl and continue slicing.

Picture
If you are using pecan halves, chop the pecans into small pieces.

Picture
Dump the sliced celery, chopped pecans, and dried fruit into a large mixing bowl and set aside.

Picture
For the dressing, slice your lemon or limes in half.  If you are going to juice by hand, slice the ends off as well to make it easier to squeeze all the juice out.

Note: When I first started making this recipe, I used a lemon as in the original dish.  Although delicious, I have since found that limes provide a smoother flavor with less of an acidic bite.  Use whichever flavor profile you prefer.

Picture
Juice the lemon or limes into a medium-sized bowl (like the kind used for cereal).

Picture
Add the mayonnaise and maple syrup.  Whisk until there are no more clumps of mayonnaise (a fork is fine for this).

Note: I have also used honey as a sweetener, but it does not stir in as easily as maple syrup.  If you use lime juice, the sweetener is less necessary so you can reduce or omit it as you prefer.

Picture
Pour the dressing onto the celery, nuts, and dried fruit.  Sprinkle on the parsley.

Picture
Stir it all together, making sure to coat everything with dressing.  Don't worry if there appears to be too much dressing; the dried fruit and nuts will soak it up.

Picture
Cover the bowl with a large lid or put the salad in a sealed container.  Put it in the fridge and leave it there for at least 24 hours before eating.  Trust me on this.  It is not even worth thinking about eating before the 24 hour mark, and, truthfully, I think it tastes best on day three.  At that point, the dried fruit has soaked up a lot of dressing and taken on more flavor and become less chewy.  Also, the celery has lost its slight bitter flavor so it is a sweet, refreshing side dish.

Picture
This salad is perfect next to hamburgers, grilled steak, and barbecued chicken.  In other words, it is the perfect backyard picnic food.  The best part is, if you are going to have company, you can make it in advance and leave a little extra time on party day for cleaning or, dare I say it, a few minutes of relaxation.  Enjoy!

0 Comments

Once Around

8/22/2014

2 Comments

 
Picture
As much as I like to get a good deal at JoAnn's, they just cannot compete with the beautiful presentation and superior quality of Once Around, an arts and crafts store in Mill Valley.  Everything is delightfully arranged in rainbows of color.  The pictures below are just a small sampling of what they have to offer.  They even have a "bits and bobs" section where you can fill a small bag for only fifty cents.  I must confess that I can't help but help myself to a bagful of these goodies.  They are perfect for art journals, kids' crafts, and mixed media projects.

My trip there y
esterday yielded a bag of bits and bobs, a piece of red felt, a fat quarter of solid black fabric, a copy of Taproot magazine, and three one-yard pieces of quilting cotton that I plan to use for a quilt for Goen when he has his own bed (not that I expect that to happen any time soon).  I have a lot of other projects on my board right now, but it is so hard to find "perfect" quilt fabrics that I decided I had better start sooner rather than later.  I'm sure he will be close to ready for it by the time I cut, sew, and quilt it.  Once I have all the fabrics for that project I will show you my full palette.  The felt and black fabric are for a stuffed animal I will be making soon.  All in all, it was a fun way to spend my birthday money, and I look forward to going again soon.  In the meantime, enjoy a look at Once Around.
Picture
Picture
Picture
Picture
Picture
Picture
And my purchases...
Picture
Picture
Picture
2 Comments

Keeping Food On the Table

8/20/2014

2 Comments

 
Picture
As every parent surely knows, keeping food on the table is a difficult task.  Not only because of the expense (although that is an ever-increasing problem) and preparation time, but also because of children's tendency to drop it on the floor.  I have met parents who allow their toddler to drop food; I have watched parents feed their child themselves to avoid the mess; and I have seen parents who opt for "neater" food options such as crackers and cheese that are easier to clean up.  But all of these seemed to me to sacrifice long-term learning and socialization.  Putting together a couple ideas from books I read, I formed my own way of approaching and handling the food-on-the-floor problem.
Picture
Several months ago I read Your Self-Confident Baby by Magda Gerber, which, among other things, talks about respecting a baby's autonomy and personhood and including them in situations that concern them.  From this book, I took away a greater understanding of the ways adults try to intervene with and control their young child's life (with good intentions, of course), as well as a better idea of what children are capable of when given the chance to grow and learn. 

A second book that has formed my method of keeping food on the table is Marshall Rosenberg's Nonviolent Communication.  Rosenberg's approach requires that conversants speak in terms of their own needs and desires rather than someone else's.  For example, if a dad wants his son to speak quietly in the house, he would say "I need you to stop yelling in the house" rather than "You need to stop yelling in the house."  The idea is that we can only know our own needs and should not assume that others have the same ones. 

Picture
Putting these ideas together helped me find a way of communicating my wants that would be respectful yet authoritative.  This is what I came up with.  At mealtime, when Goen tries to throw food on the floor, I hold out my hand palm up and say, "I don't want you to throw food on the floor.  Food stays on the table.  If you don't want it you can give it to me."  When I first started doing this, I would gently take the food out of his hand before he could drop it (if he had already dropped it, I would pick it up and put it back on the table out of reach).  After many weeks of this, when he began to realize that I didn't want him to drop food on the floor, he would pause before dropping it.  At that point, I would hold my hand under his and let him decide whether to put it in my hand or put it back on the table or move his hand to the other side and drop it there (something he rarely does).  Within a few months of starting this routine, food dropping became more of the exception than the rule and now he will push food away from himself and towards me if he does not want to eat it.

Making known my desire for keeping food on the table does not always result in it being met; we still end up with food on the floor at many meals.  But I can tell that Goen is beginning to internalize the idea that food belongs on the table.  I think that if I just let him drop it without intervening so that he could "get the experience of dropping food on the floor" (as one mom I talked to put it), I would be left with the problem of deciding arbitrarily when he had enough of the experience and of implementing the rule after the habit was set.  If I fed him myself, I would never get to eat my own food at the same time as my family.  And if I always fed him less messy foods, he wouldn't develop a palate for the many other delicious foods out there (like curry and avocado and squash).  Instead, I decided that it would be better to set the rule from the beginning.  Although there are no consequences (other than reducing the amount of food available to throw on the floor) or traditional enforcement measures for when he does not follow what I want, I continue to let him know what is acceptable and what I expect from him.  My hope is that he will begin to adopt social conventions that will make it easier (or as least less embarrassing) to eat out at restaurants or at the houses of friends and family.  And, so far, it seems to be working.

What about you?  How do you keep food on the table?  Leave a comment to share techniques that have worked for your family.
Picture
2 Comments

Stitchery Book

8/18/2014

0 Comments

 
Picture
Before you get all amazed, no, I did not make this beautiful stitchery.  It's a picture I took from a book I bought (the piece was stitched by Rosie James).  I like to look at art books for inspiration and to find artists whose work I like so I can find more of their work.  Usually I find these perusing the library because I just can't afford to buy and house so many pretty books.  That being said, when a good deal presents itself, I indulge.  And that is just what happened on a trip to Barnes & Noble. 
Picture
I was looking through the clearance bin when I uncovered this book on modern stitchery artists called Push Stitchery.  Although it mainly includes the more "edgy" artists in the industry (the kind that use needle and thread to stitch unusual subjects such as meat, freeway scenes, and luchadores), the ideas can be used for a wide variety of subjects or applications.  Today, I'll share a few of my favorite pieces from this book.

Picture
This first piece is by a Lithuanian artist whose name I can't spell without visiting a foreign alphabets website: Severija Inčirauskaitė-Kriaunevičienė (a mouthful to be sure).  I particularly like that she chose a traditional design for her non-traditional canvas.  There is nothing like embroidered watering cans to prove that anything can be stitched on.  Drill or punch a few holes and you can make anything a canvas.  Some of the things I would like to use this idea on are chair backs, window screens, and book covers.  Really, the options are endless with the right tools. 

Picture
Clyde Olliver definitely challenges what it means to do stitchery.  A pile of rocks and a piece of knotted rope threaded through holes in the rocks.  It's not something I would ever think of, and I can't help liking it, perhaps for that very reason.

Picture
I love the dimensionality in this piece from a series by Diem Chau.  Of all the ideas in this book, this is one I really want to figure out how to do.  I can't be sure, but it looks like she uses some sort of stabilizer for the stitchery that then gets fused to the plates.  As with the watering can, there are endless applications.  Liven up a window, a wall, or other smooth surface with the swipe of an iron.  They can even be made and sold like patches for people to apply to their chosen surface.  I feel a future tutorial forming...

Picture
This piece by Gillian Bates uses raw edge applique to add blocks of color and stitched lines to create dimension and texture.  Although machine stitched, the technique can be used with handstitching or embroidery.  In fact, this is an idea I have been mulling over for some time, albeit in a smaller scale.  I would like to use it to make "artist cards" to hand out to people or perhaps a quilt tag.  Whatever I decide on, I'm sure you'll be seeing something like this soon.

Picture
There are several pieces by Joetta Maue that I found intensely interesting.  This one, depicting a woman embroidering what I assume to be aspects of her life, oozes with self-revelation.  I can almost hear the author telling her story through the images she stitched.  And her story is easy to mistake for our own.  The strands connecting each item can easily become a complicated web as another and another are added (life in a nutshell, yes?).  In her Q & A she says that she uses methods and materials traditional to "the domain of the home and the female" to help the viewer "identify the conflict being explored in the work."  And that is the essence of art: to get the feelings we have inside out into the world for others to see,  understand, and identify with.

Picture
This stitched paper work by Peter Crawley is one of the main reasons I bought the book.  It is such a simple idea with a bold effect.  The letters seem to both draw towards and away from the viewer.  And the loose strands juxtapose nicely with the rigid stitched lines.  Although the technique he discusses in the book sounds time-consuming in order to achieve anything close to perfection, I imagine even an amateur (i.e. me) could create something beautiful.  Or, at least that is my hope, as I intend to give this one a try at some point.

0 Comments
<<Previous
    Picture


    Carley Biblin

    Hi.  My name is Carley.  I love to sew, craft, and create. As a Jane-of all-crafts so to speak, I enjoy sewing, writing, cooking, drawing, photographing.  But the constant thread (if you'll excuse the pun) throughout my weeks is needle arts. 
    I hope you'll join me in
    Making It Up As I Sew Along.
    Learn More...

    My Etsy Shop

      If you'd like to sign up to receive my newsletter, type your email address in the box below and get news, tips, and other neat stuff delivered to your inbox.

    Submit
    Instagram

    Archives

    January 2017
    December 2016
    November 2016
    October 2016
    September 2016
    August 2016
    July 2016
    June 2016
    May 2016
    April 2016
    March 2016
    February 2016
    January 2016
    December 2015
    November 2015
    October 2015
    September 2015
    August 2015
    July 2015
    June 2015
    May 2015
    April 2015
    March 2015
    February 2015
    January 2015
    December 2014
    November 2014
    October 2014
    September 2014
    August 2014
    July 2014
    June 2014
    May 2014

    Categories

    All
    Arts & Crafting
    Books & Music
    Celebrations
    Embroidery
    Family Photos
    Fixing
    Guest Posting
    Inspiration
    Kids & Family
    My Week
    Parenting
    Photo Tour
    Present Moment
    Recap And Goals
    Recipes & Food
    Reviews
    Sewing
    Shop Update
    Swaps
    Tips And Techniques
    Travel
    Tutorials

Powered by Create your own unique website with customizable templates.