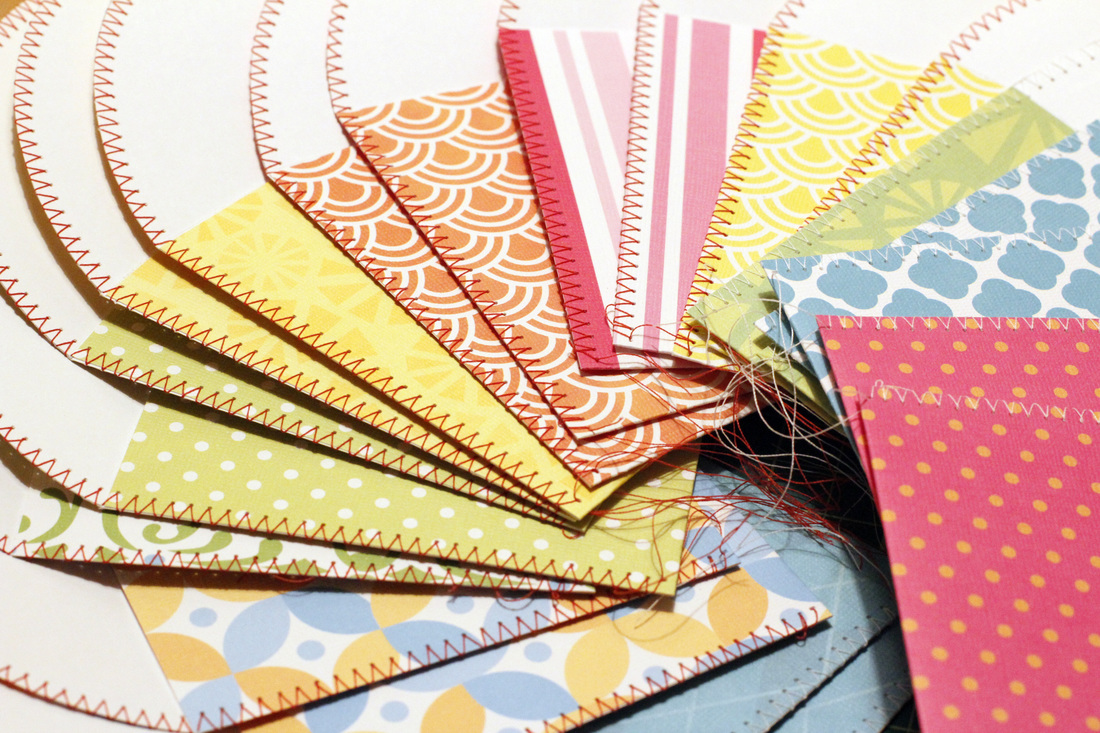
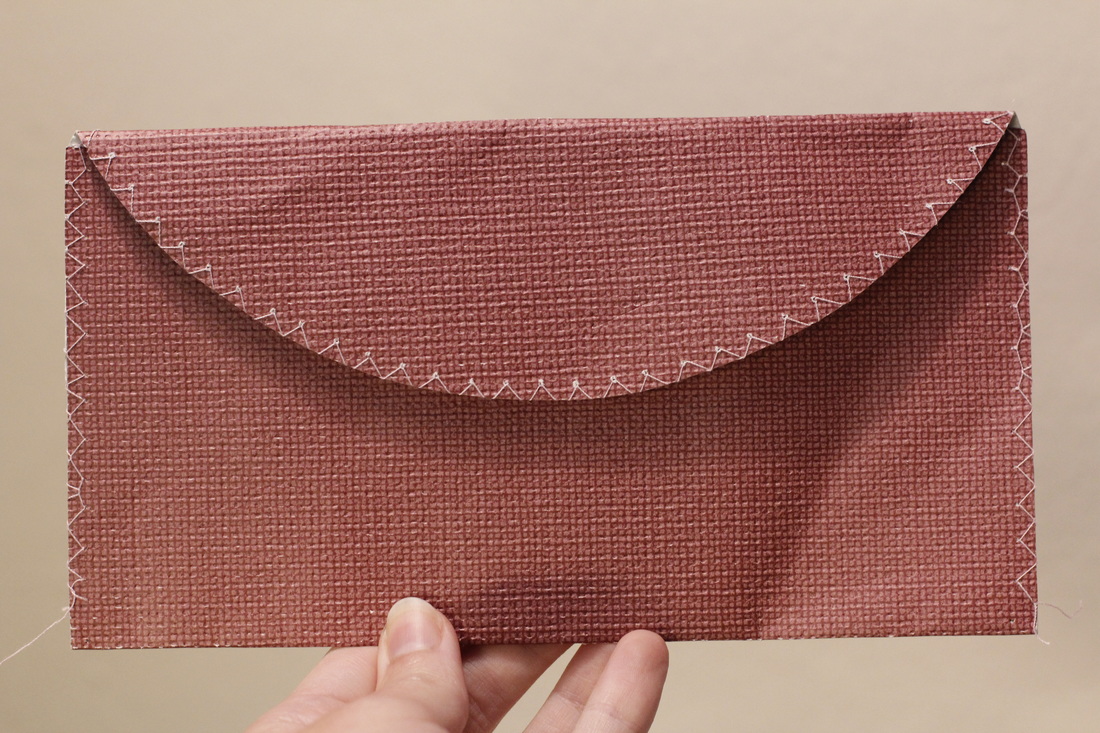
When everyone knows you like to make things, they tend to give you things that they think you'd find interesting. Such was the case several months ago when my sister-in-law gave me an envelope she found. It was simply a piece of textured brown card stock folded then stitched on the sides and around the flap. I loved it immediately and put it on my list of things to make. Of course, the list then sat untouched for a bit when other things came up. Then one day I signed up for a polaroid quilt block greeting card swap (more details on this soon). This envelope design was the perfect handmade touch to send each of the greeting cards and blocks in. And I think everyone loved receiving one.
The envelopes I made are six inches wide and just over four inches tall (smaller than the one I was given), but they could be made in almost any dimensions. You could even experiment with stitching two pieces of card stock together instead of folding one. The downside of these dimensions, though, is that the envelopes don't exactly fit a standard 4 x 6 greeting card since the stitching on the sides takes up about a quarter inch total. So, of course I had to make special cards to go inside them. You could also trim standard cards to make them fit. Either way, it's a fun and simple way to make snail mail even more special. Here's how you can make some, too.
Materials:
- 12" x 12" sheet of card stock
- Paper cutter or scissors
- Ruler (preferably clear acrylic)
- Cutting mat
- Pencil
- 6" bowl or plate
- Scoring tool
- White glue (optional)
Instructions:
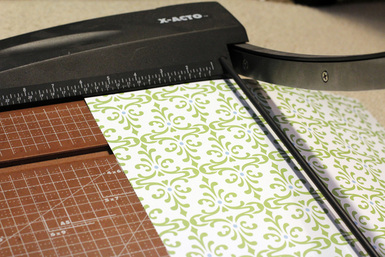
Use your paper cutter or scissors to cut the 12 x 12 sheet of card stock in half. Set one piece aside for now.

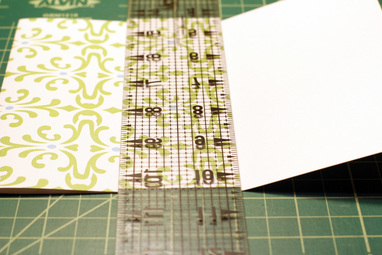
Lay one of the sections of card stock on your work surface. A cutting mat works best since it has measurements on the sides, top, and bottom. Place your ruler so that one edge is at the 4 3/8" mark. Make sure it is aligned properly. Use your scoring tool to score along the 4 3/8" mark
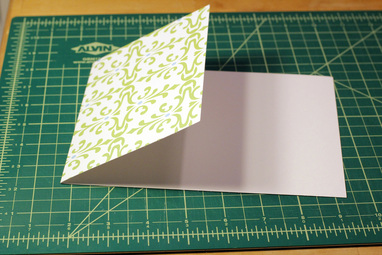
Fold the card stock along the score line and use your thumbnail to press down on and smooth the crease. This will be the back side of the envelope where the flap will rest.
Lay your paper so that the fold is on the left. Place your ruler so that the edge lines up with the edge of the paper that you folded inward in the previous step. It sounds confusing, but the picture is pretty clear. Score the paper along the ruler edge of the ruler (in the picture, it is the right edge. The scoring should appear on what will be the inside of the envelope).
Fold the card stock along the score line and use your thumbnail to press down on and smooth the crease. This will be the flap of the envelope.
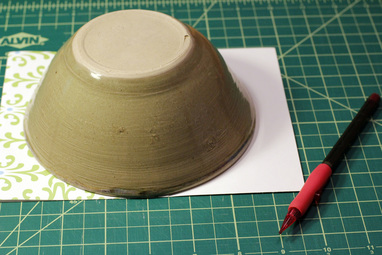
Unfold the flap you just made. Set your bowl or plate so that the sides match up with the corners of the back side of the envelope. Draw a line around the bowl, beginning at one corner of the back side and ending at the other. This will give a rounded flap. Feel free to experiment with other shapes.
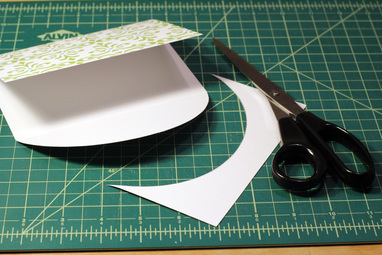
Use a pair of paper scissors to cut along the line you drew.
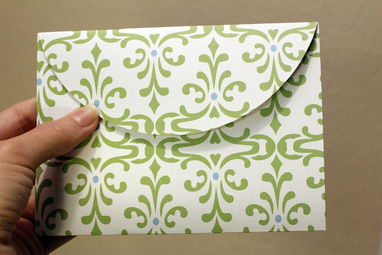
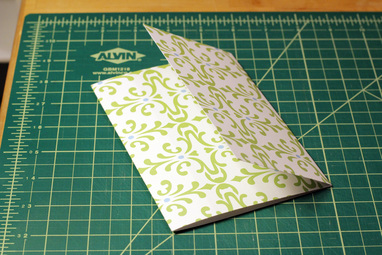
Your envelope should now look like this.
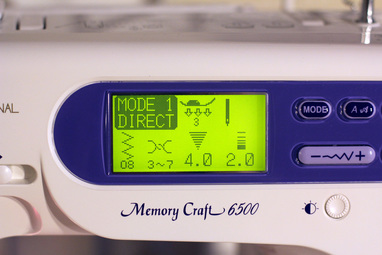
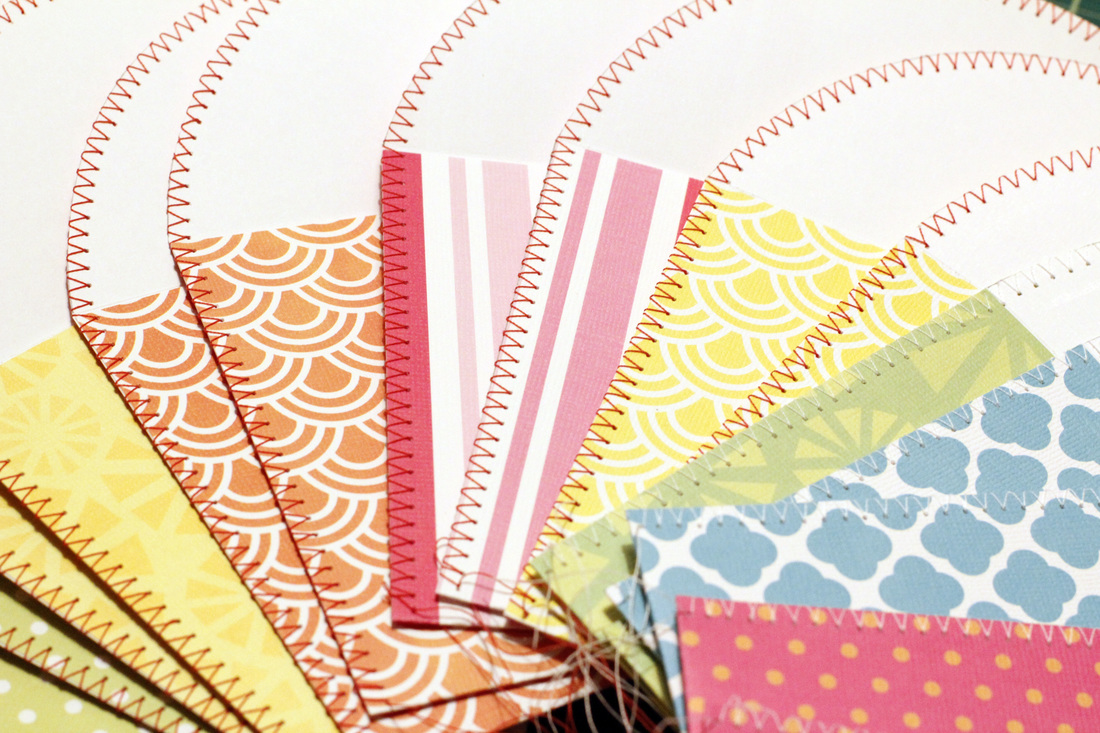
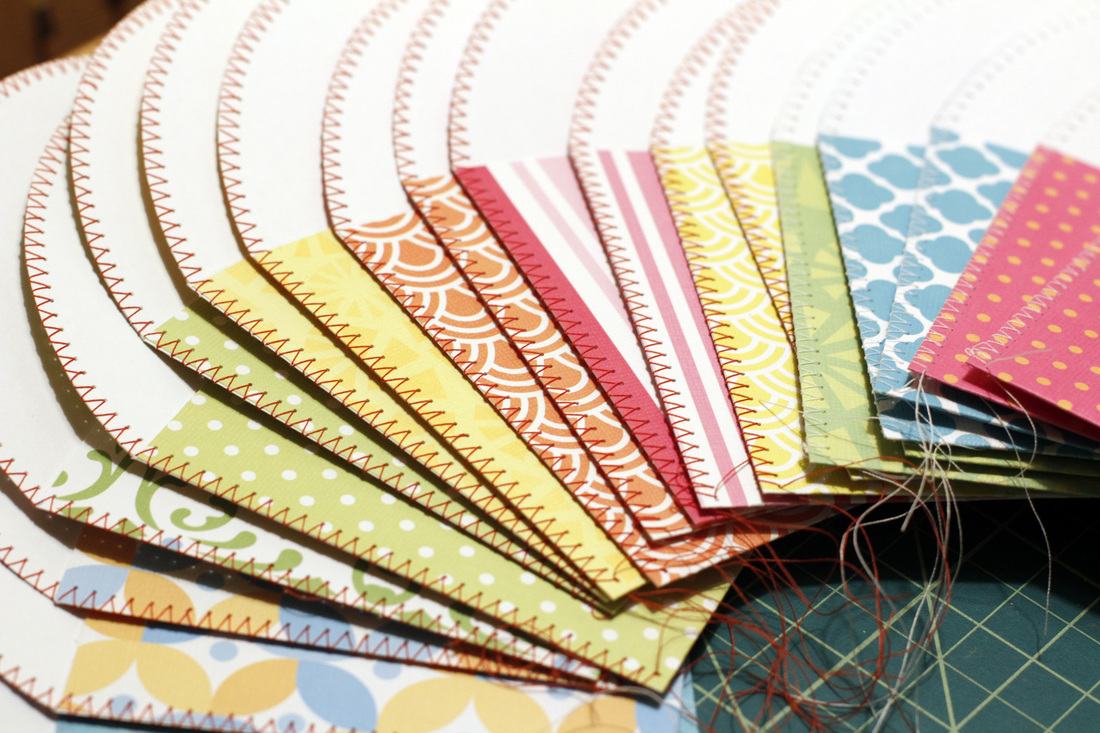
Now to sew. Set your machine to a zig-zag stitch. The width is up to you, but keep in mind that the wider the stitch the smaller your greeting cards must be. I set my zig-zag to just over 1/8" wide.
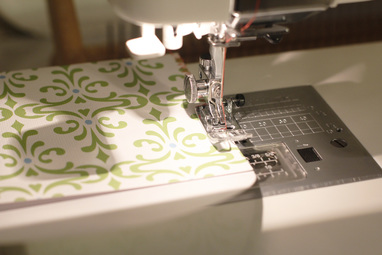
Manually move the needle to check where the edges of the zig-zag will be. Place a bottom corner of the envelope under the presser foot so that the needle will sew just past the right edge. In other words, the needle will pierce the paper on the zig but not the zag. Continue sewing along the side of the envelope. Make sure the flap is open.
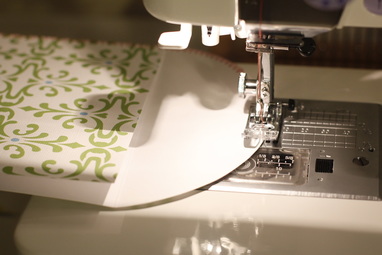
As you approach the flap, slow down so that you can adjust the paper without sewing off the edge. Continue sewing around the top and down the other side.
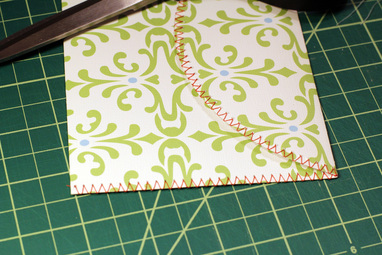
Cut the threads at both corners.
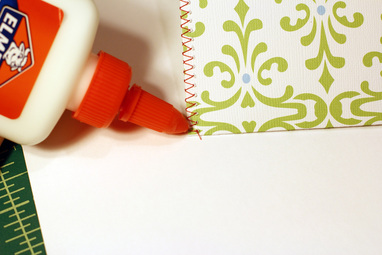
If you want to keep the stitches fro coming out, you can put a tiny dap of glue at each corner where you cut the threads. Make sure to let it dry before stacking or using your envelopes.
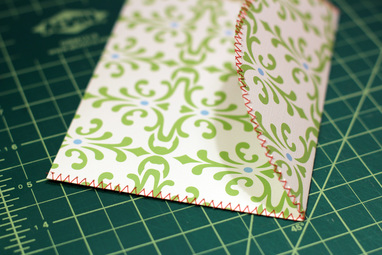
Your envelope is now ready to use! Repeat the steps with the other section of card stock, and as many more times as you want. Don't forget to cut cards to go along with them. My next project will be to make a complete set of notecards for myself so that I always have some on hand for birthdays or holidays or greeting card swaps.
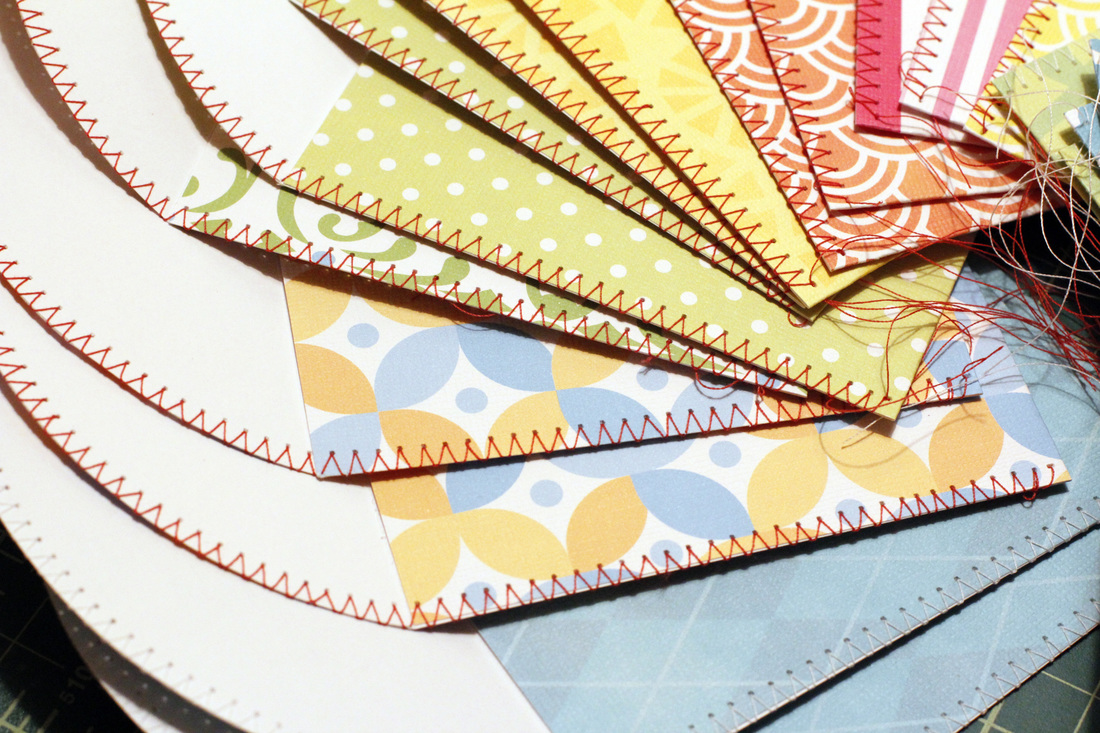
I'd love to see what you make with this tutorial. Drop me a line or tag me on Instagram so I can check it out.

