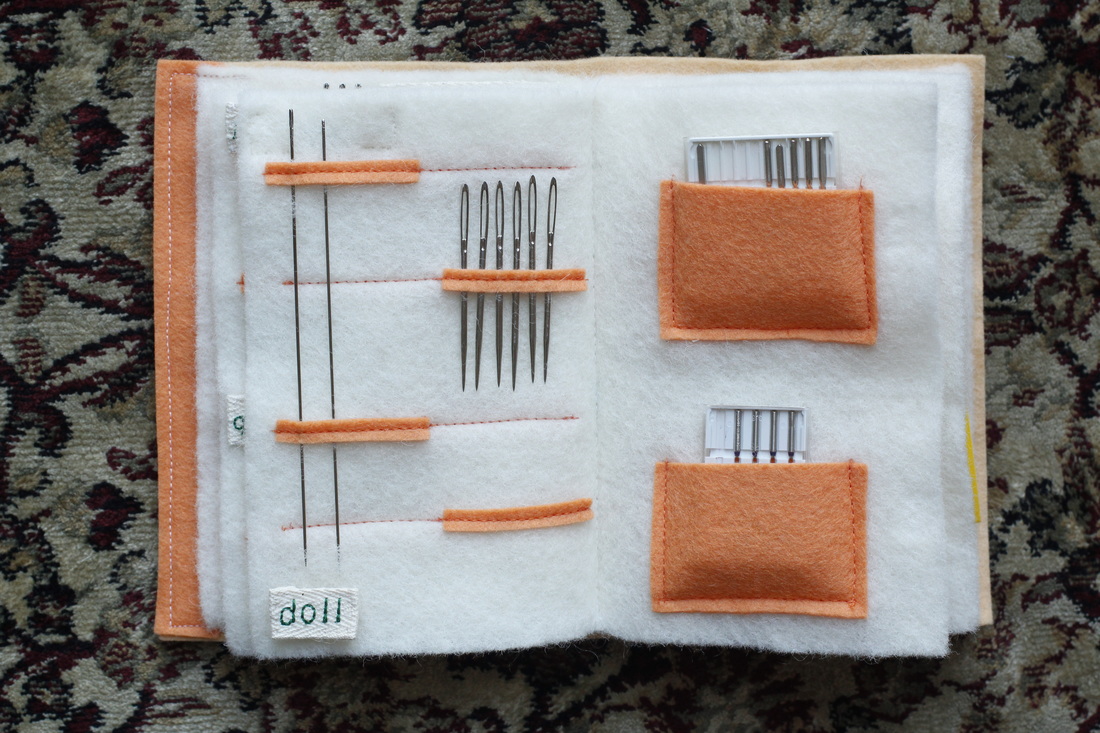
As needle books go, my new one is something of a tome. It's large enough to hold all my hand and machine needles, including my longest doll needle at 5 1/2 inches. It's ten (single-sided) pages include labelled storage for loose needles, small plastic needle cases, and a strap to hold packaged needles that I haven't opened yet.
I designed this needle book myself because I wanted one place to store all my needles. As usual, I took it one step further and made a beautiful paisley motif felt applique for the cover to make myself that much happier every time I open it. And, of course, it took me much longer than it should have to finish it. I mentioned it way back in this post, but it was already long in process at that point. Oh, well. I never do anything unless it's worth taking a long time to do (that makes me sound a bit like Treebeard, though. Hmmmm.).
Anyway, my needle book measure about six inches tall and four inches wide. It holds all my needles, which are organized by type and size so I will be sure to find the needle I want when I need it. Labels next to each type help me keep track of which needles are which. Basically, it keeps me organized and gives me a place to put otherwise homeless needles.
Here's how you can make one of your own.
Felt Needle Book Tutorial
Materials:
- Felt for pages (see below for my dimensions or customize as desired)
- Felt for pockets
- Felt for needle holders
- Felt for cover
- Thread
- Twill tape or ribbon for labels (optional)
Instructions:
Materials:
- Felt for pages (see below for my dimensions or customize as desired)
- Felt for pockets
- Felt for needle holders
- Felt for cover
- Thread
- Twill tape or ribbon for labels (optional)
Instructions:
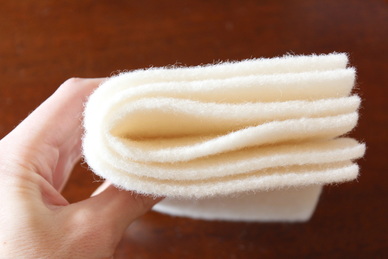
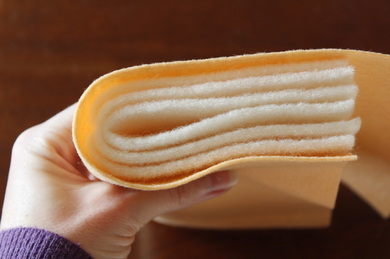
Cut a piece of felt 6" x 8"
Cut a second piece 6" x 8.5"
Cut a third piece 6" x 9"
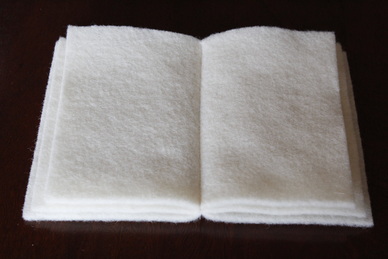
Stack the felt so that the largest piece is on the bottom, the second one is centered on top of it, and the smallest one is centered on the first two. Use clips to keep the pages in place. Find and mark the center of the pages (chalk is pretty useless on felt, but pins work well if you don't have disappearing ink). Using a stitch length between 3 and 4, sew the pages together along the center line.
Cut a second piece 6" x 8.5"
Cut a third piece 6" x 9"
Stack the felt so that the largest piece is on the bottom, the second one is centered on top of it, and the smallest one is centered on the first two. Use clips to keep the pages in place. Find and mark the center of the pages (chalk is pretty useless on felt, but pins work well if you don't have disappearing ink). Using a stitch length between 3 and 4, sew the pages together along the center line.
The pages should fold nicely along the stitch line. Close the book and trim the pages so that they are even along the edges.
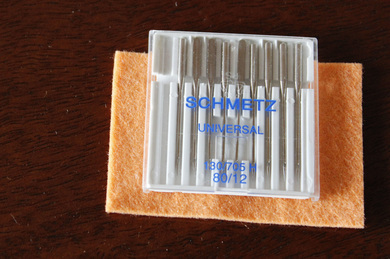
Cut felt rectangles for the pockets. Make them large enough for the sewing machine needles you want to keep in them. I cut mine 1 5/8" x 2 3/8" to hold the larger plastic case of needles. Two pockets will fit on each page.
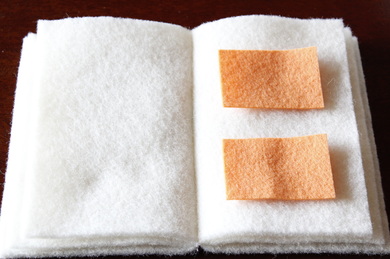
Place two felt rectangles on a page of your needle book. Pin them in place. On the other side of the same page, place two more rectangles in alignment with the first two. Each pair of opposite pockets will be sewn with the same lines of stitching.
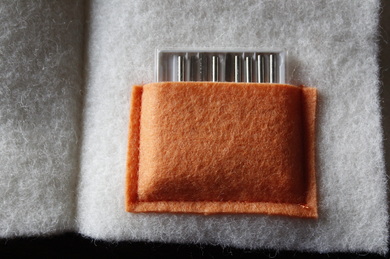
Working one pair of pockets at a time, sew through the pockets and page. Since this is felt and it shouldn't receive too much stress, you don't need much of a seam allowance. Starting at one top corner, sew down to a bottom corner, along the bottom, and up the other side. Remove the pins as you go. Backstitch at the beginning and end to secure the stitches.
Note: I attached all my pockets toward the back of my book since I don't switch machine needle as often as I want a different hand sewing needle.
Note: I attached all my pockets toward the back of my book since I don't switch machine needle as often as I want a different hand sewing needle.
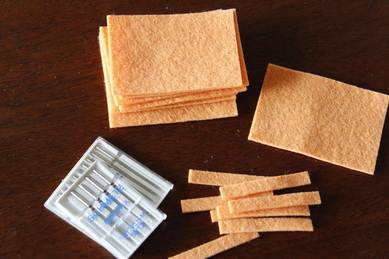
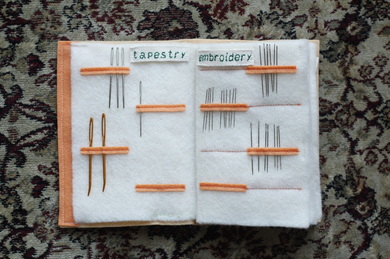
Cut narrow strips of felt to hold loose hand-sewing needles. I cut mine 1 3/4" x 1/4". Each strip will hold up to 10 needles depending on the size. Longer needles (such as doll needles) may span more than one strip downwards.
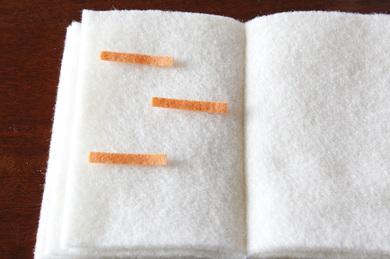
Place three or four narrow strips on a page of your needle book. Stagger them as shown to maximize storage and make needle retrieval easier. Pin them in place. Working one strip at a time, remove a pin, holding the strip in place with your fingers. Place the page under you presser foot and sew through both the strip and the page, backstitching at the beginning and end.
Note: Larger gauge needles and tapestry needles fit better with a longer stitch length.
Note: Larger gauge needles and tapestry needles fit better with a longer stitch length.
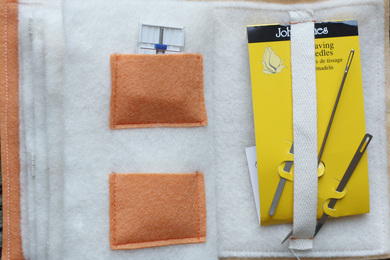
On the last page of my book, I added a strip of twill tape to hold "homeless" needles and carded needles that don't fit anywhere else. To make one for your book, cut a length of twill tape or similar woven ribbon and stitch it to a page along the top and bottom. Fold under the ends of the ribbon before sewing for a cleaner look.
For the cover, start with a large piece of felt (or make a patchwork one). Close the pages of your needle book and wrap the piece of felt around them to measure for the cover. Decide how much of an overhang you want on all sides. An eighth of an inch looked about right to me. Mark the cutting places with pins on either side. Use an acrylic ruler to cut the cover piece to size, removing the pins once the ruler is in place.
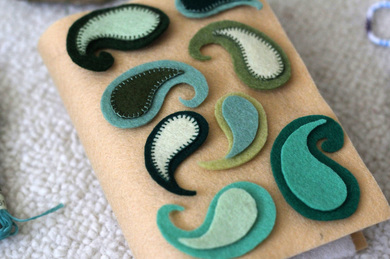
Embellish your cover before attaching it. Applique, beading, embroidery, or stamping are just a few ideas for how to give your needle book that something extra. Once the cover is all decorated, you can attach it to the pages.
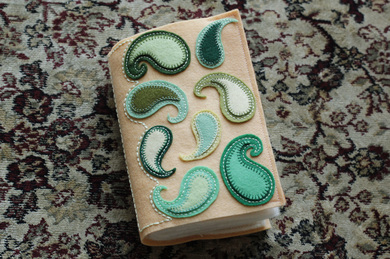
Since the felt pages and cover were too bulky to get under my presser foot, I attached the cover to the front and back pages only. You can see the stitching on the front right side. There is almost identical stitching for the back of the cover and last page. Of course, this means that the sides of the pages facing the cover are not usable for storage. It also means that my applique stitches were hidden. If you need the extra storage, you could attach the cover by hand by sewing along the stitching keeping the pages together along the spine.
Your needle book is now ready for needles! Play around a bit with placement, making sure the needles you want most handy are at the front. As you put the needles in their slots, make a note of which ones you put where. If you'd like, make some labels so you never forget what needles are on each page.
And my needle book is finally done! Okay, I may have a couple labels left to sew on, but, other than that, it's finished!
Although I designed the final needle book myself, I used lots of sources for inspiration. Here are some of my favorites:
Tiny Apartment Crafts Needle Book
Mmmcrafts Needle Book
Domestic Doozie Needle Book Tutorial
Little Birdie Secrets Needle Book Tutorial
Paisley Applique Design
Paisley Template
How to Draw Paisley
Do you have a favorite needle book? Does it hold all your needles or just the most used ones?

