After making my bunting banner, I didn't have enough felt left over to make the same flowers from the inspiration banner in the Wise Craft book, so I went a-pinteresting and found a tutorial for burlap flowers here. I'm trying to make my sewing and craft projects more environmentally friendly (more on that in a future post), so I changed it up a bit to avoid using hot glue. I'm not sure what exactly I did so differently from the tutorial above, but mine turned out way poofier. Here is what I did.
Burlap Flower Tutorial:
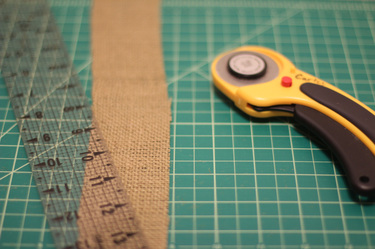
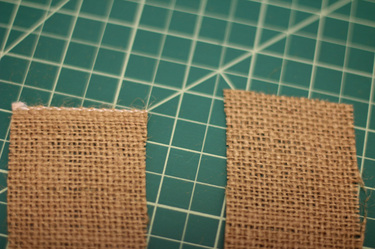
Square up your burlap before beginning this project. This is essential to a successfully finished flower. Using a ruler, rotary cutter, and mat (or scissors), cut a two-inch wide strip from your burlap. I found it best to cut from selvedge to selvedge (you'll see why in a later step). You can change the width, to get larger or smaller flowers, or length, to get more or less full flowers. You are basically creating a burlap ribbon here.
If you cut from selvedge to selvedge as I did, slice off the selvedge from one side. You don't need to take off much, just a quarter inch or so.
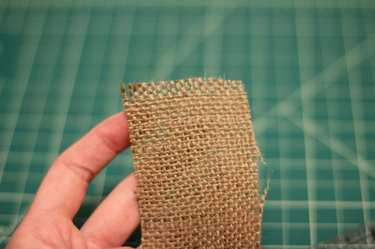
Remove several threads from the edge you just trimmed. The threads you removed, which are parallel to the selvedge, are called warp threads. The loose threads that are left are called weft threads.
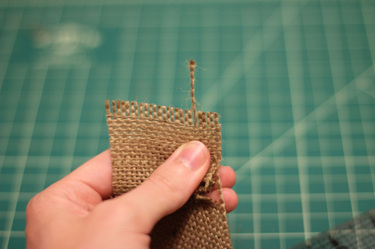
Select one of the weft threads close to one side. The fourth or fifth one in works well. Gently pull the thread so that your burlap ribbon begins to gather. It's important to go slowly so you don't break the burlap thread. Carefully ease the father towards the other end of the ribbon. Gather a little more and move out down.
Once you have moved some of the gather all the way to the other end, the thread will have become loosened from the fabric and you can move a little faster. Still, I advise not to go too fast. As you gather, your single thread will get rubbed and worn against the fabric, which can cause it to break (this only happened to me once or twice, and probably because I was using cheap craft burlap). Once you stay working with it, you will find the rhythm that works best for you.
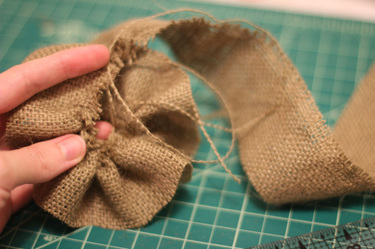
Once you have gathered the entire ribbon of burlap, you will have a long corkscrew.
Fold under the raw edge of burlap about a half inch. Thread a tapestry needle onto the burlap thread you used to gather the ribbon (yes, the same one). Whipstitch along the raw edge to sew it down. Don't cut the thread yet, it's work is not yet done.
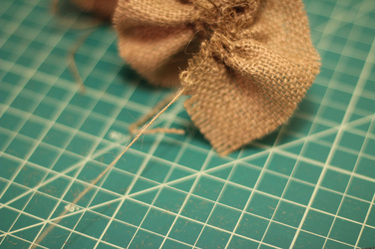
Unwind the burlap corkscrew. Beginning at the edge opposite the thread, start forming a flat spiral for the flower. The end with the selvedge still intact should be at the bottom of the spiral so it is not seen in the finished flower. You should end up with several layers, though the exact number depends on how long you made your ribbon. Use your thumb and finger to hold the layers together; they have a tendency to want to unwind.
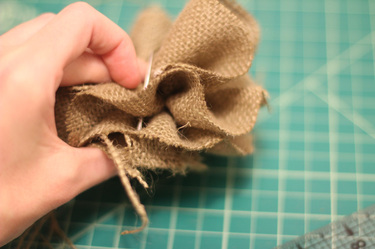
The same burlap thread and tapestry needle from a few steps ago will return for this step. If your thread looks weakened, tie it off and get a new one by removing another thread from the burlap fabric. Or you may have several stray threads from squaring off the burlap that you can use. Either way, use the tapestry needle and thread to stitch the layers in place.
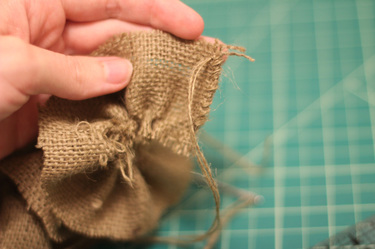
Keep the stitches near the center of the flower, but far enough out that you go through all the layers. As you go, flip the flower over to double check. As before, don't go too fast or pull too hard on the burlap thread. Pull just hard enough to tack the layers together. If your thread is long enough, go around the flower twice before tying off.
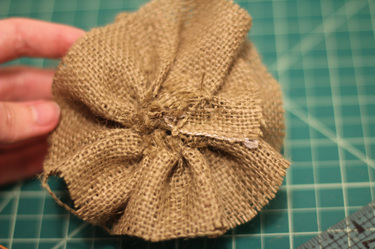
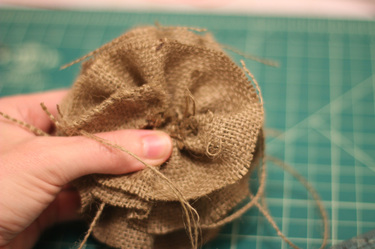
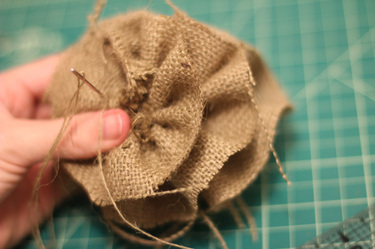
Tie off your thread at an inconspicuous spot at the back of your flower.
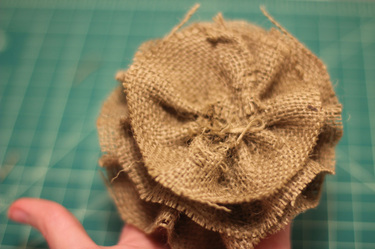
Turn your flower right side up and trim any stray threads (or leave them if you prefer that look. I left mine plain, but this is a great project for adding some colorful or sparkly embellishment. Stitch on a button, a scrap of fabric, some beads, or anything else that strikes your fancy. Make a few more of these and use them to adorn a pillow, picture frame, or holiday decoration.
Have fun with this project. Make it yours and make it fun. And when you're done, share a link for all to see.

