I had hoped to share a toddler shoe tutorial with you. Alas, most of my efforts since this post, where I decided that I would sew a pair of soft-bottomed shoes, have been a learning experience in things that can go wrong. I won't say that I failed, just that I tried many things that didn't work. So, instead of showing you how to make toddler shoes, I will show you how not to make toddler shoes. I will also tell you how I would do it if I weren't so burned out from the whole process. 
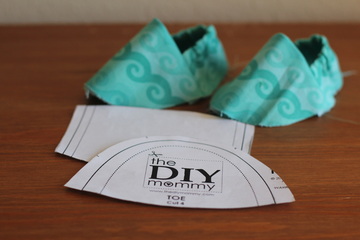
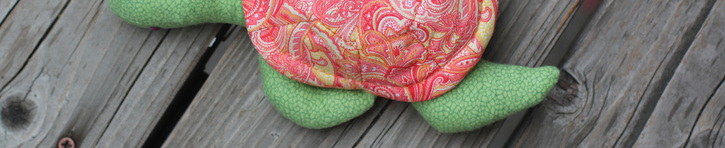
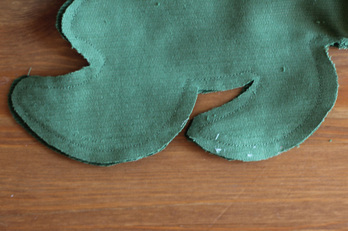
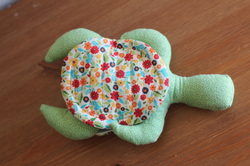
To make my first effort at shoes more likely to end in success, I started with the simple (and free) baby booties pattern from DIY mommy. The pattern goes up to 12 months, and a quick measure of Goen's feet revealed that they were already longer than the sole piece included in the pattern. I figured I could increase the pattern pieces proportionally and have a usable pattern. I added 1/2" to the sides of the heel piece and at the widest points of the toe piece and then sewed the uppers you see in the picture. By all appearances, this is a successful pair of shoes, but I slipped them onto Goen's feet to size them only to discover that they were still too short. 
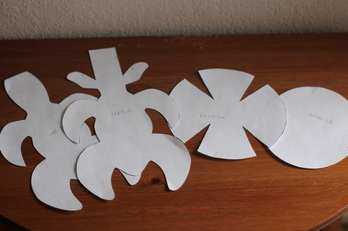
For my second attempt, I traced new pattern pieces that again increased the size proportionally. I cut the fabric, sewed the uppers, and slipped them on Goen's feet. Not only were they too small, but the fabric that went over the top of the foot was baggy. To try to fix the problem for the next pattern redo, I pinned to see how much I would need to get rid of and from where. This revealed that I would have to get rid of all the increase I had just added. Looking back on this design, I realized that none of these pattern alterations were making the shoe longer, which is what I needed. What I should have done is leave the curve of the toe piece alone and, instead, extended it from front to back (not side to side as I had done). 
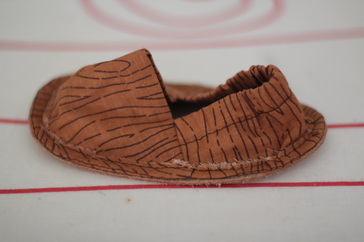
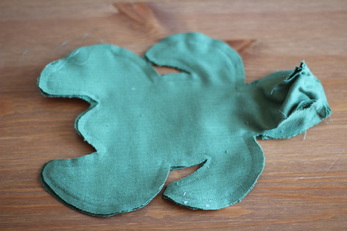
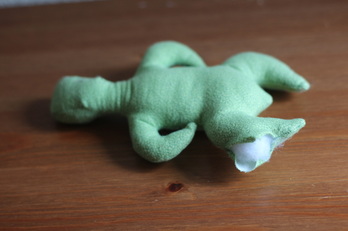
Before I made this last realization, I tried changing the pattern a different way. This time I left the toe piece alone and extended the heel piece (making it both taller and wider) in order to force the shoe to be a bigger size. It worked, sort of, but the toe piece did not cover enough of his foot to keep it on well. Of course, I did not notice this fact until after I sewed on a sole piece. I had bought split hide veg tanned leather on Amazon and discovered that this type of leather is not pliable enough to mold to a foot. It was easy to cut and sew, but so stiff that turning the shoe right side out was difficult. The stiffness also made it a tripping hazard. 
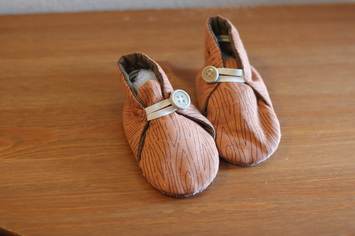
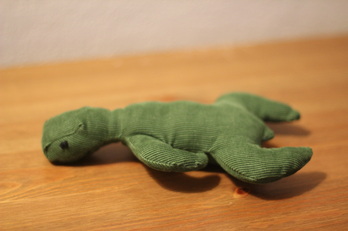
It was time to try a different pattern entirely. I checked out Anna Maria Horner's book Handmade Beginnings: 24 Sewing Projects to Welcome Baby. One of the patterns is for baby booties. Although they are more complicated than I prefer, I decided to give them a try since the pattern included Goen's current size. Here is a picture of the finished booties. But, alas, they are too big. Can you believe it? After all the problems with the others being too small, I go and make these too big. In my defense, I used the right size pattern, but Goen's feet are at the smaller end of the size range. At least he will be able to wear them eventually, though. I couldn't bring myself to make a smaller shoe in this pattern (it took three hours of concentrated time), especially since he would not be able to wear them for long. So, I went to Etsy and found a pair of nubuck leather moccasins from Starry Knight Design. The shop owner, Melanie Knight, has many adorable booties. There are plain colors, bright colors, and stitched-on designs. The elastic goes all the way around the ankle from the front, so they are easy to get on and off. Best of all, the leather bottoms don't slip and slide like socks (which was all he had previously). They have enough grip for him to run around on many different surfaces, but not so much that they stick (which rubber has a tendency to do) and make him trip. And the price? I'll just say that this frugal mama went ahead with her purchase.
0 Comments
Oh, the simple joys of being a mama to a little one. The first smile, the first wave, the first snuggle. All these seemingly small things eclipse the more difficult parts of being a parent (such as the first tantrum). To this list I can now add the first kiss. Last night I was nursing Goen to sleep in bed when he popped up, crawled up to my face in the darkness, and put his mouth to my face. It may not have been a typical kiss. There were no puckered lips; in fact, they were parted. But it was sweet, and made this mama smile to get her first toddler kiss. Although there is not the same sort of emotion within a toddler's kiss as within an adult's, it is so innocent and, in it's way, very genuine. There was nothing he expected in return, nothing to be gained or lost. The thought came to him and, unreservedly, he followed through (there is a lesson here that I am slowly learning for myself as well).
As I revel in this occasion of the first kiss, I am reminded of how Goen used to react to affection. When he was a very small baby he hardly noticed and didn't seem to care. Then, as he became more aware, he would look at us quizzically when hugged or kissed. Sometimes he would giggle or squirm away. Sometimes he would turn his head so that a kiss on his cheek turned into a kiss on his mouth. He would stare at David and I when we kissed. Then, after all his observations, he started to copy. At the time, I hardly took notice of each reaction, but there is a definite sequence of growth. And somewhere along the line I'm sure he will begin to notice and learn what these kisses are all about. He will begin to understand that we, as parents, have the deepest of affection for him. He may not fully understand it until he is an adult himself, but I see the beginnings of it in his first kiss. Ever since I saw the book Flip Dolls and Other Toys by Laura Wilson, I wanted to make the Peek-a-Boo turtle. But my local library did not have a copy and I did not want to buy the book for a single pattern. But then I found this link where the author offered the template and instructions for free. So I printed it out and got to work. Although the directions were included with the pattern, I had a little trouble with it until I discovered that not all the necessary information is provided. If you would like to sew along with me, I will show you what I figured out. Also, one turtle is a gift for one of my recently adopted nieces (adopted in the sense that I decided I felt like their aunt). I got creative when I made the shell for her turtle. She likes Pokemon, so I will include a tutorial on how to make a Pokemon turtle shell. Here are all the pieces printed and cut out. To make the top shell easier, I cut out the dart lines on the upper shell pattern piece. This allowed me to simply trace the dart lines onto the back of the fabric after I cut it out. One thing that the free instructions do not mention is that the body pieces do not include a seam allowance (which I figured out before cutting) and the shell pieces do (which I only found out after sewing one together). So, if you use this template, add a 1/4" seam allowance to the body when you cut out the fabric, but cut the shell pieces "as is." I sewed the head darts and then stitched the top and bottom body pieces together. The front of the head was the hardest since the fabric tends to fold into itself. It required a lot of pinning and stops with the needle down to get the folds out of the way and to make sure the sides matched up. There is a gap left in the leg for turning and stuffing. When I made my felt bird, the author noted that stitching across a point is better than stitching at a sharp angle because it makes turning easier. Here is a closeup of the stitching on one of the arms. You can see at the tip how I stitched across a couple stitches instead of making the sharp turn that the pattern piece seems to require. When I turned it right side out I could tell that the arm was actually more pointed (as it is supposed to be) than if I had sewed a sharp angle. Another factor that contributes to a better point on the arm is to reduce the fabric bulk by trimming the seam allowance and clipping the curves. For my first turtle I forgot to clip all the curves and regretted it. I decided to leave it rather than turning it inside out again because it is such a difficult process on a narrow-limbed creature. So don't forget! After clipping the curves on the rest of my turtles, I turned the body right side out and stuffed through the gap in the leg. I used two different fabrics for my turtles. Most of the pictures here show the dark green corduroy, but this picture shows the light green flannel I used that has a great printed texture for turtle skin. To finish my turtle, I stitched the leg closed with a ladder stitch and used embroidery floss to satin stitch on some eyes. I used black and brown for my corduroy turtles and navy and purple on the flannel ones. For the top shell, I used the template to cut out an outer fabric using quilting cotton and lining fabric that is is a satiny polyester to help slip the shell smoothly onto the fuzzy corduroy and flannel. I traced the darts onto the back of each layer, matched up the dart lines, pinned, and stitched. For the batting, the instructions from the book say to cut batting for the top shell using the bottom shell template. I did that once, but the batting did not get close enough to the edges of the fabric to get stitched into the seam allowance. Plus, it did not create the puffier area at the edge of the shell that shows in the author's pictures. After that I just used the upper shell template and clipped once at each dart (as shown in the image) and overlapped the batting to get the curved shape. I put the top fabric and lining fabric right sides together and then put the batting on top, making sure to line up all the dart seams. I pinned and stitched using a 1/4" seam allowance, leaving a gap at the back for turning. Since it is a simple shape, it is easy enough to turn by reaching into the gap between the outer and lining fabrics, grabbing the far side, and pulling it through. A quick press, a neat ladder stitch to close the gap, and it's ready for quilting. I topstitched around the whole shell 1/2" from the edge on all my shells. For some, that is all I did. For others, I added stitching to mimic a real turtle shell. Here is the first turtle shell I made (the one where I used the bottom shell template for the batting on the top shell). It shows the stitching best, though, and it looks pretty neat with the wood grain fabric. To do the stitching, I sewed from the point of one dart line across the top (by the neck) to the point of the other dart. I then stitched along the dart until I got to the topstitching, turned, and went back to the dart point. At the side of the turtle shell, I again connected the points of the darts, but with an angled line and more stitching to the edge of the shell. It sounds more confusing than it is, so just look at the picture to see what I mean. When I got to the end of the design, I added a second line of stitching over the center hexagon to make it more pronounced. This means that, when you are done, there should be two overlapping lines of thread wherever the design is stitched. Using topstitching thread (which is thicker than regular sewing thread) would add an even bolder look. The process for the bottom shell is even easier than for the top. There are no darts, so all you have to do is lay the outer and inner fabrics right sides together, lay the batting on top, and sew with a 1/4" seam allowance. Turn it right side out as before and press. Topstitch 1/4" from the edge and then add some decorative stitching I decided to add some decorative stitching to the bottom shells on all my turtles. For one, I did a tight spiral in matching thread. I only did one of these because it takes a lot of time to sew slowly and carefully. As the spiral gets closer to the center it required lots of stopping and hand-cranking of the machine wheel. For all the other shells I went for a more natural look and did a back and forth wave that looks more like a real bottom turtle shell. That wraps up the first part of this post. Now for the Pokemon shell tutorial. Pokemon Shell Tutorial: Supplies: red fabric white fabric black ribbon or black fabric strip black fabric scrap lining fabric coordinating thread Using the top shell template, cut a piece of white fabric that is half the circle plus a 1/2" seam allowance. Repeat for the red fabric. Place the two pieces right sides together so that the straight edges match up. Sew Along the straight edge. Press the seam to the red side. Place the template on top to make sure it is the right shape. Trim if necessary. Using the bottom shell template, cut a piece of white fabric that is half the oval plus a 1/2" seam allowance. Repeat for the red fabric. Place the two pieces right sides together so that the straight edges match up. Sew Along the straight edge. Press the seam to the red side. Place the template on top to make sure it is the right shape. Trim if necessary. Cut two pieces of half inch black ribbon to go from edge to edge over the seams on the top and bottom shells. Iron fusible web on the back side of the ribbons and then iron them to the fabric. Stitch the ribbon close to the edges using black thread (this should also go through the seam allowance to keep it flat). This was the first time I tried making circles, so they are not exactly circular. I have since discovered a better way, so I will explain what I wish I had done rather than what I did do. Cut two 3" circles from the black fabric. With right sides together, sew all around the circle with a 1/4" seam allowance. Do not leave a gap. With your fingers, pull the layers apart in the center and cut a small slit. Use this slit to turn the circle right side out. Press. Now cut two 2.5" circles from the white fabric. With right sides together, sew all around the circle with a 1/4" seam allowance. Do not leave a gap. With your fingers, pull the layers apart in the center and cut a small slit. Use this slit to turn the circle right side out. Press. Lay the white circle on top of the black circle and stitch it in place by sewing close to the outer edge of the white circle with white thread. Place the layered circles at the center of the ribbon on the top shell piece. Stitch it in place by sewing close to the edge of the black circle with black thread. Finish the top and bottom shells as described above. And this is what you will end up with (except better since you will use the better way of making circles). To finish off the Peek-a-Boo Turtle project, I did a photo shoot on our deck. It looks to me like a game of tic-tac-turtles. Have fun stitching your Peek-a-Boo Turtles. And, as always, don't forget to share your creations.
I have been in a Thai-food mood and recently made two of my favorite, not to mention easy, curry-based dinner recipes. The first is Red Curry Soup and the second is Yellow Curry with Rice. Both recipes use Trader Joe's curry sauces (but only the red and yellow because the green is not so good). I often change up the vegetables depending on the season, so these are both recipes that can be made all year. Plus, they make great leftovers, so I always make extra. Red Curry Soup Recipe Makes 6-8 servings Ingredients: 1 large red pepper 1 medium eggplant 1 medium-to-large butternut squash 1 box (32 oz.) chicken or vegetable broth 1 can coconut milk (the full fat stuff tastes best) 1 bottle red curry sauce from Trader Joe's Basil to taste (fresh or dried depending on your preference) Black sesame seeds for garnish (optional) Directions:
Yellow Curry with Rice Recipe
Makes 4-5 servings Ingredients: 1 red pepper 1 yellow pepper 1 small onion 2 pounds of chicken (dark meat works best since it does not dry out as easily) 1/3 bottle yellow curry sauce from Trader Joe's (more or less according to preference) Rice Black and white sesame seeds for garnish (optional) Directions:
A great addition to this would be spinach (if you have it on hand). It adds a nice bit of color. Just put it in about five minutes before serving and only cook it long enough to wilt it. If you make enough curry for leftovers, make sure to remove the extra before adding the spinach since spinach does not keep so well in the fridge after it cooks. |
Carley Biblin
Hi. My name is Carley. I love to sew, craft, and create. As a Jane-of all-crafts so to speak, I enjoy sewing, writing, cooking, drawing, photographing. But the constant thread (if you'll excuse the pun) throughout my weeks is needle arts. Archives
January 2017
Categories
All
|