I came upon an idea in a book recently that described how to make a booklet out of envelopes and tape. I loved the idea so much that I thought and thought about a way to use it, and I finally decided what to make: an address book. I know what you're thinking: "But address books are a thing of the past." And in that you may be right. But, as much as I love this digital age, there are some things that I prefer to touch and hold in my hands. Besides, this is no ordinary address book. Instead of just holding information to be copied down, it holds already-completed address labels and stamps. It could also hold some extra envelopes as long as they are the correct dimensions. But enough of that. Here is what I did to create my beautifully artistic address book.
Address Book Tutorial:
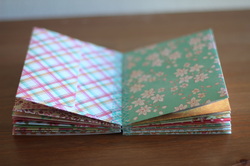
Begin by making the envelopes. I used a template that makes envelopes with the dimensions 5 3/4" x 4 3/8" but other dimensions are possible. trace the template shape onto the back side of a sheet of paper (the slightly thicker kind, but not cardstock) and cut it out. Make as many of these as you need (my book has twenty). Decide how you want to arrange your envelopes. The flaps and backs can face each other or all the flaps can face the same direction. For the sake of simplicity, I will now refer to each envelope as a page. Lay two pages beside each other so the top and bottom edges are even. Use a decorative tape, such as washi tape or other durable tape, to connect the pages. The tape should be half on the first page and half on the second page. Tape from top to bottom, making sure that the tape is not laying at an angle.
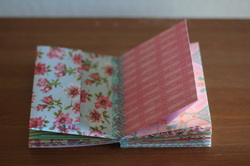
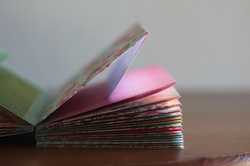
Flip the second page so it is laying on top of the first page. Lay a third page next to these and align the edges. Tape as before. Continue adding pages. As the stack of taped pages gets taller, you may need to boost up each new page to get it at the right level to tape. Thin books work well for this. Add pages until you reach the number you want. If all you want is a simple address book, you can stop here. But, as is my wont, I will take this project to the next level by making a custom fabric cover. Read on to find out how to make one.
Cut out two pieces of cardstock to the same dimensions as your enveleopes. Tape them to either end of your stack of pages in the same way as you attached the envelopes together. If you are using a textured paper, make sure that the texture faces the envelopes (that is, the texture should be face down when the book is closed). These will be inserted into pockets to hold the pages inside the cover.
Admire your handiwork once more and then pull out paper, pencil, and ruler. If you are not mathematically inclined, you may also want a calculator, but the calculations are mostly pretty simple fraction addition.
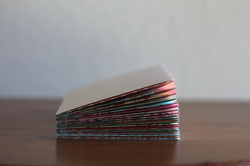
To figure out the dimensions of the cover, measure and write down the dimensions of your pages and the thickness of the book (if your envelopes tend to fluff up, squeeze them together a little bit to measure their thickness).
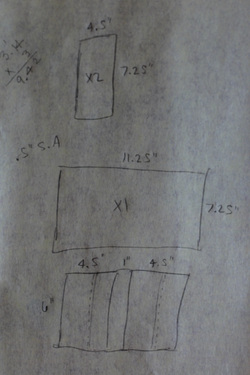
Draw a horizontal rectangle on your piece of paper (accuracy is not important here). The right and left lines represent the height of the book cover and the top and bottom lines represent the distance from the left edge to the right edge of the book when it is opened flat (including the spine).
Take your height measurement and add 1" for top and bottom seam allowances (this means you will sew with 1/2" seam allowance) and some wiggle room (between 1/4" and 1/2" is best). Write the resulting number on the right or left side of your rectangle. Now take your width measurement and thickness measurement and add them together. Add 1" for the side seam allowances (again, sew with 1/2" seam allowance) and more wiggle room. Write this number to the top or bottom of your diagram. This is for the main cover.
For the endpaper pockets, create a second diagram by sketching a vertical rectangle. The height will be the same as for the cover, so just copy that number over to the left or right side of the rectangle. Now, take your width measurement again, cut it in half (give or take), add 1" for a hem on one side and 1/2" for a seam allowance on the other side. Write this number at the top or bottom of the diagram.
Once you have all your notes and diagrams in order, it is time to get to cutting your fabric. Cut out two of the cover pieces and two of the pocket pieces.
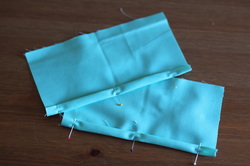
To hem the pockets, take one of the pieces and fold over 1/2" on one of the long sides and press (make sure you are folding towards the wrong side). Fold it over another 1/2" and press. Pin if necessary and stitch from top to bottom.
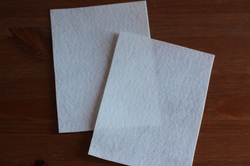
If you want a more substantial feel to the cover, add medium or heavy weight interfacing. I cut two smaller pieces for mine, but you could cut one continuous piece if you want to reinforce the spine as well. The dimensions should be about the same as those for the envelope pages. After stitching the cover, you may need to trim the interfacing if you didn't add enough wiggle room.
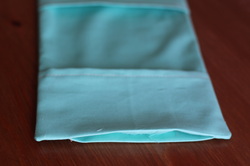
Now to assemble the cover. Lay the inside cover (that is, the piece of fabric that will be visible on the inside of the book) face up on your work surface. Place one pocket right side up so that the raw edge on the long side meets up with the raw edge on the left side of the cover piece. Place the other pocket in the same way on the right side of the cover. Then, lay the outside cover piece face down so that its edges match up with the inside cover. Pin all around and sew. Leave an opening on one of the short sides large enough to slip in the interfacing. Clip the corners and turn right side out. If, when you turn it, the pockets come out on the wrong side, just turn them to the other side (the process is similar to that when turning the cover right side out). Push out the corners with whatever tool you have handy. Iron everything down smoothly, making sure to fold the seam allowances under at the opening.
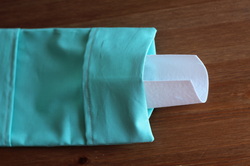
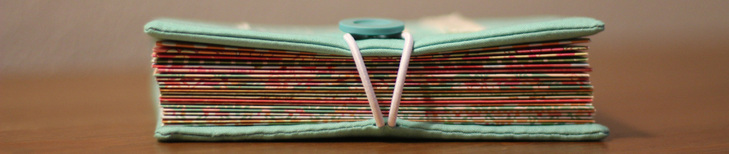
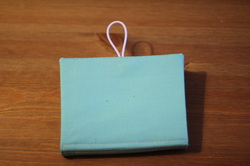
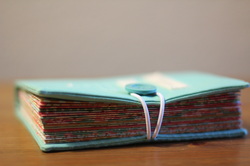
Flex the interfacing pieces and slide them into the cover one at a time. One will be pushed all the way over to the far side and the other will need to be eased into position on the side with the opening. The latter will be more difficult since you have to get the interfacing under the seam allowance in order to get it flush with the edge of the cover. I decided to add a closure to my book using cord elastic and a button. The length of the elastic depends on how wide the book is, but make sure to add an inch for the seam allowances. Before stitching the opening closed, place the elastic at the center of the open side and pin (I know. Cord elastic is hard to pin, but do your best). Hand stitch the opening closed with a ladder stitch, pausing briefly at the elastic to make several stitches through fabric and elastic. Sew a button to the front cover for the elastic to loop around. Make sure to sew from inside the pocket, not through it.
To make sure the interfacing stays in place, stitch through it at the edge closest to the spine. If you used iron-on interfacing, you can skip this step. Unless, of course, you doubt the integrity of the glue. In which case, stitch away.
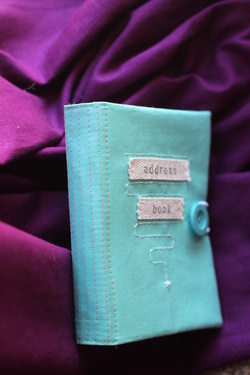
Embellish the front cover however you wish. I stamped cotton twill tape with fabric ink to stitch onto the cover and then added a running stitch with thick cotton thread. I also did extra lines of stitching on the spine to add some texture.
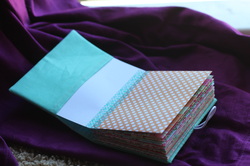
Open the cover and carefully insert the endpapers one at a time. You may need to open the cover all the way so the front and back meet in order to get them at the right angle.
The last step is most important of all. Take a picture of your wonderful creation, upload it to the internet, and link to it in the comments for all to see.

