
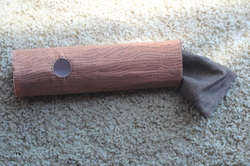
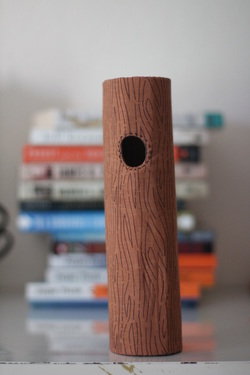
After sharing with you a photo tour of the Muir Woods, I thought it was fitting to post a tutorial on making a fabric log. It can be made with the peep hole or without. But, either way, it is a great addition to any child's play set.
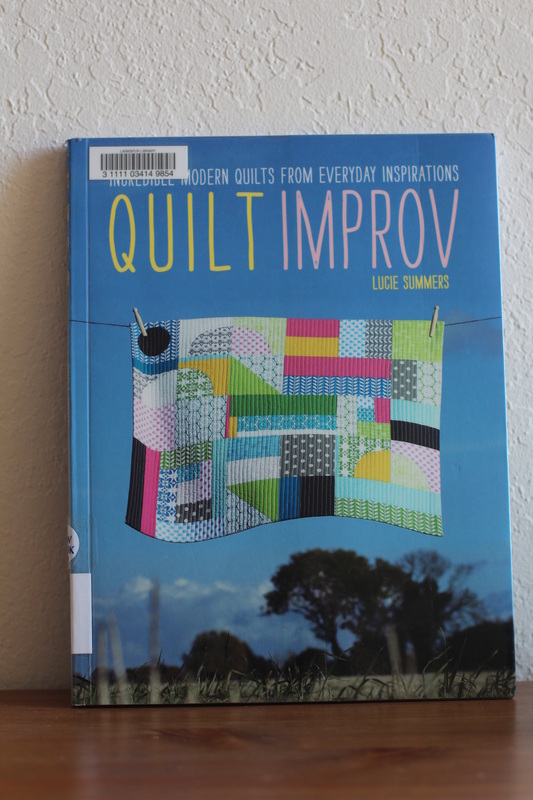
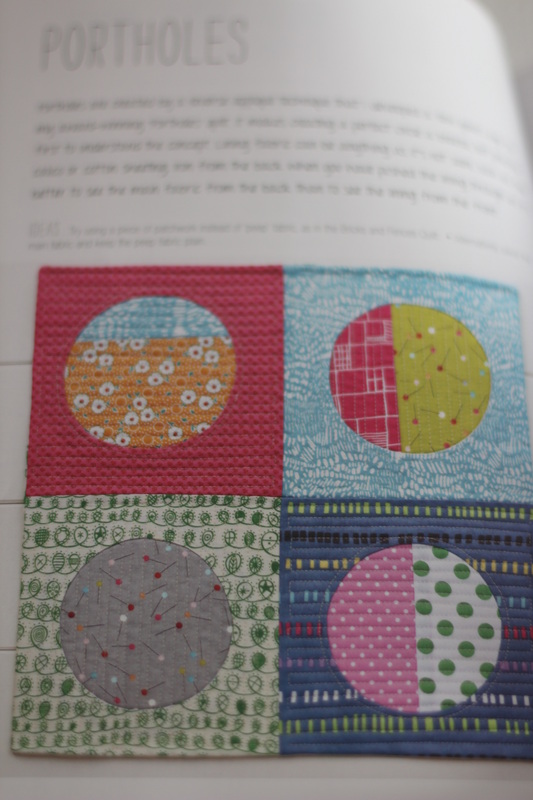
After making my felt stuffed bird, I decided that she needed a perch. At the same time I was planning to create it, I happened to have in my possession a copy of Quilt Improv by Lucie Summers. One of the designs in the book is called "Portholes." It is a sort of reverse applique method, but I won't try to describe it here. I do recommend checking out the book since it has so many neat ideas and inspiring pictures. Part of my tutorial below is based on what I learned from this book.
After making my felt stuffed bird, I decided that she needed a perch. At the same time I was planning to create it, I happened to have in my possession a copy of Quilt Improv by Lucie Summers. One of the designs in the book is called "Portholes." It is a sort of reverse applique method, but I won't try to describe it here. I do recommend checking out the book since it has so many neat ideas and inspiring pictures. Part of my tutorial below is based on what I learned from this book.
| 
|
Hollow Log Tutorial:
Supplies:
Wood grain fabric
Dark lining fabric
Heavy weight interfacing (sew-in is fine, but fusible is stiffer)
Matching thread
Embroidery floss (optional)
Calculator (optional)
Supplies:
Wood grain fabric
Dark lining fabric
Heavy weight interfacing (sew-in is fine, but fusible is stiffer)
Matching thread
Embroidery floss (optional)
Calculator (optional)
The first step to making a hollow log is deciding how big to make it. Draw a rectangle on a piece of paper (scale does not matter, it is just a reference point). On the right or left side, write the measurement for the height of your log plus 1" for seam allowances. Now you need to calculate the circumference of your log. Multiply the diameter you want your log to be by 3.14 (or pi). Add 1" for seam allowances and write the resulting number on the top or bottom of the rectangle. For a size reference, my log is 8" tall and has a diameter of 3". This means that the height of my log is actually less than the distance around. Make sure you keep track of which side is which since it is easy to get them mixed up for this very reason.
Next, use your rectangle dimensions to cut out a piece of wood grain fabric (making sure that the grain follows the height of your log and not the diameter) and a piece of lining fabric. For the interfacing, subtract the seam allowances and then trace the rectangle directly onto the interfacing. Cut the interfacing and set it aside for now.
Next, use your rectangle dimensions to cut out a piece of wood grain fabric (making sure that the grain follows the height of your log and not the diameter) and a piece of lining fabric. For the interfacing, subtract the seam allowances and then trace the rectangle directly onto the interfacing. Cut the interfacing and set it aside for now.
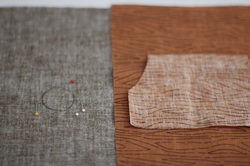
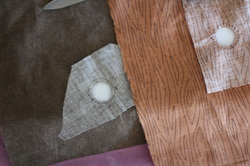
Use a small circle template (such as a medium-sized spool of thread) to trace a circle onto the wrong side of the wood grain fabric and the lining fabric. Make sure the circle is the same distance from the top (or bottom) on both pieces. Pin a scrap of fabric behind the circle. The scrap should be larger than the circle. Make sure to put right sides together.
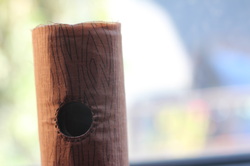
The picture here shows a circle drawn onto the wrong side of the liner fabric (left) and a scrap laid right sides together with the wood grain fabric (right).
The picture here shows a circle drawn onto the wrong side of the liner fabric (left) and a scrap laid right sides together with the wood grain fabric (right).
Using a small stitch length, sew around the traced circle on both the wood grain fabric and the lining fabric. If your circle is small (like mine), hand sewing may result in a better-formed circle.
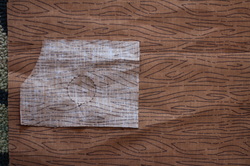
Use a sharp pair of scissors to cut out a circle of fabric inside the stitch line, leaving a very narrow seam allowance. Cut through both the main fabric and the scrap piece. You should be able to see through it. Clip the curves well.
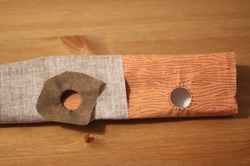
Press the seams for the wood grain fabric and the lining fabric in opposite directions. Turn the wood grain fabric right side out. Ease the interfacing inside. You may need to fold it or squish it to get it in. The interfacing should be 1/2" shorter on each end than the outer and lining fabrics and centered accordingly. Slip the lining fabric over the wood grain fabric so that the right sides are together. Make sure the holes are lined up. Machine stitch one end of the log with a 1/2" seam allowance.
Take the wood grain layer and push the scrap piece through the hole you created in the last step. Smooth it out and press. Make sure the circle is well formed. If not, you may need to clip more of the seam allowance. If you want, use embroidery floss to make a decorative running stitch around the edge of the circle. Repeat for the lining fabric.
With the right side of your wood grain fabric facing up, fold the fabric in half so that the raw edges representing the height of your log meet up. Pin along the height and sew with a 1/2" seam allowance. Repeat for the lining fabric, but sew with a 5/8" seam allowance (this will help reduce some of the excess fabric that will result from it being the inside layer, which will inevitably have a smaller diameter than the outer fabric).
Roll the piece of interfacing into a log shape so that the edges representing the height meet up but do not overlap. Whipstitch the edges together snugly. Make sure to take enough of a "bite" with your needle so that the thread does not rip through the interfacing.
Pull the lining fabric off of the wood grain fabric.
Push the lining fabric through the sewn end so that it is inside the log.
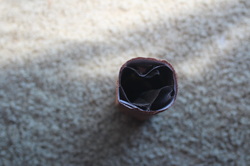
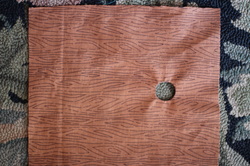
Here is a top view of the log with the lining fabric in place. As you can see, the lining fabric wrinkles up a bit as a result of the smaller diameter of the inside of the log. It will smooth out a bit after you stitch the top seam.
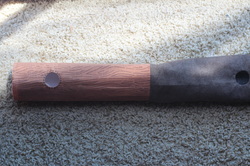
Ease the holes into position so that they are in alignment. Sew around the holes using a ladder stitch, going through the outer and inner fabrics.
Fold over the remaining raw edges and (right sides together) sew them with a ladder stitch. And you're done!
One of the great things about this hollow log is that it lays flat because of the seam in the interfacing. That means it won't take up much space in a toy box (so you can make lots of them!) and it can easily be tossed into a traveling toy bag and act as a prop in a game of imaginative play.
One of the great things about this hollow log is that it lays flat because of the seam in the interfacing. That means it won't take up much space in a toy box (so you can make lots of them!) and it can easily be tossed into a traveling toy bag and act as a prop in a game of imaginative play.
After making this I started thinking about how to make it into a tree by adding a green, leafy top. Fabric? Crochet? Something else? I don't know yet, but it seems that this side project has led to yet another side project.

