Alright. It's been a while since I added a post to my Getting Stuffed series. I have been thinking about this particular project for quite a while and, I'm happy to say, I finally got to it. It's a ram from Abby Glassenberg's book Stuffed Animals. I used the templates and sewing instructions, but I'm making several aesthetic changes that make it more, um...involved. Somehow, I just can't keep sewing projects simple. With my ram, instead of using safety eyes, I'm making embroidered felt eyes. Instead of using fleece for the fur, I'm using thick wool yarn to create the look of real fur. Instead of machine sewing straight lines on the ram's horns, I'm hand embroidering a continuous spiral pattern. For this last one, I have created a tutorial. If you make something with it, I'd love to see.
Embroidered Stuffed Animal Horn Tutorial:
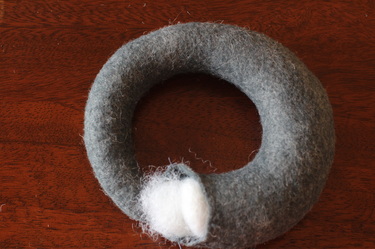
Sew and stuff the horn according to the pattern instructions. The firmer you stuff, the easier it will be to embroider them without altering their shape.
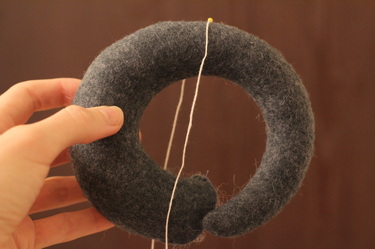
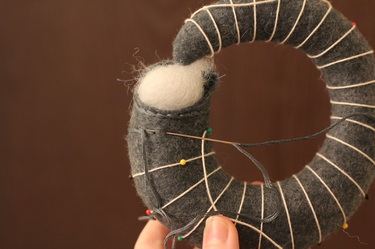
Measure and cut a piece of string. The exact length will depend on the size of the horn and how far the spirals are spaced. For my project, I cut a nine-foot piece of string (a little more than I needed) and spiralled around 25 times. Find the middle of the string (approximately), drape it over the center of the horn and pin it in place.
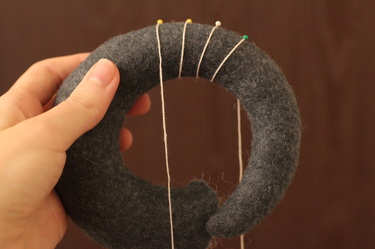
Wrap the string in a spiral pattern around the horn until you reach the tip. Make sure you are happy with the distance between each round before pinning.
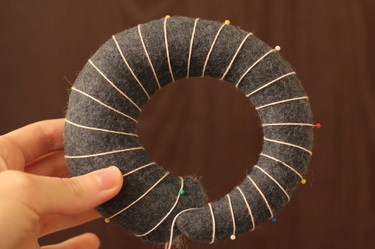
Continue wrapping the rest of the horn from the center to the base. The spacing of the spiral should be greater along the outside of the horn than the center as shown in the picture.
Cut a length of embroidery floss in your chosen color. I used all six strands for my project, but you may choose a different number depending on the look you want. Thread the floss onto an embroidery needle and tie a knot in the end (subsequent floss will not be knotted). Beginning at the base of the horn where the string starts, bring your needle up through fabric. Remove the first pin and embroider along the string, moving it aside as you go. I chose a stem stitch to create a thick and smooth line, but other stitches can be used for different effects and textures.
Note: If your string is the same or a similar color to the horn fabric or floss, you can embroider directly over the string rather than removing it as you go.
Note: If your string is the same or a similar color to the horn fabric or floss, you can embroider directly over the string rather than removing it as you go.

Continue embroidering until your floss begins to run out. Finish the end by hiding a straight stitch under the embroidery line, bringing the needle out close to the line of stitching a short distance away. Pull the floss taut and clip it close to the horn, being careful not to cut the embroidery stitches. Begin a new strand where you left off, locking the floss in place with another hidden straight stitch. Continue embroidering until you reach the tip of the horn.
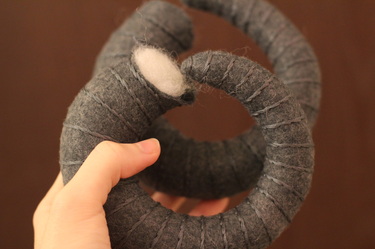
Repeat the above steps for the second horn (unless you are making a unicorn, that is), reversing the direction of the spiral (e.g. clockwise instead of counter-clockwise). Attach the horns according to the pattern instructions.
My horns may be done, but I have only just begun the very long process of embroidering the fur. It's a great nap or anytime-I-have-a-minute project since I can pick it up and put it down in the middle of a stitch. And I still have the eyes to design. I'd better get back to it. I'll keep you updated on my progress.

